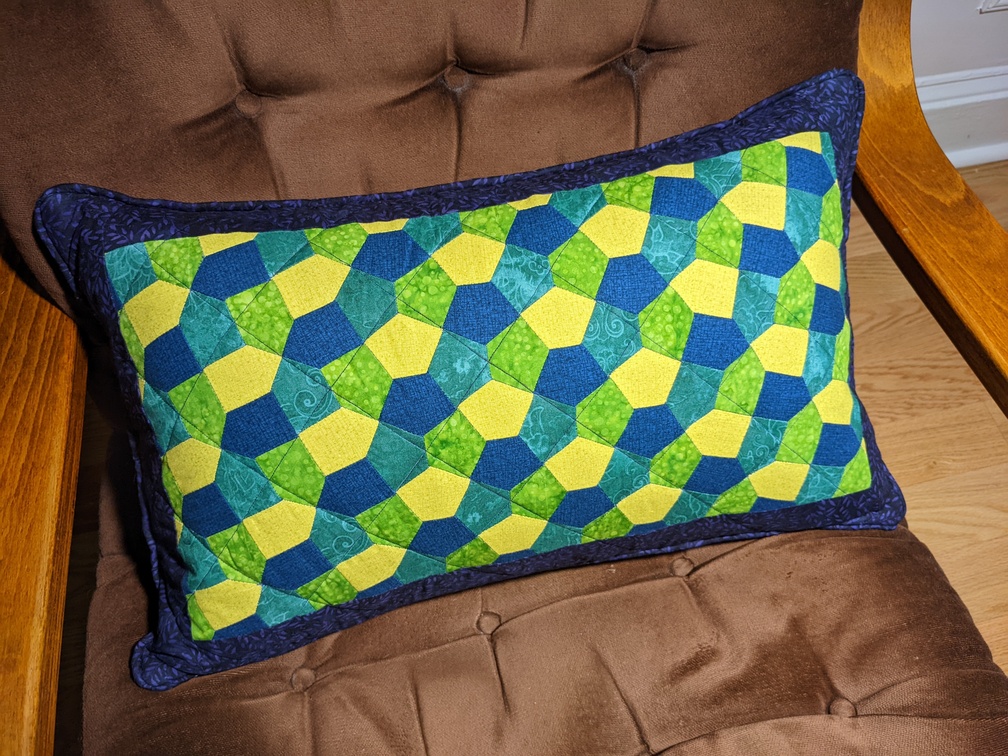
Pentagonal tiling pillowcase
My second quilt, based on the Cairo tiling.
After my epic first quilting project, I was excited to keep learning and sewing, but I also decided it would be nice to aim for a project with a slightly smaller scope of work.
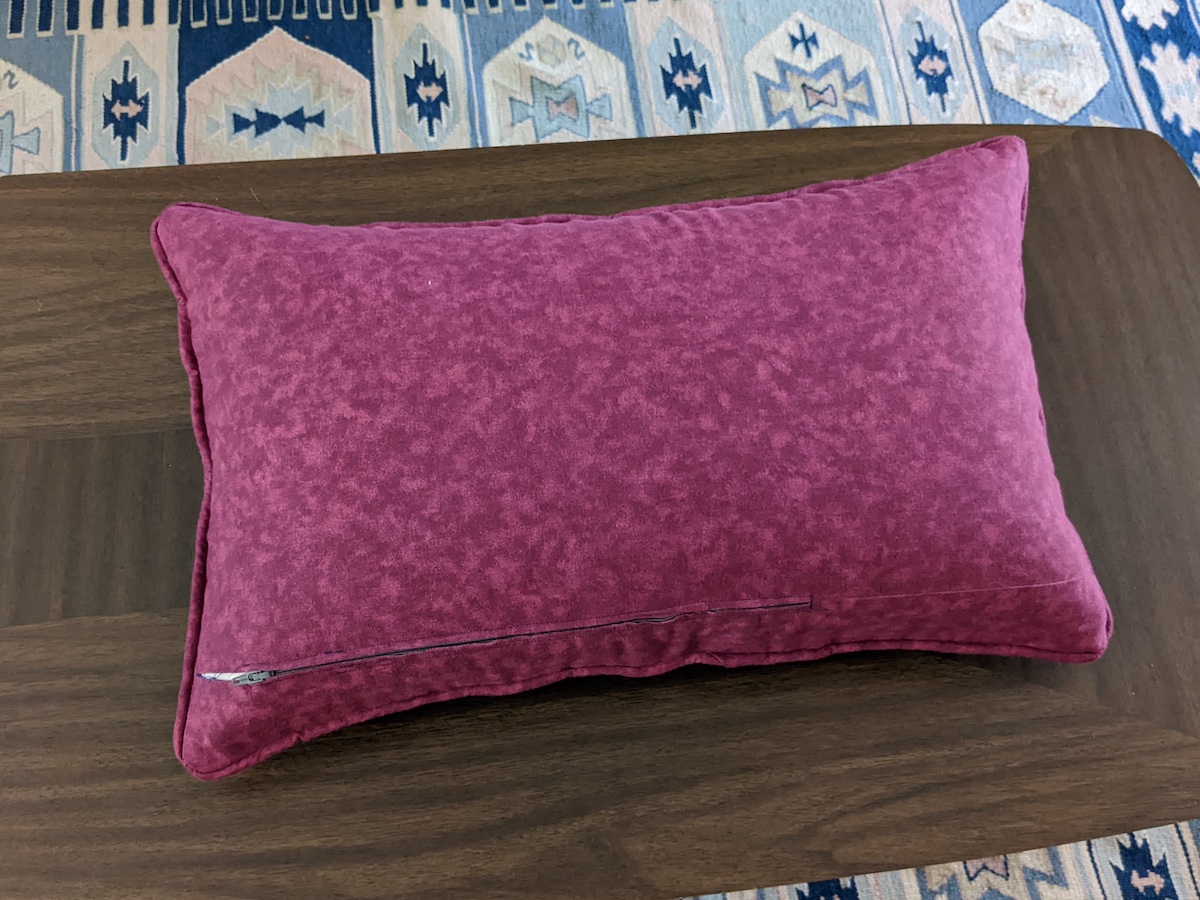
Here’s the result: a pillowcase featuring a tiling of right-angled pentagons:
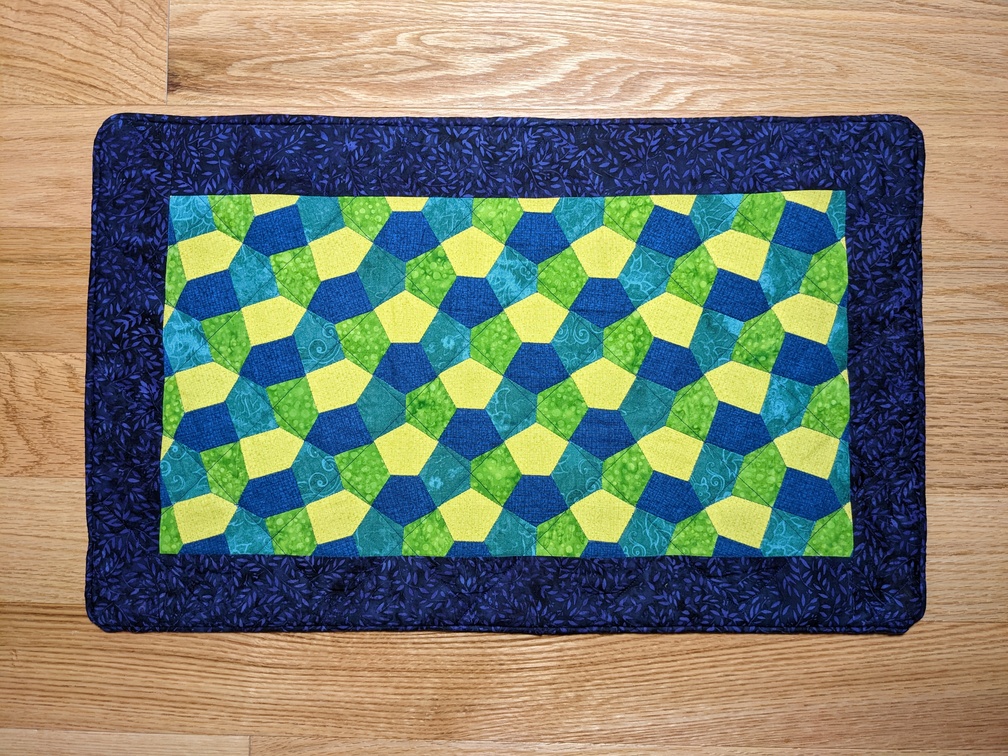
The pillowcase is approximately 21” × 13” (53 cm × 33 cm). This is what it looks like when its stuffed with the appropriate pillow:
Read on for why and how I decided to create this particular pattern.
Inspiration
In late 2021, I developed some nerve issues, specifically ridiculopathy, that my physical therapist attributed to a combination of stress and spinal posture. He recommended using a lumbar support pillow to help with the posture, so I found a decent memory foam one on Amazon. It helped a lot, but I found its plain white appearance a little depressing, and also a poor for my brown chair.
Earlier in the fall, I had made this little interactive graphic on shadertoy (you can hit the play button to start the animation, and click and drag in the window to control the tiling):
It’s based on the classical Cairo pentagonal tiling, which dates back to at least 18th century India. The motif in the most popular variant involves a pentagon that has two right angles and three 120° angles, as shown in this figure from Wikipedia:

Many of the vertices in the diagram above lie on an underlying square lattice – this relates to the fact that the Cairo pentagonal tiling is the dual of the snub square tiling.
My goal for the interactive graphic was to incorporate the Cairo tiling into an animated parquet deformation. As shown in the figure from the linked article, parquet deformations are tessellations in which the tile shapes change or evolve as they repeat throughout the design.
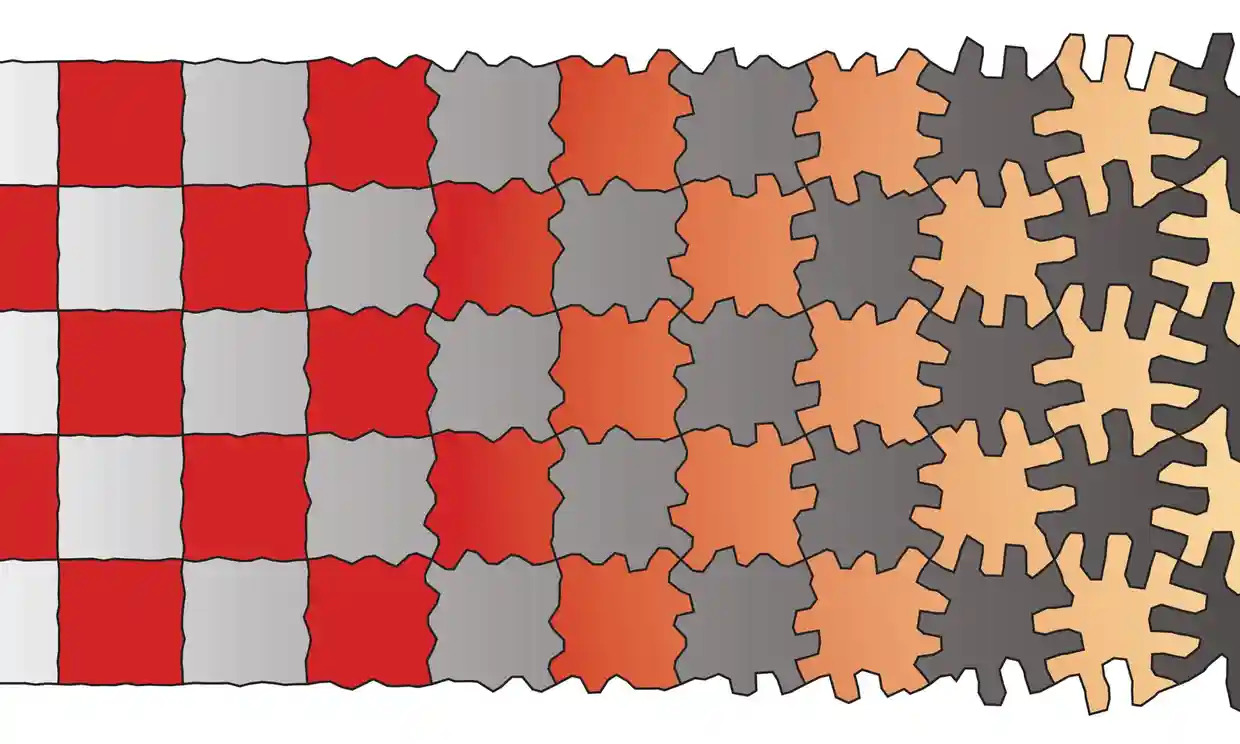
The checkerboard-based pattern above is by Craig S. Kaplan, whose artwork and twitter feed served as the inspiration for my own parquet tiling attempts.
Anyways, getting back to the lumbar pillow – after a couple of months contemplating possible pillowcase designs, I decided it would be fun to try doing a Cairo parquet deformation as a quilt. Rather than subdividing tiles along straight seams and using foundation paper piecing (FPP), as in my Penrose quilt, this time I would use Engish paper piecing (EPP).
Both techniques involve gluing or basting fabric to a paper template which stabilizes the work in progress. But whereas FPP involves machine-sewing through the template, EPP involves hand-sewing tiles together along the thin edges between tiles, where the fabric wraps from the front to the back. You can sew a greater variety of shapes using EPP than are possible with FPP, but it does require more skill and patience.
The variety of shapes achievable with EPP is nonetheless constrained by the fact that all tiles must be convex. I was a little sad to realize I couldn’t use the nonconvex pentagons from my parquet deformation, but I still thought it would be a viable and worthwhile quilting project.
Design
In late July 2022, I started working on the pillowcase in earnest. It took me about two days to hastily adapt a previously-written Python program1 to churn out a quilt pattern. This time, I based my color palette on the viridis colormap by Nathaniel J. Smith, Stéfan van der Walt and Eric Firing.
The program produces three different types of graphical output. The first one is the preview of the finished design, using solid color fills to stand in for the different fabrics:
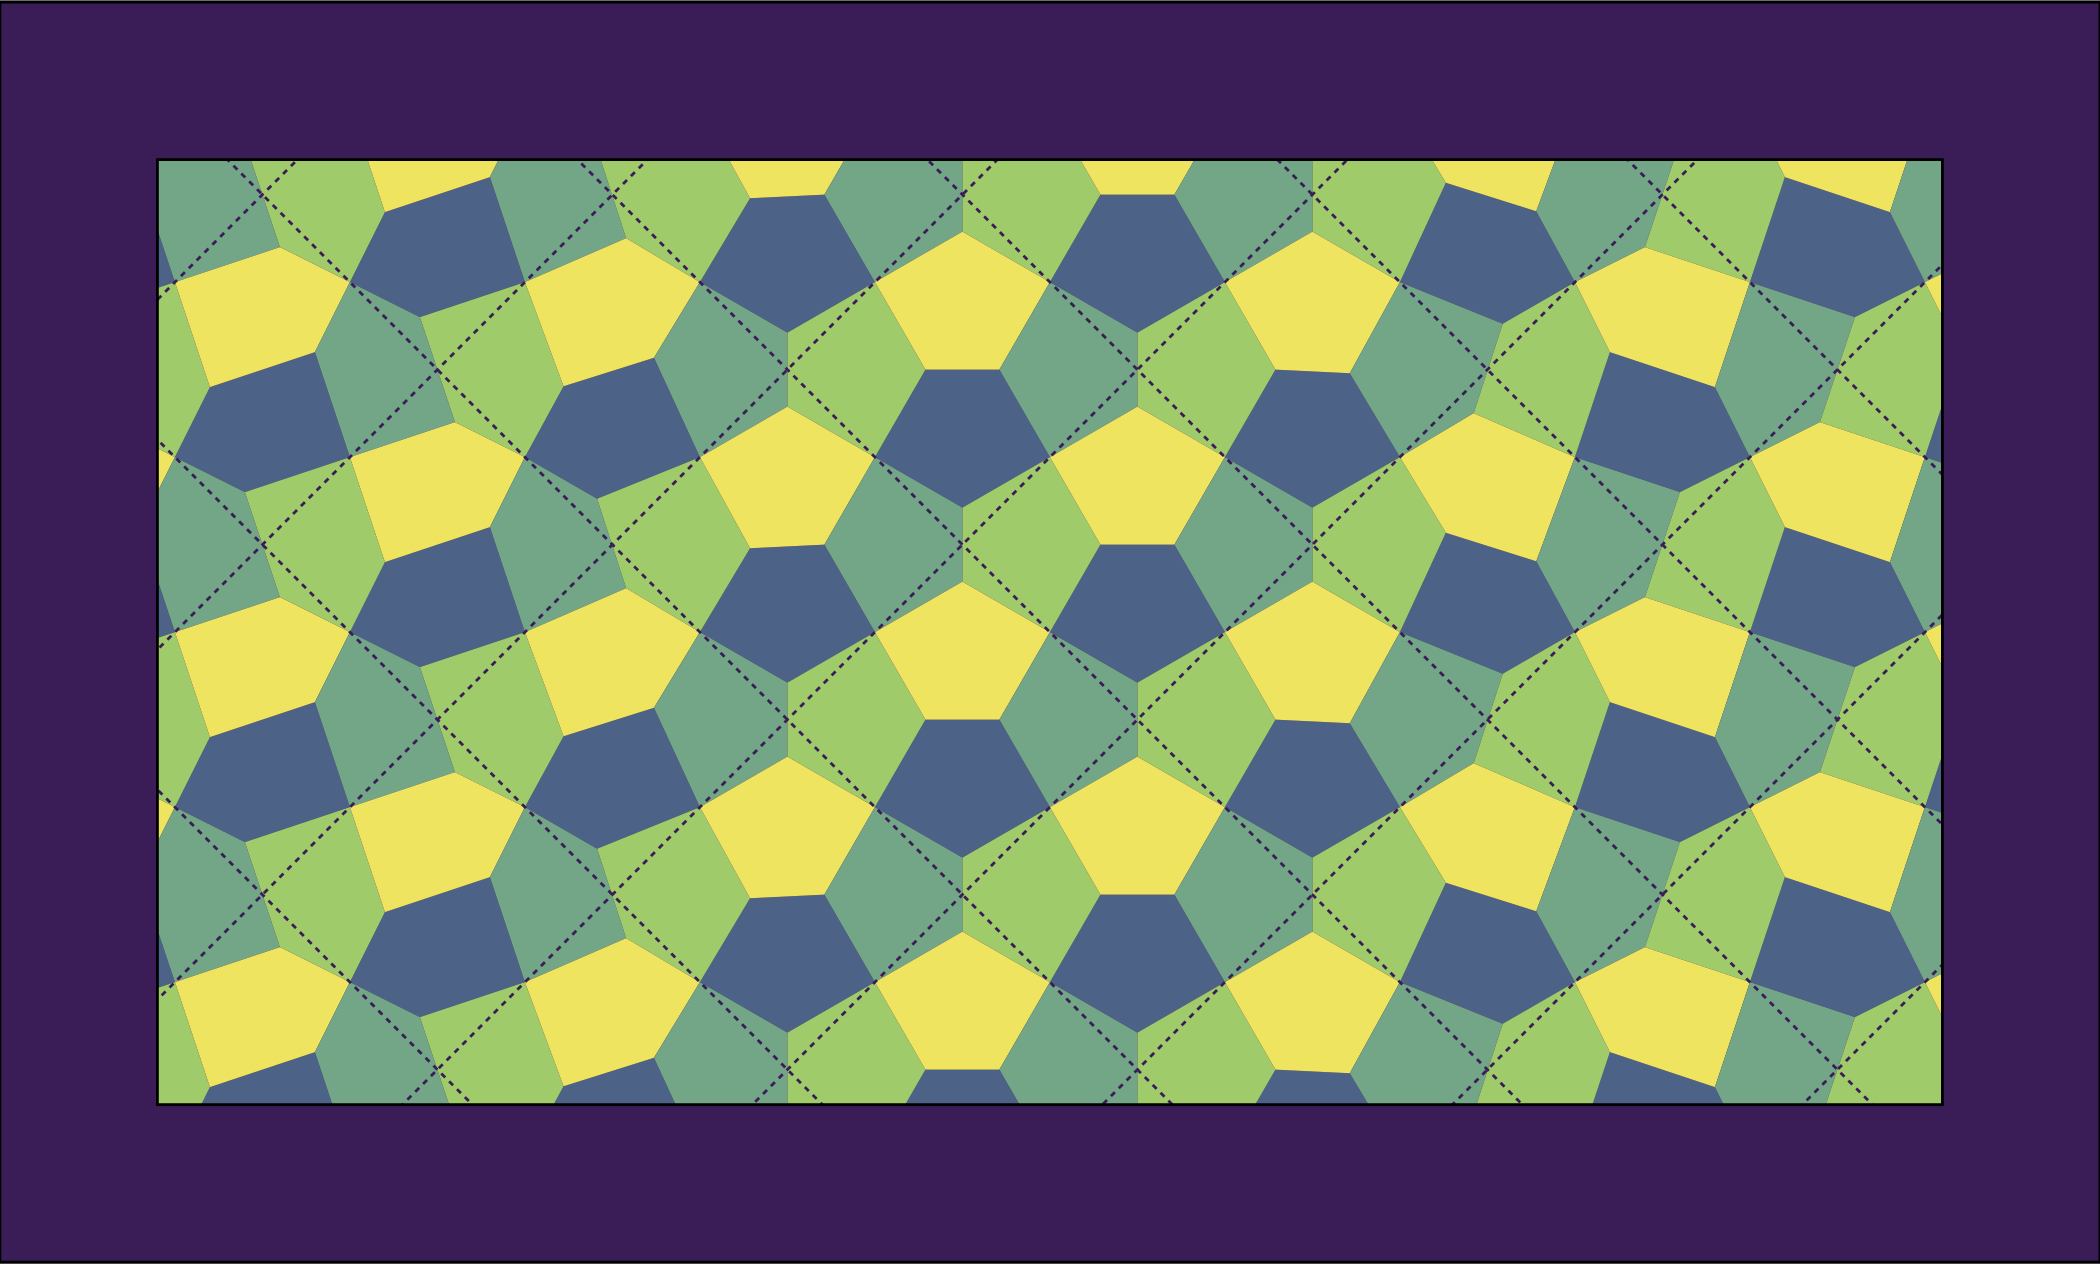
The dark dashed lines represent the quilting seams in the final work.2 They reveal the regular square lattice underlying the parquet deformation. There’s another possible set of parallel grid lines you could draw that passes through the midpoints of the blue/yellow edges, but I couldn’t find a single color of thread that would give nice contrast on both the light yellow tiles and the dark blue tiles while still coordinating with the overall palette.
The next important program output is the tile map. It shows the reverse side of the pattern, and labels each tile with an address or designation so that it can be easily located within the overall composition.
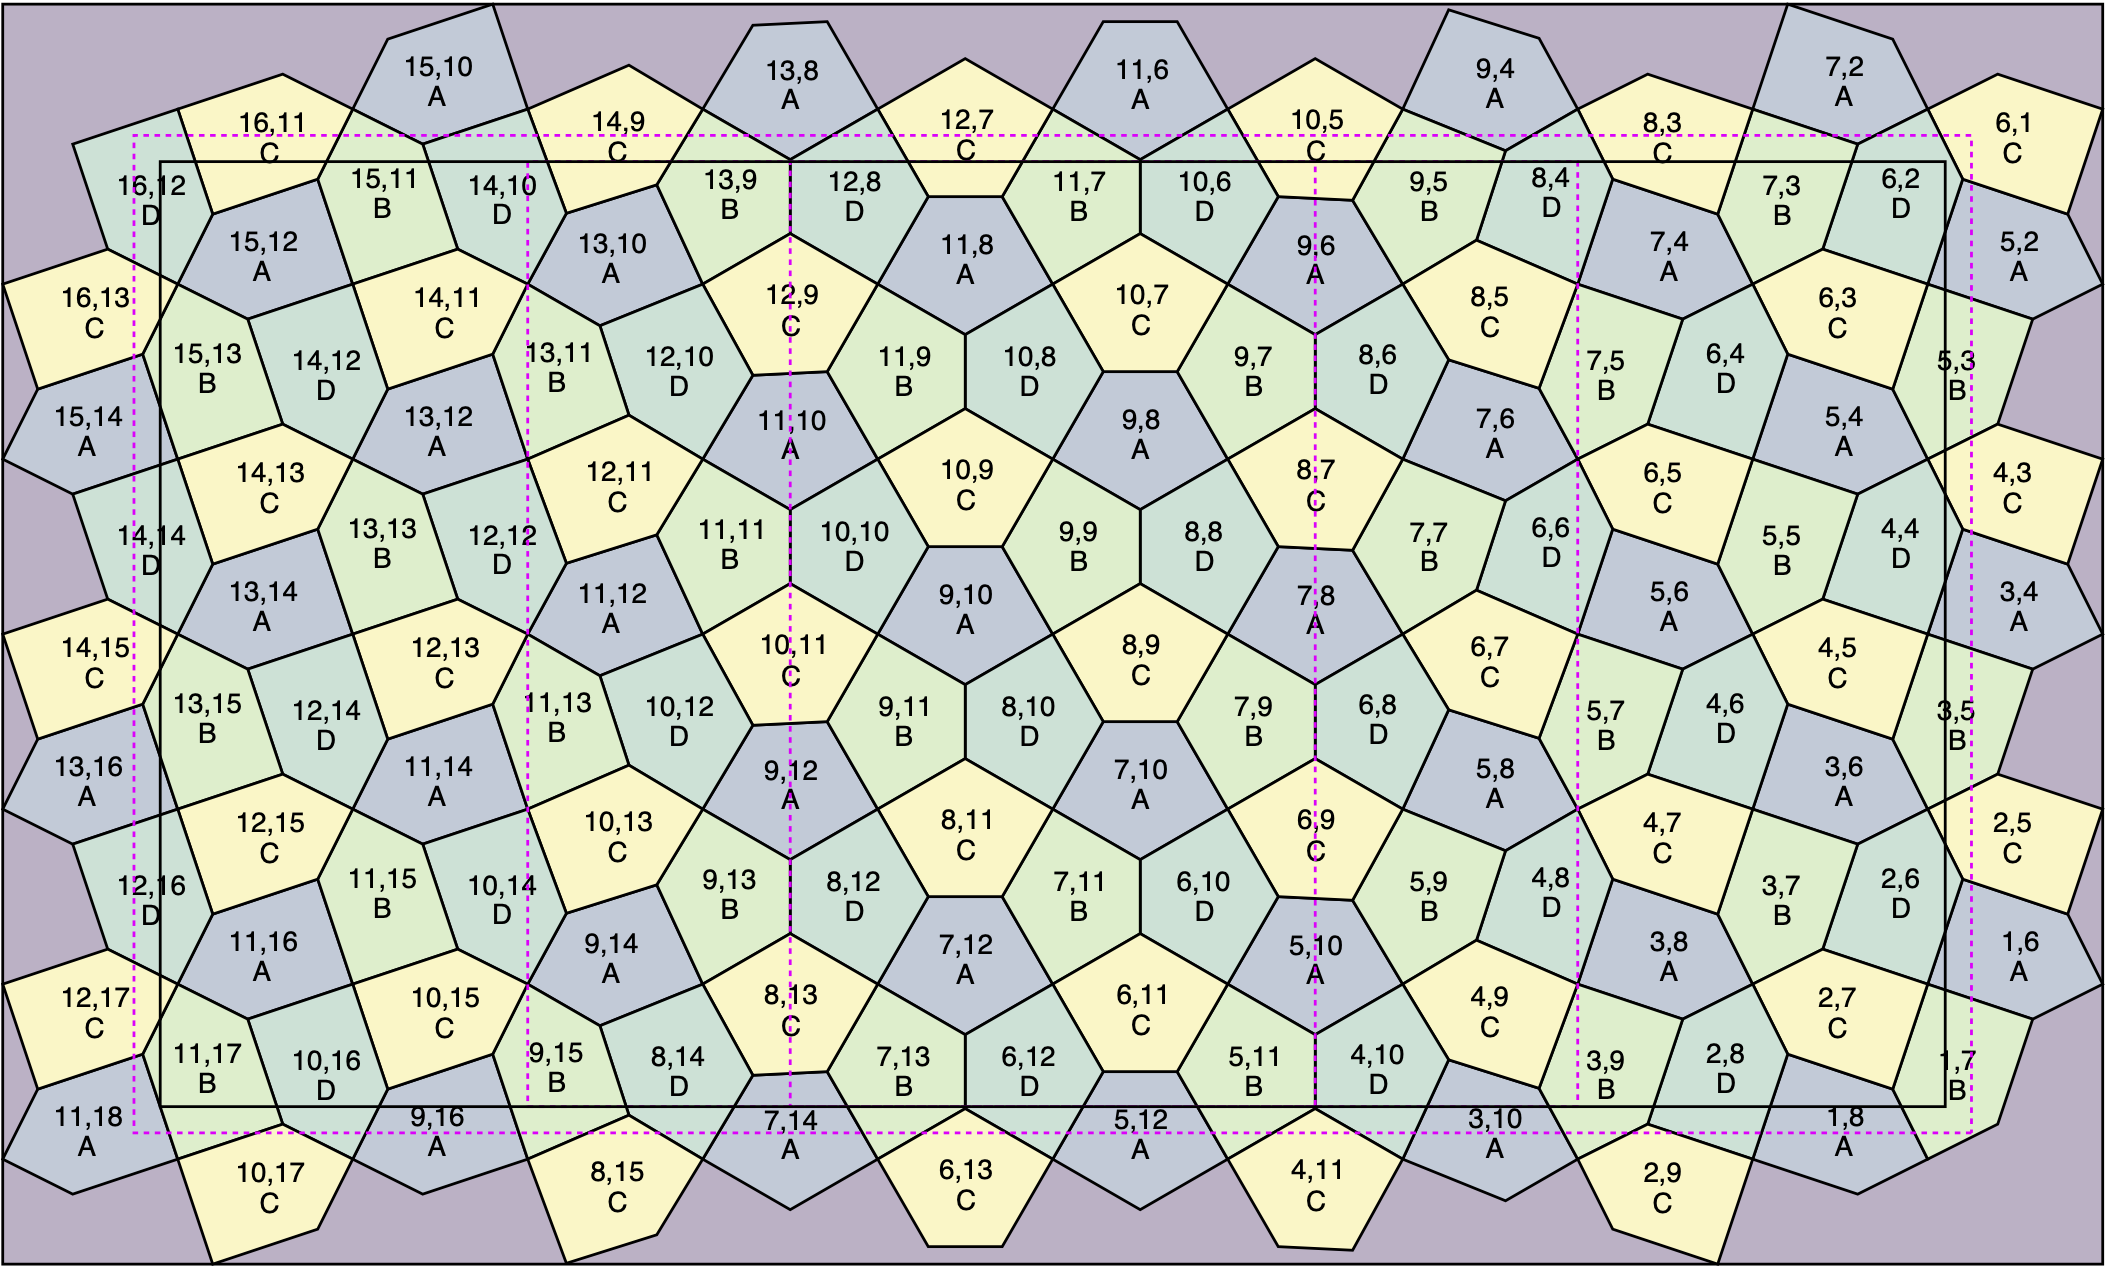
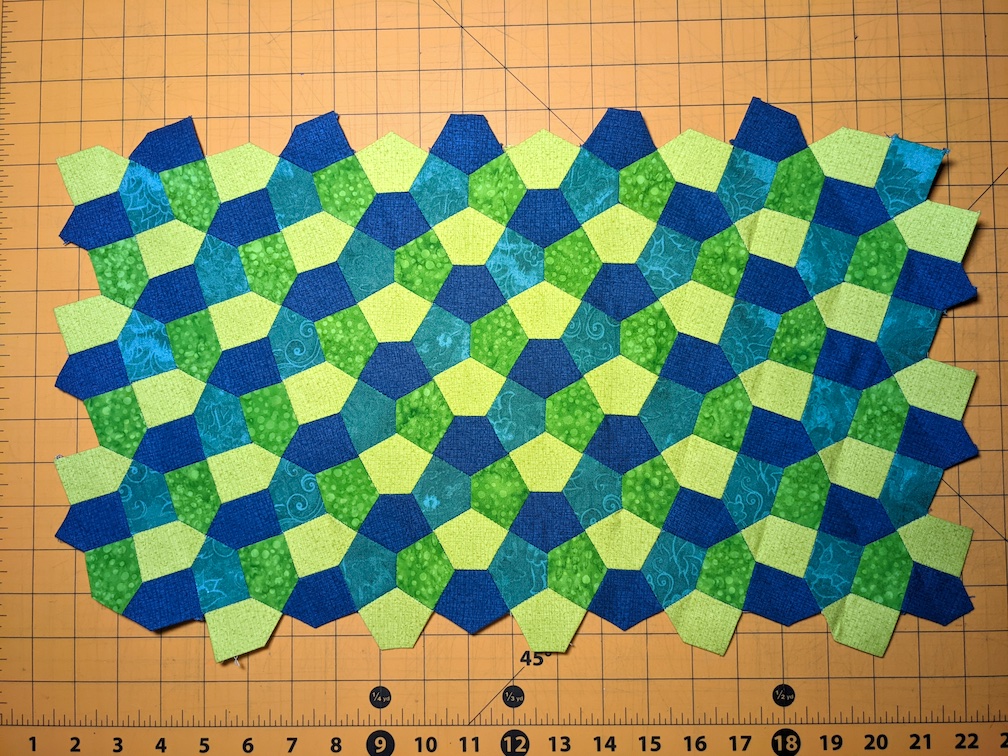
The addresses vary along the same diagonal directions upon which the quilting gridlines are based. Even-numbered “rows” contain alternations of yellow and blue tiles, and odd-numbered rows alternate between the two colors of green tiles. When fabricating the quilt, I first hand-stitched the tiles together into these continuous rows, then sewed the rows together into the finished center panel.
The third and final program output is the outlines of the individual tiles themselves, to be used as EPP templates. These were printed at a 1:1 scale onto cardstock and carefully cut out by hand with scissors.3
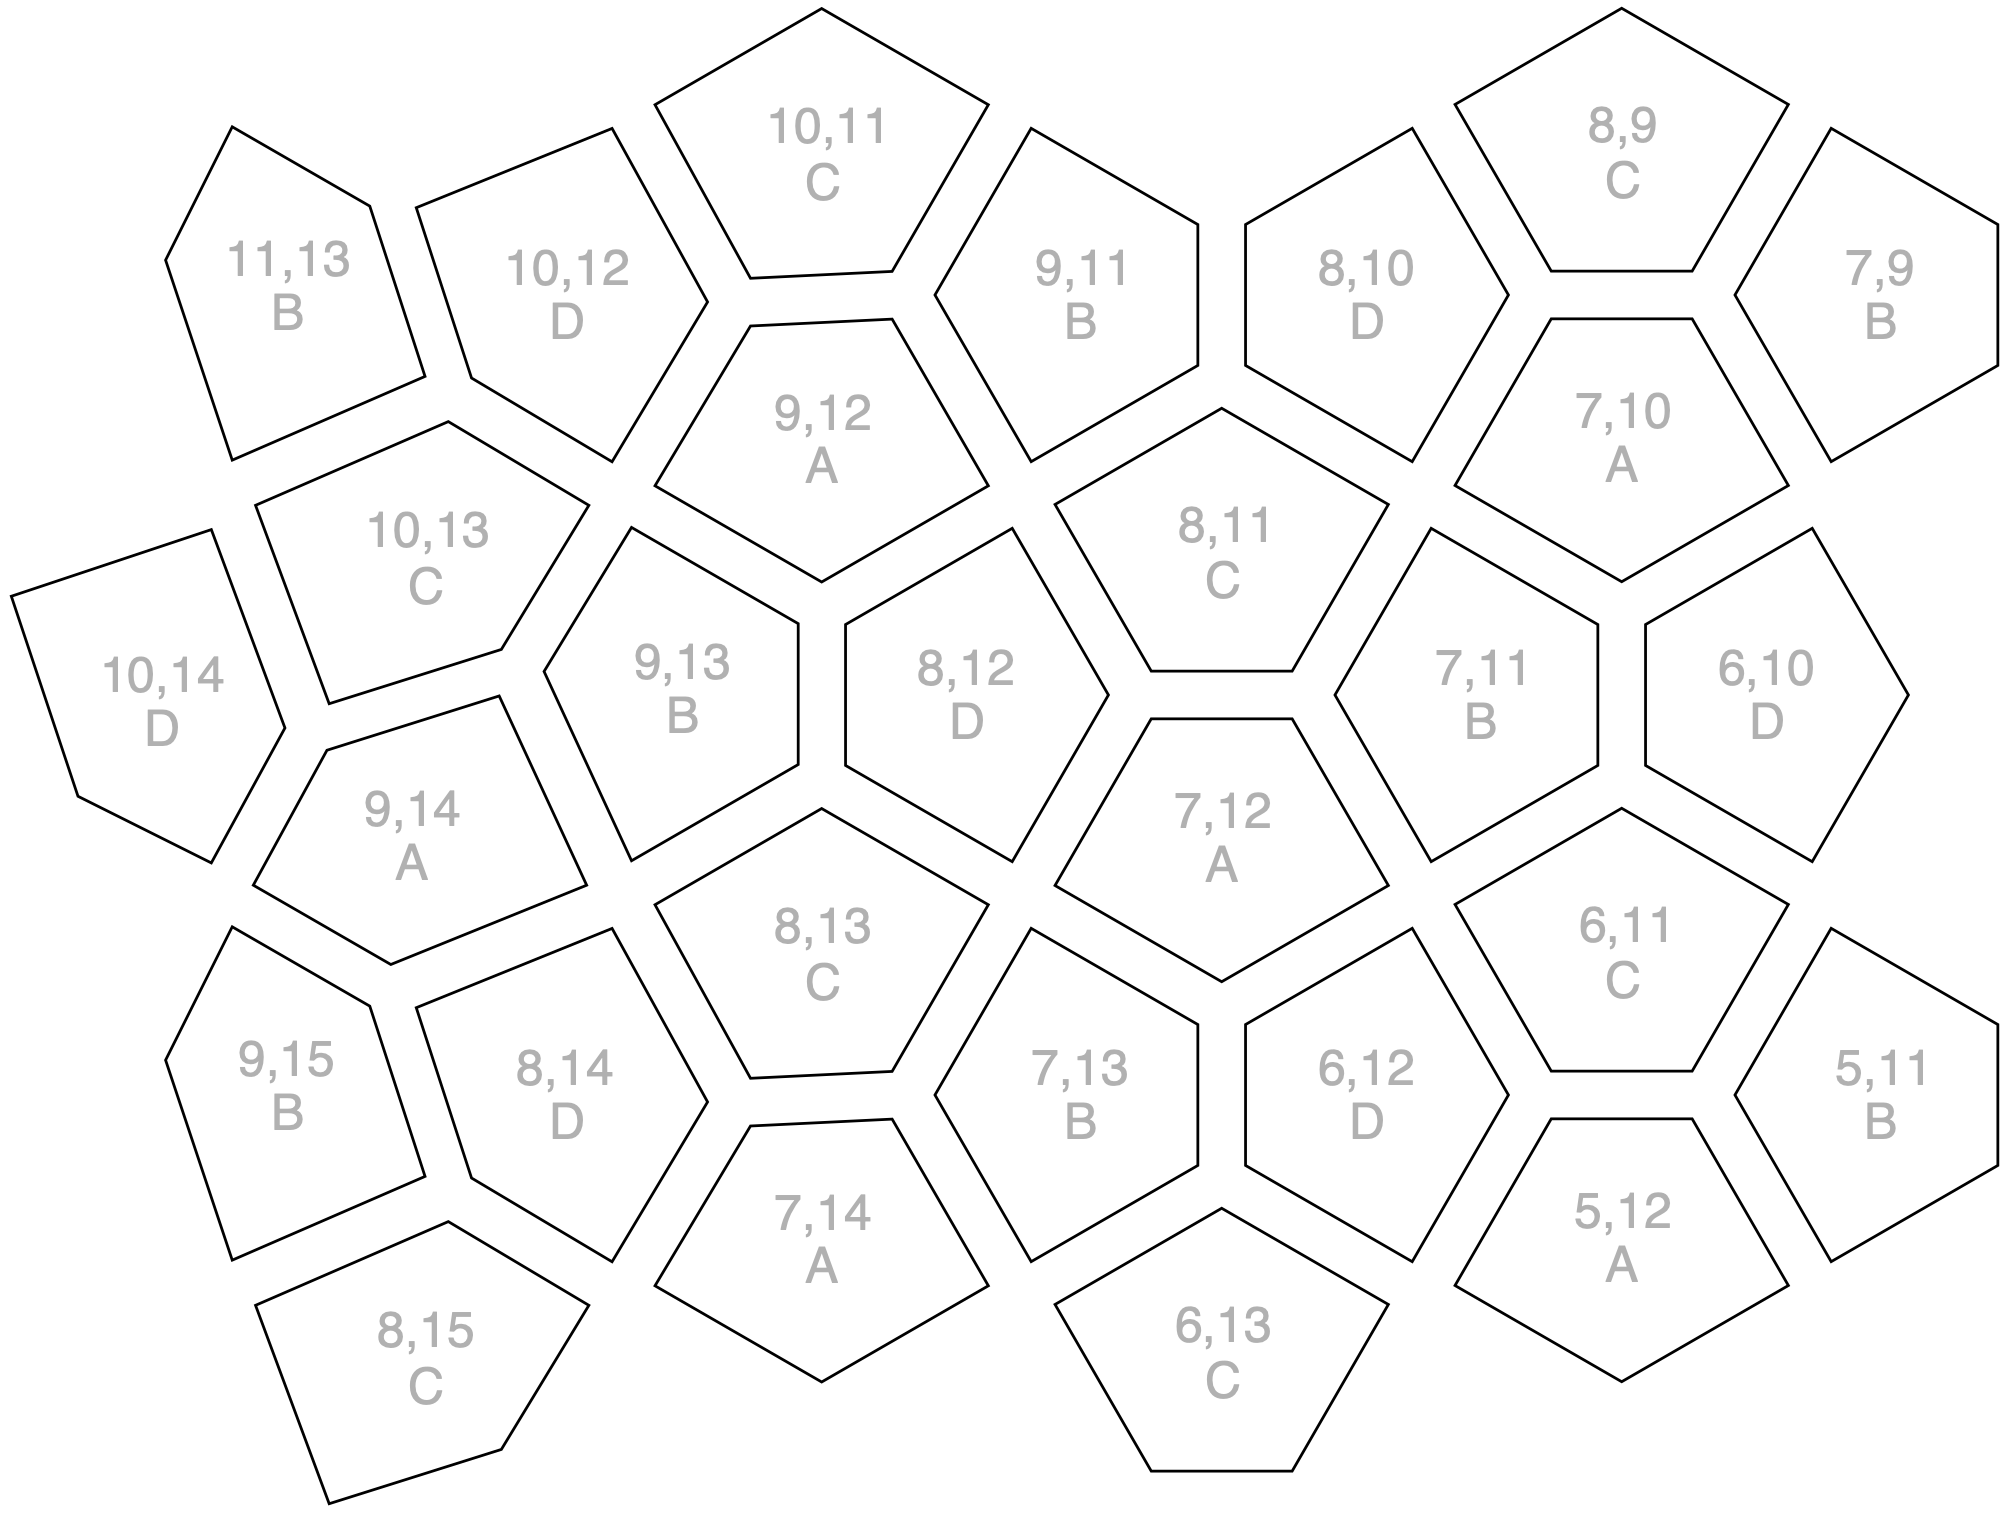
The overall composition contains 148 tiles across 16 rows. The EPP templates spanned 6 pages of 8.5” × 11” (roughly A4-sized) cardstock.
Fabrication
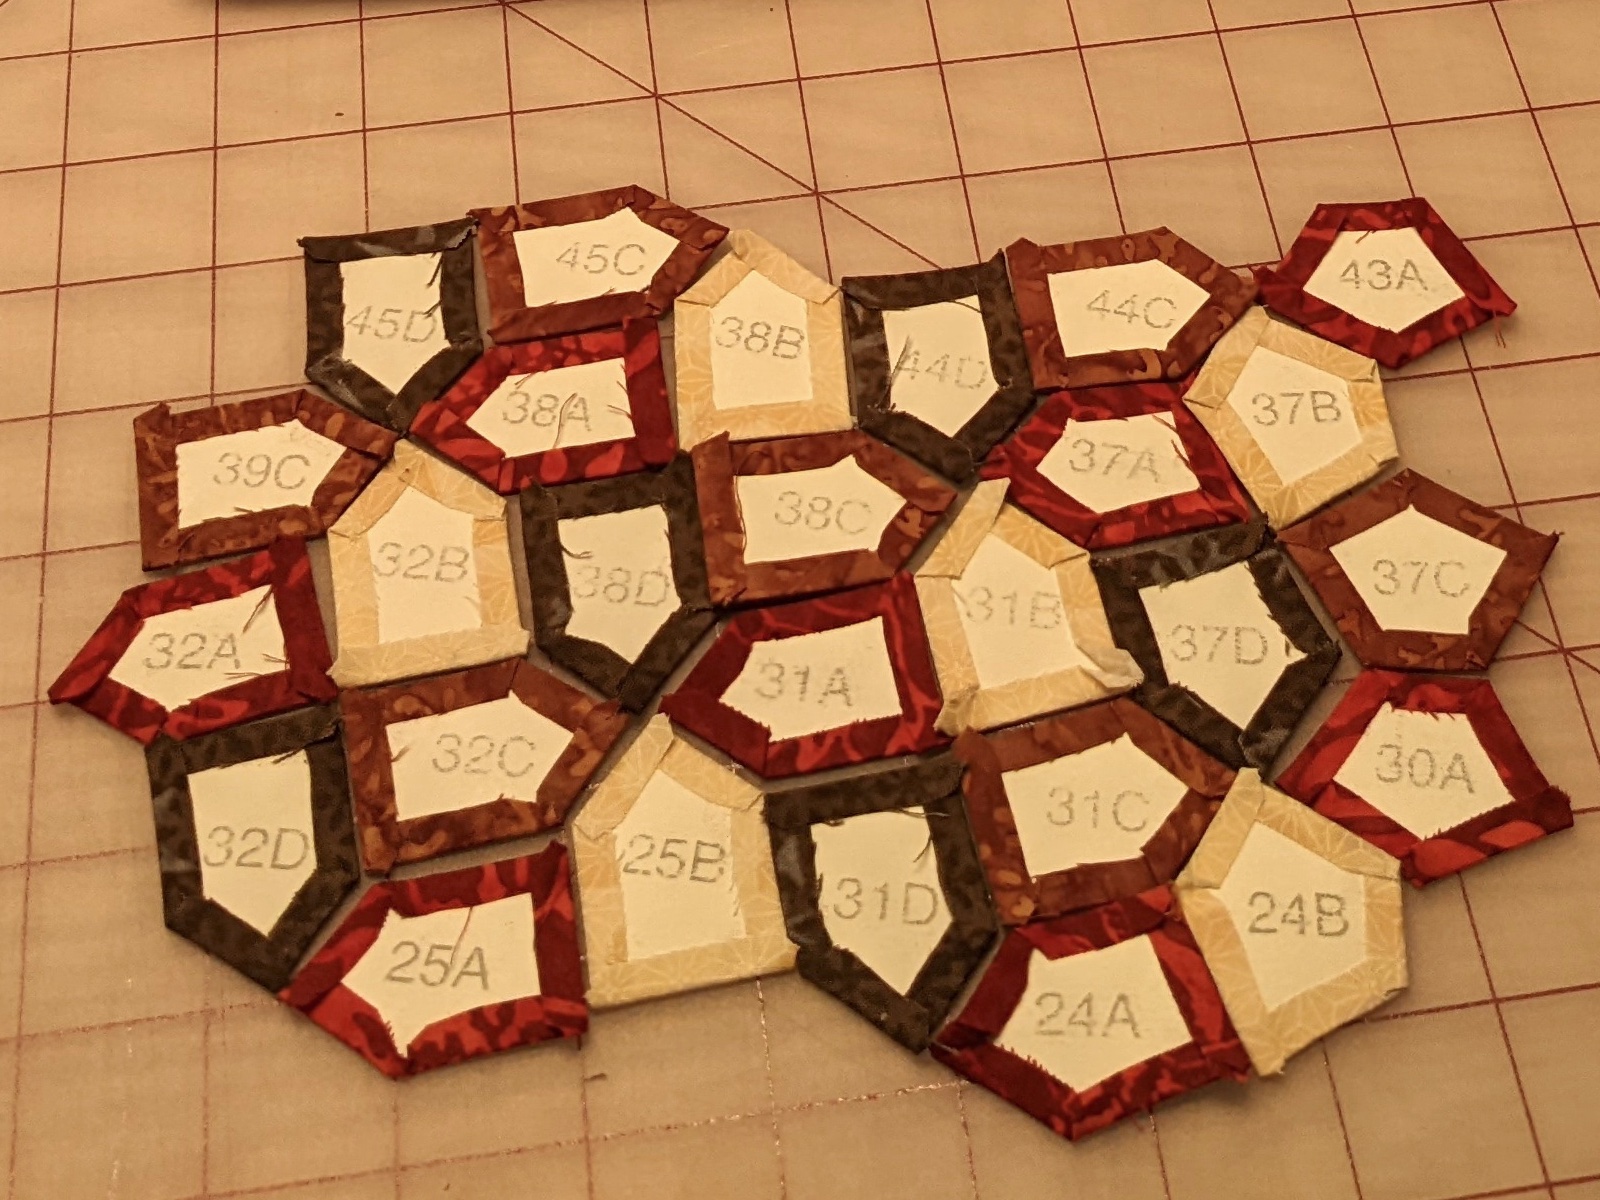
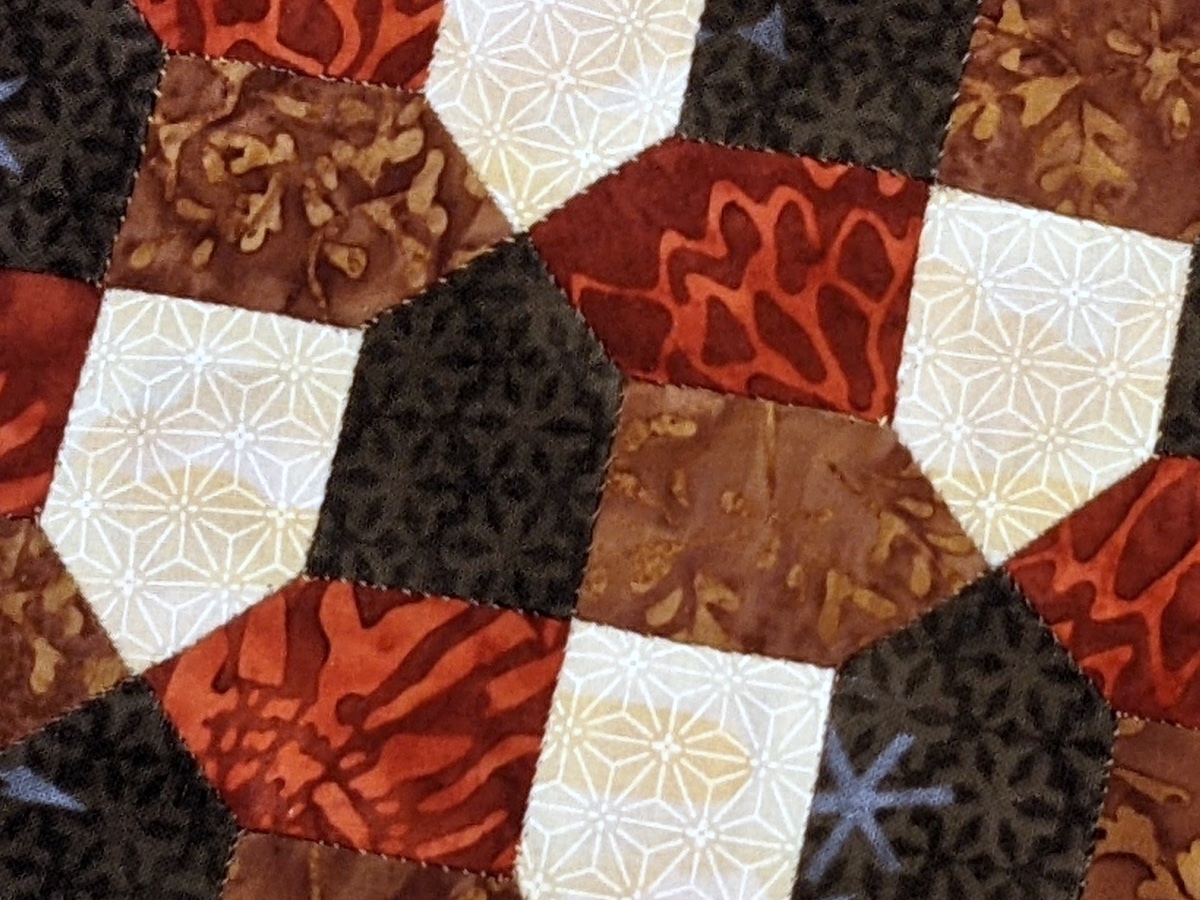
Before I bought the final fabrics, I printed out a subset of tiles to sew together a test piece, and although I resolved to improve my hand-stitching once I saw the result, it was clear that the concept would work out just fine. In the photo on the left below you can see the basted tiles with the fabric glued over the EPP templates – they are all placed into the correct arrangement, but not yet sewn together. On the right, you can see a detail of the finished test piece. It was my goal to have the hand stitching not be quite as visible on the final product.
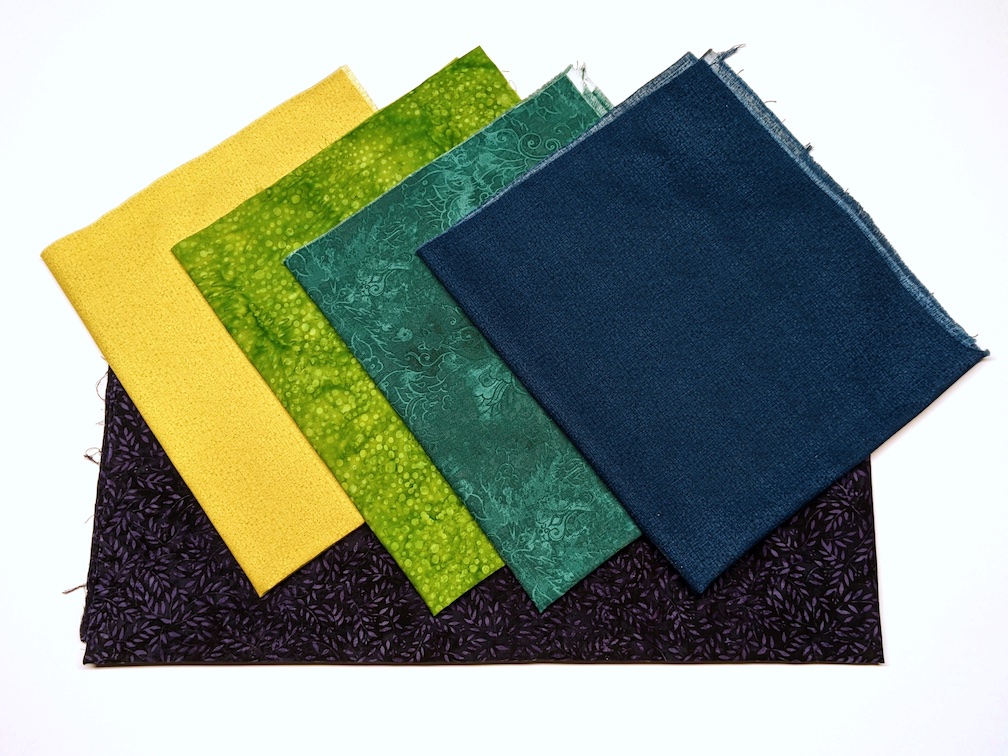
With the test piece out of the way, it was time to start on the final product. The first step was a trip to Quilter’s corner in Ithaca, NY. Buying fabric in person was so much more fulfilling than trying to match colors online, like I had done with the Penrose quilt. Since the pillowcase was so small, I needed less than a yard of each color, except for the purple which would form the border and the backing.
Then it was just a lot of quality time with scissors, glue, iron, needle, and thread.
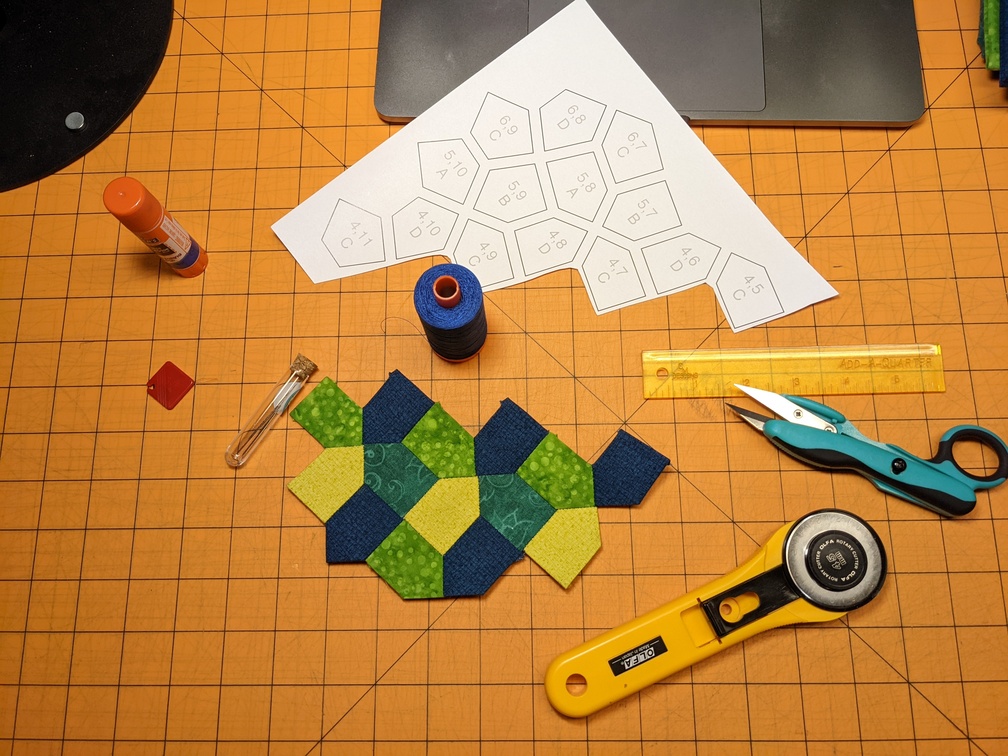
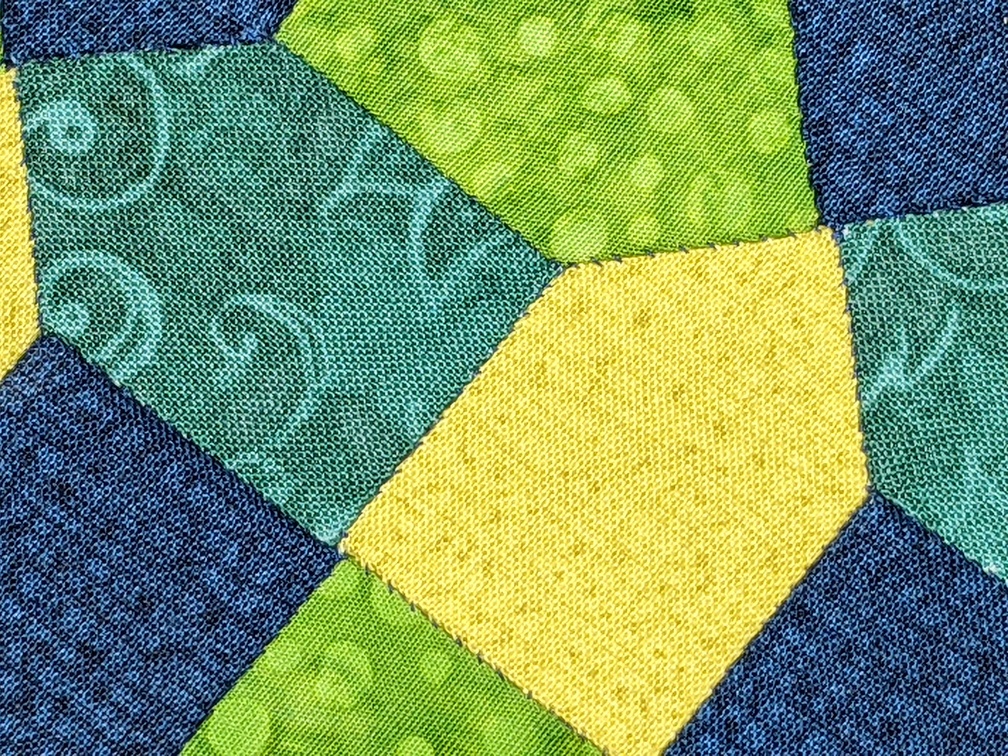
Pro tip for EPP: podcasts and YouTube videos where the visuals don’t matter are both wonderful ways to distract from the drudgery of hand-stitching. After just a few days, the center panel was fully stitched together, and I managed to keep the stitches both less visible and more regular than on the prototype.
Next, another brief prototyping venture to learn how to do piping and zippers (YouTube tutorials were heavily involved). The less said about the cheapo fabric I used for it, the better.4
Once I had figured out those techniques, it was quick work to finish up the borders, quilting, piping, backing, and zipper.
Conclusion
Here’s the final pillowcase, once more:
If you squint at it, there’s almost a 3D effect where the yellow color works as a highlight and the blue as a shadow. I like the way that you can fixate on a single color – yellow, for example – and see how it transitions from rightward-pointing pentagons on the left, to symmetric pentagons in the middle, to leftward-pointing ones on the right. To me, the apparent complexity of the composition is softened to some extent by the fact that the outer and the inner pentagons combine right angles with the easily-recognizable angles you would see in regular octogons (135°) and hexagons (120°), respectively. My hope is that seeing the quilted grid lines for the first time feels somewhat startling, as the viewer realizes that the entire composition is embedded in a uniform square lattice.
It ended up being a pretty quick project – just under two weeks from start to finish, compared with the four months I spent on the Penrose quilt. Although when I first learned about EPP, I was concerned about how long it would take to do all of the hand-stitching, it took more time to do the templates, cutting, basting, and trimming than it took to do the actual sewing for the center panel. So it’s consistent with machine-sewn projects in the sense that the non-sewing activities still dominate the fabrication time.
Given how well this one worked out, I’m excited to try another parquet deformation quilt soon!
Questions? Comments? Please chime in on my Mastodon!
-
Actually, the shadertoy above was my second artwork based on a parquet-deformed Cairo tiling. The first, which I have yet to fabricate, is a design for heavily-engraved steel license plate frame. It’ll look really cool, if I ever get around to making it! ↩
-
This feature of the output got added once fabrication had already begun – I hadn’t actually decided how to quilt the front until after I finished the piecework. ↩
-
Next time, I’m just going to use the laser cutter at school for this. ↩
-
This fabric was a reject from the Penrose quilt project, and its visual ugliness is surpassed by a tactile unpleasantness that brings to mind the texture of the infrequently-cleaned upholstery in an early-1990s-era Wendy’s. ↩