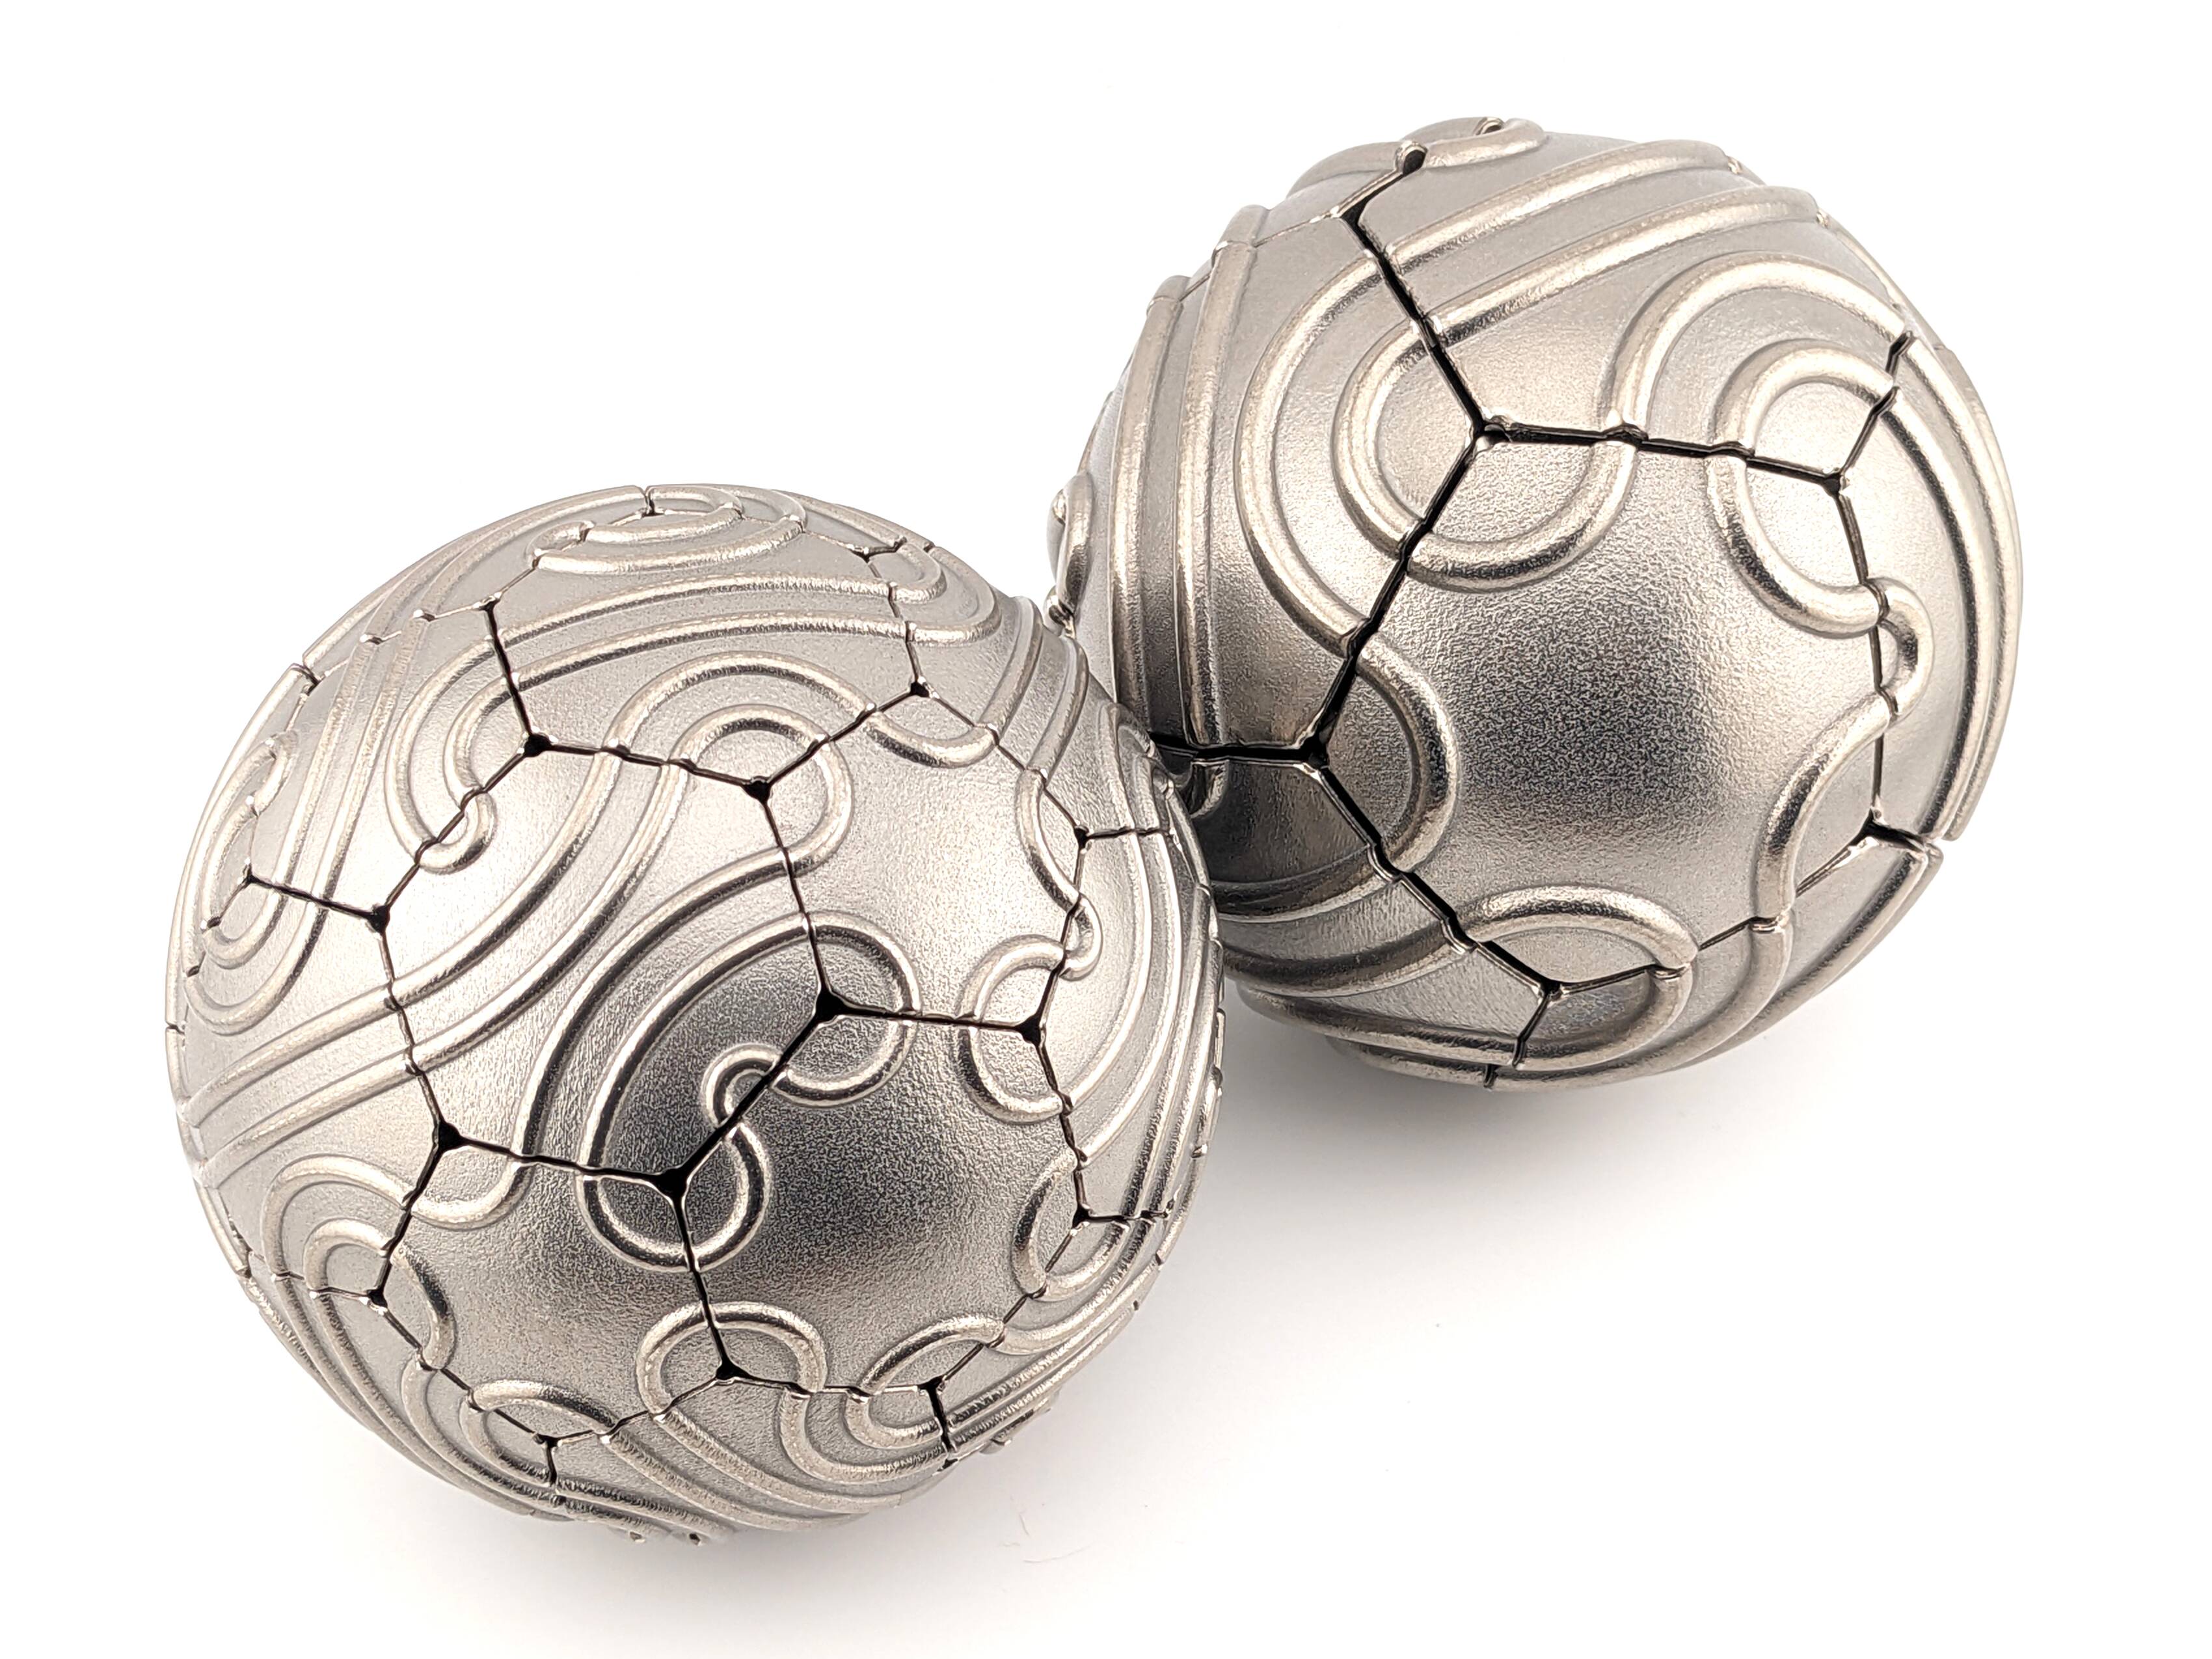
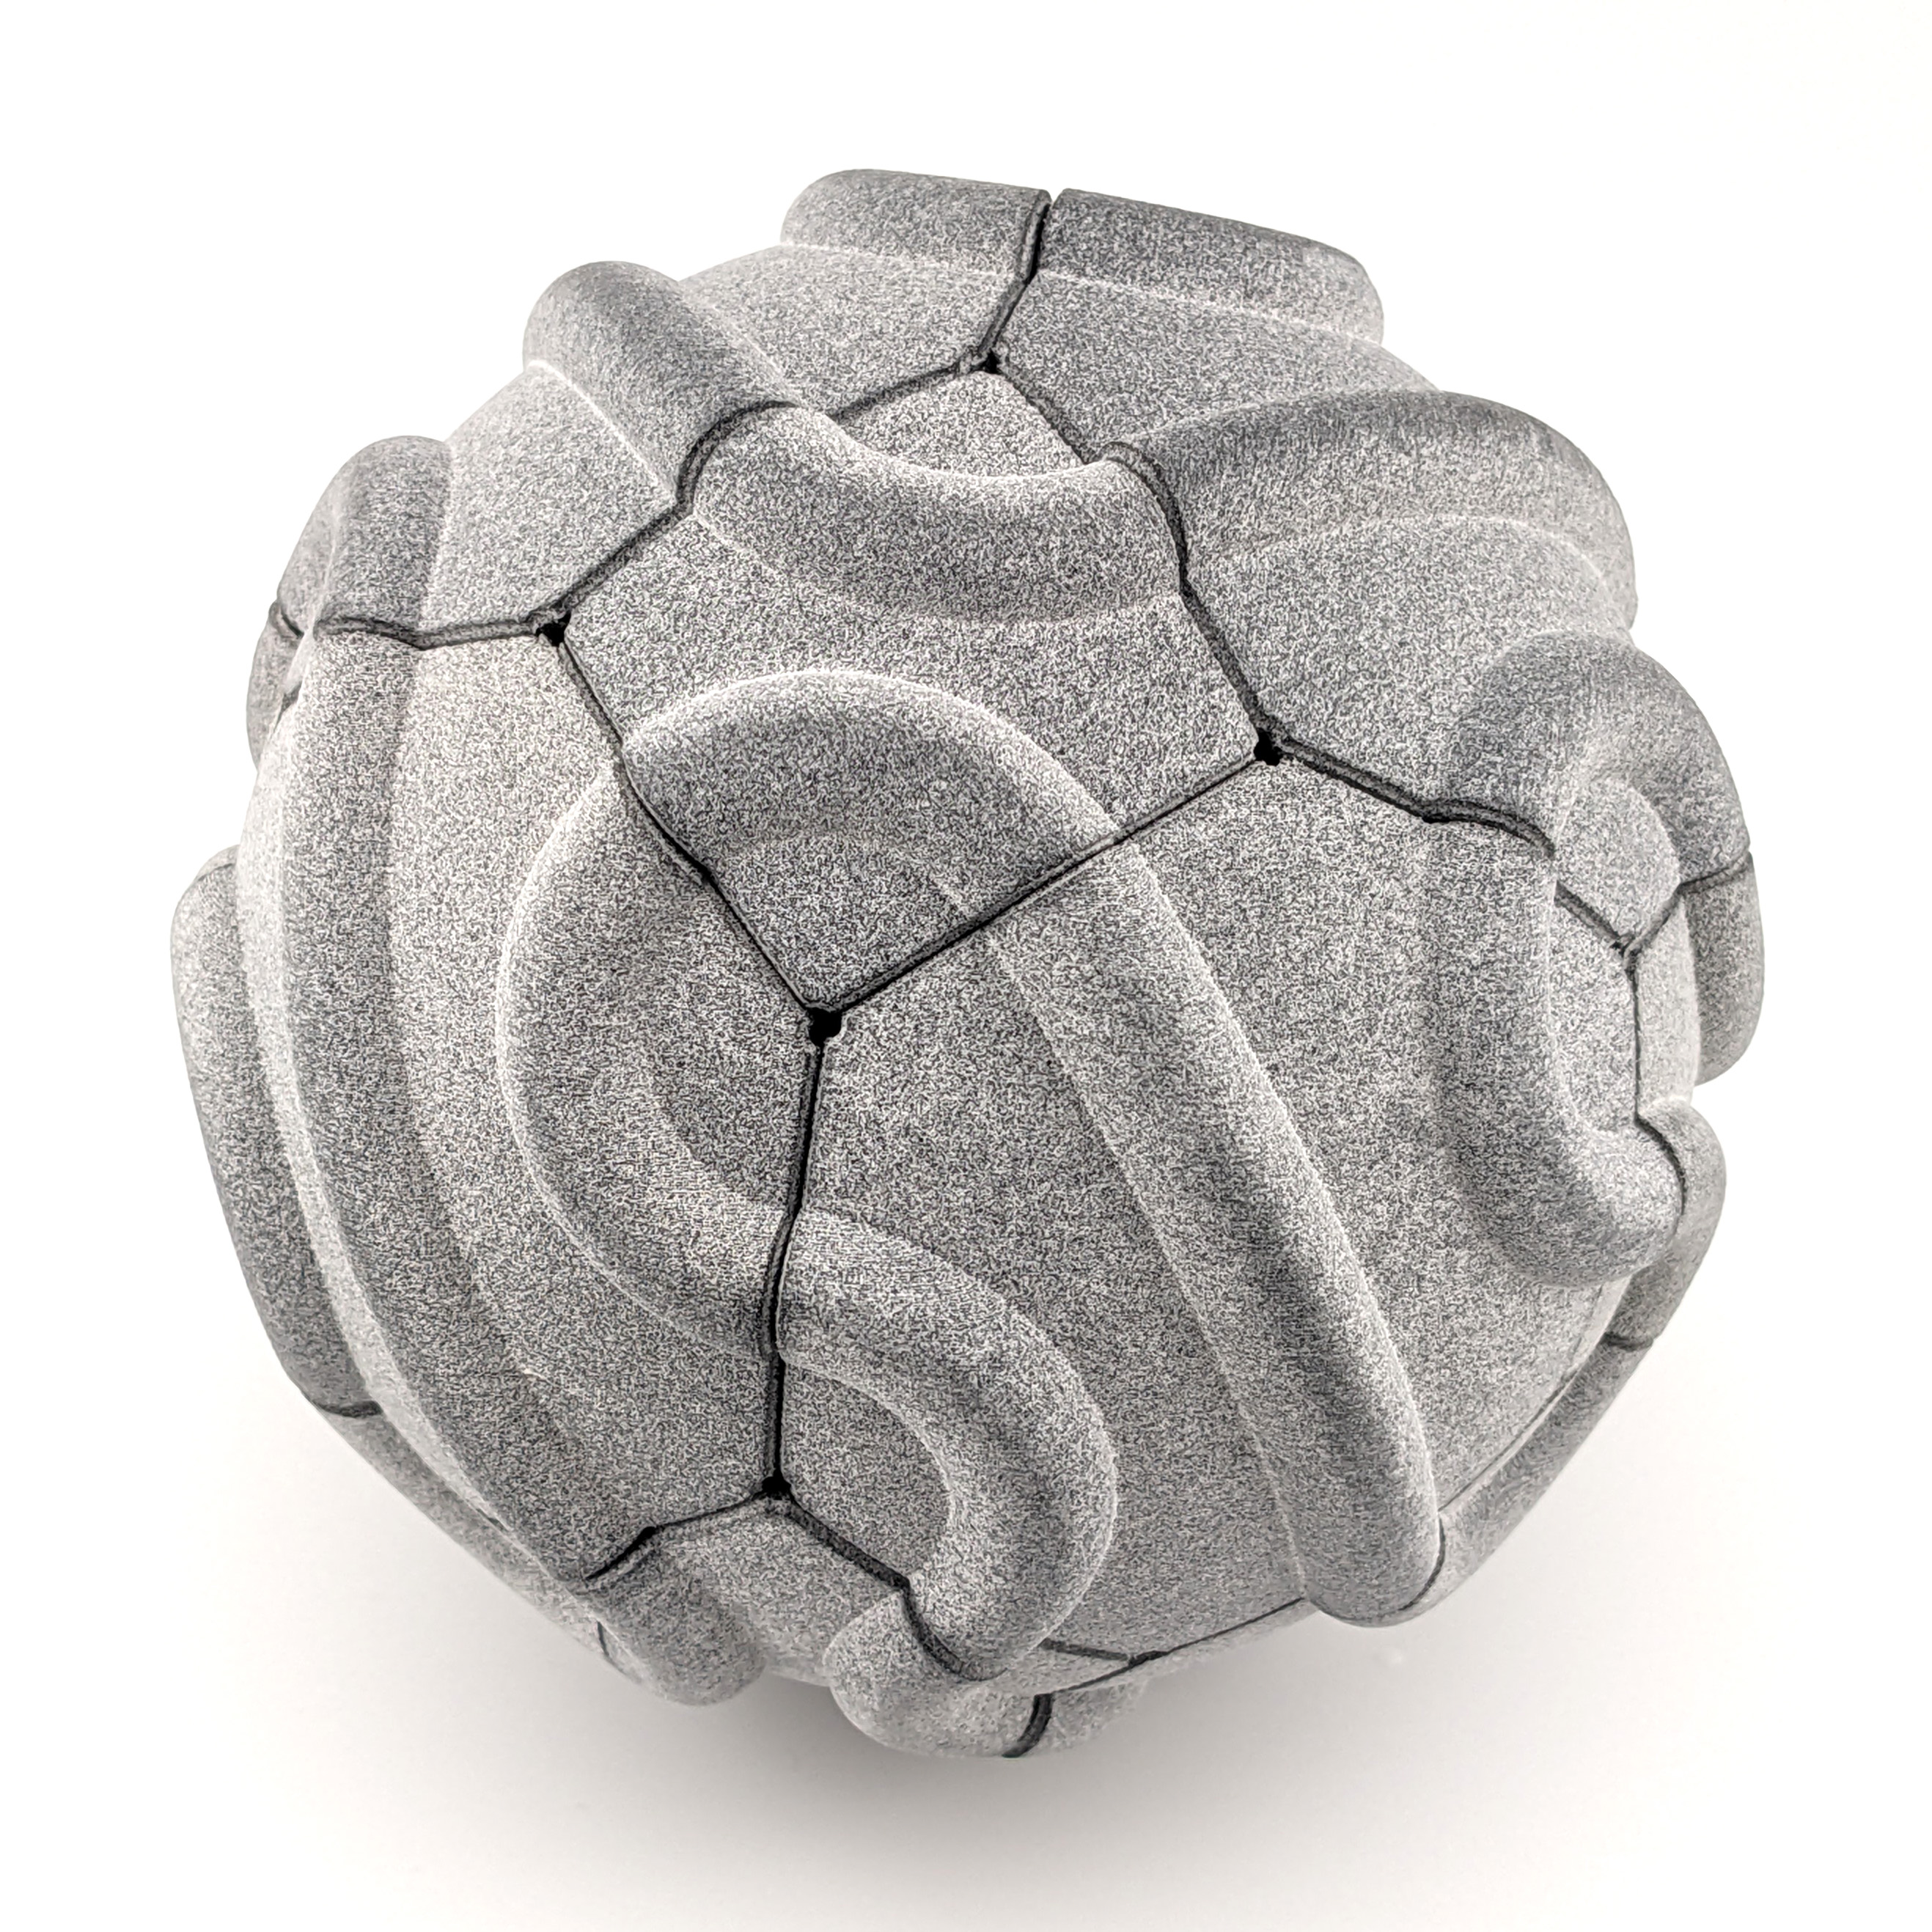
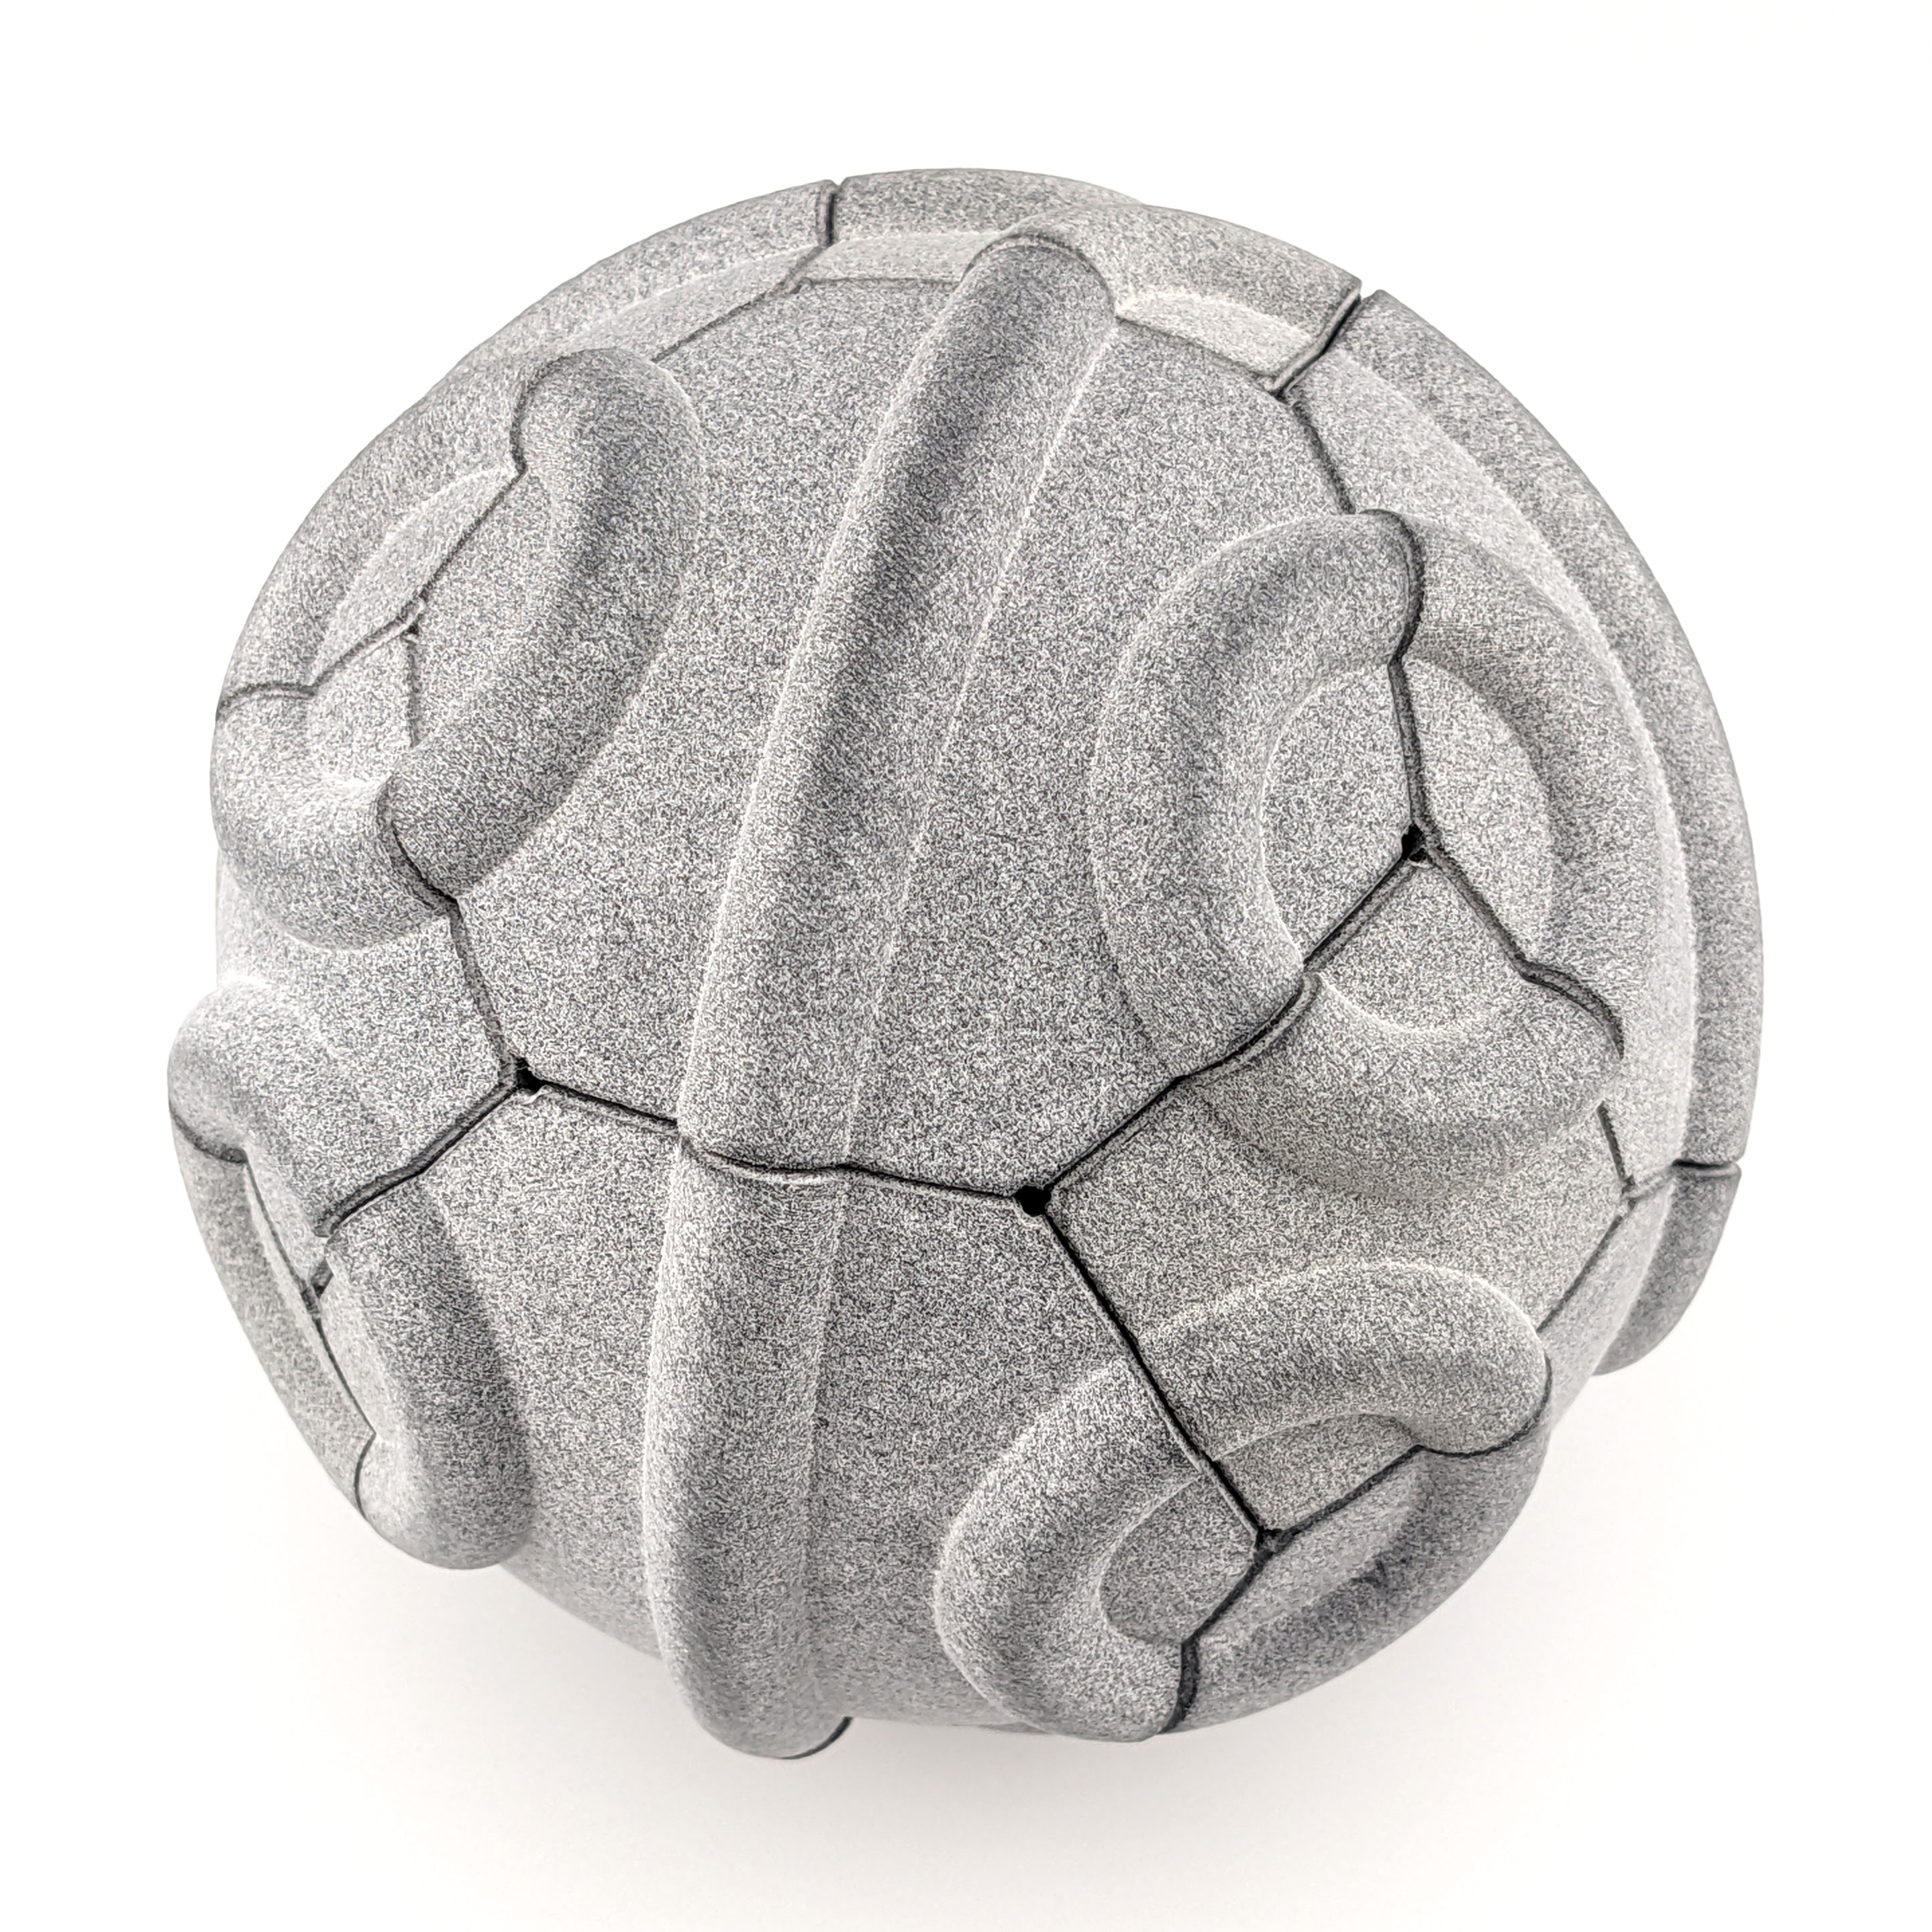
Squiggle orbs
3D printed reconfigurable Truchet tilings of spherical polyhedra.
July 2025 update
Here’s a link to the Bridges 2025 paper and to the slides presented at the conference.
The artworks
The sculptures below are slated to be exhibited at the art exhibition at the Bridges 2025 Eindhoven conference on Mathematics and the Arts.
Read on for a description of what they are and how they were made. For a more mathematical/technical perspective, you can also read this preprint of my Bridges 2025 paper about the tilings.
Background - Truchet tiles
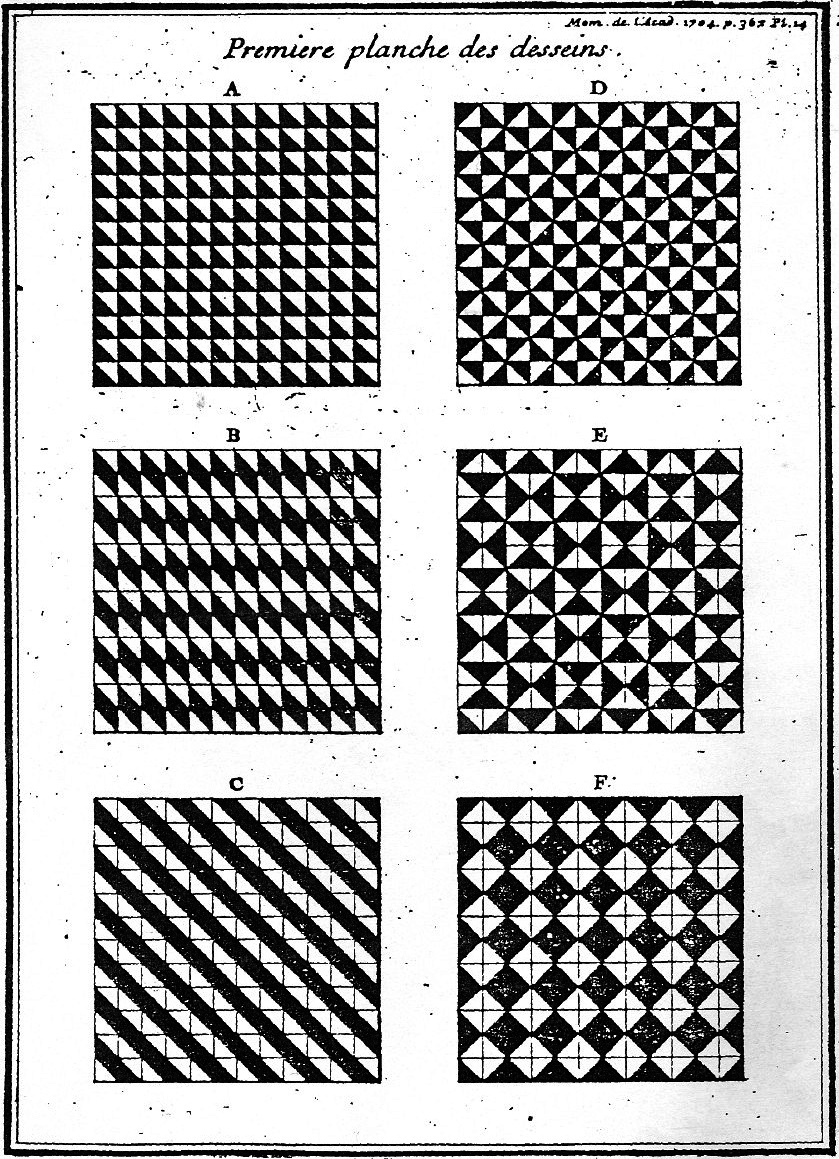
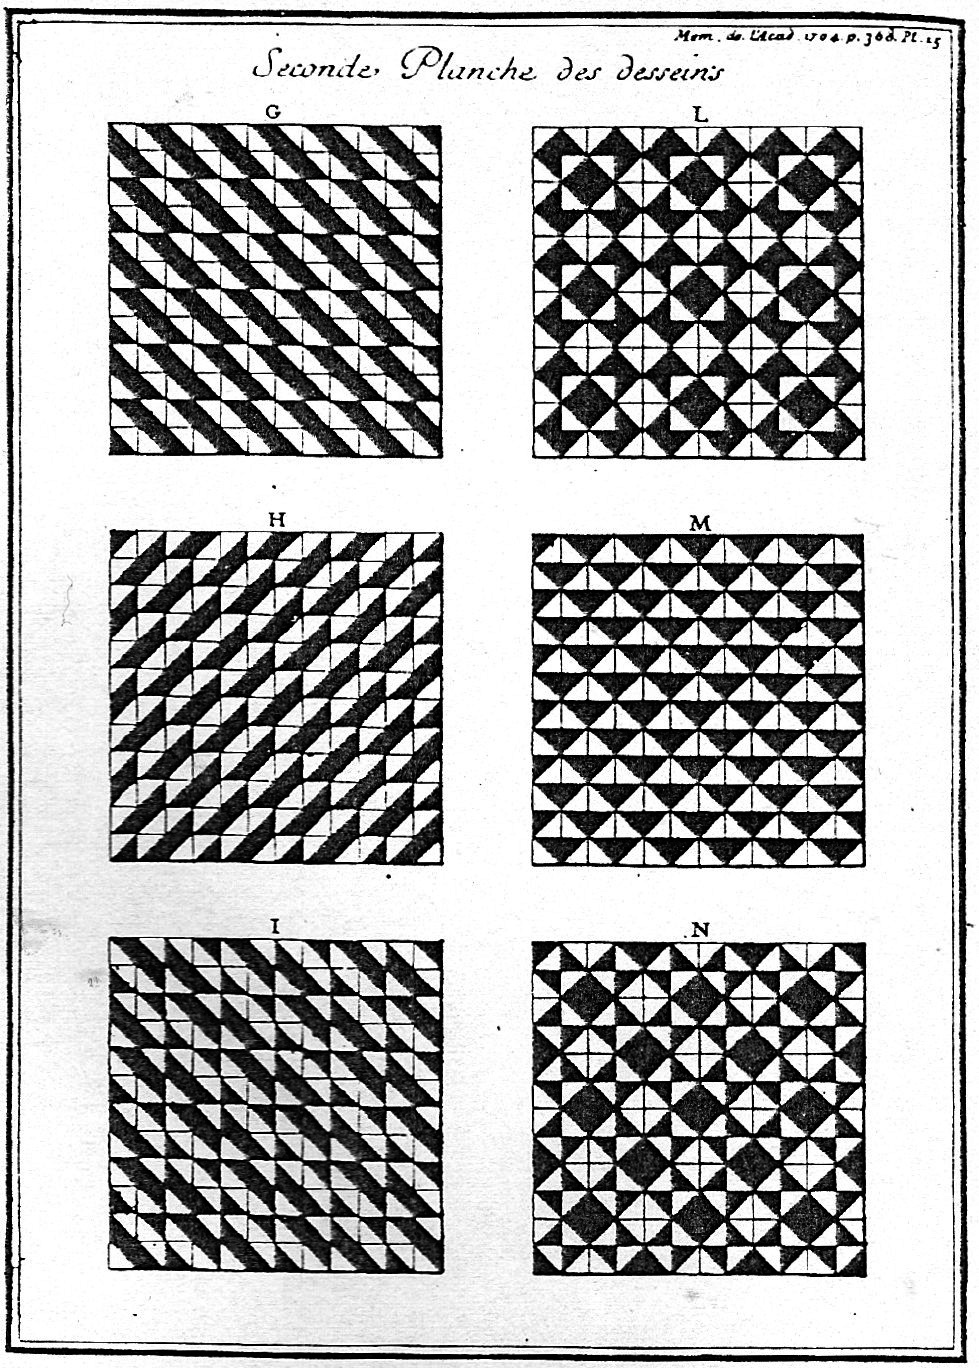
In the early 1700s, Jean Truchet, a French Dominican priest, observed that it was possible to create complex patterns and symmetries using just four rotations of a single square tile ◩ split along its diagonal and shaded on one side:
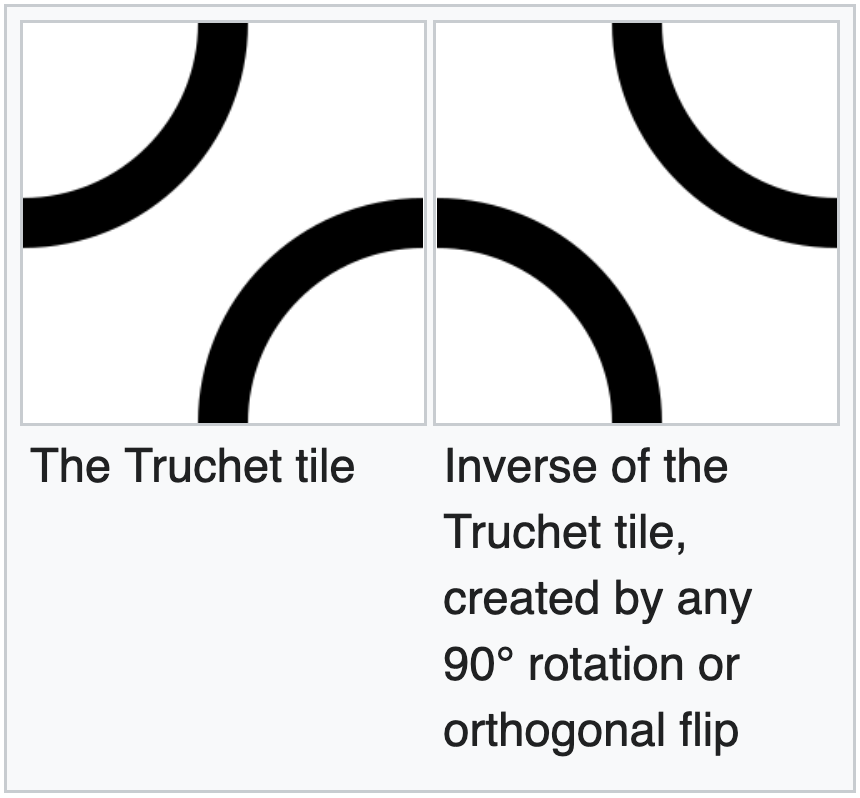
Truchet’s core idea – a fixed set of tiles that could fill the plane with varied and interesting patterns – was re-popularized in the 1980s by Cyril Stanley Smith, who proposed a two-tile variant consisting of pairs of quarter-circle arcs connecting the midpoints of adjacent edges (image from Wikipedia):
Here is a tiling created using Smith’s tiles (again, image from Wikipedia):

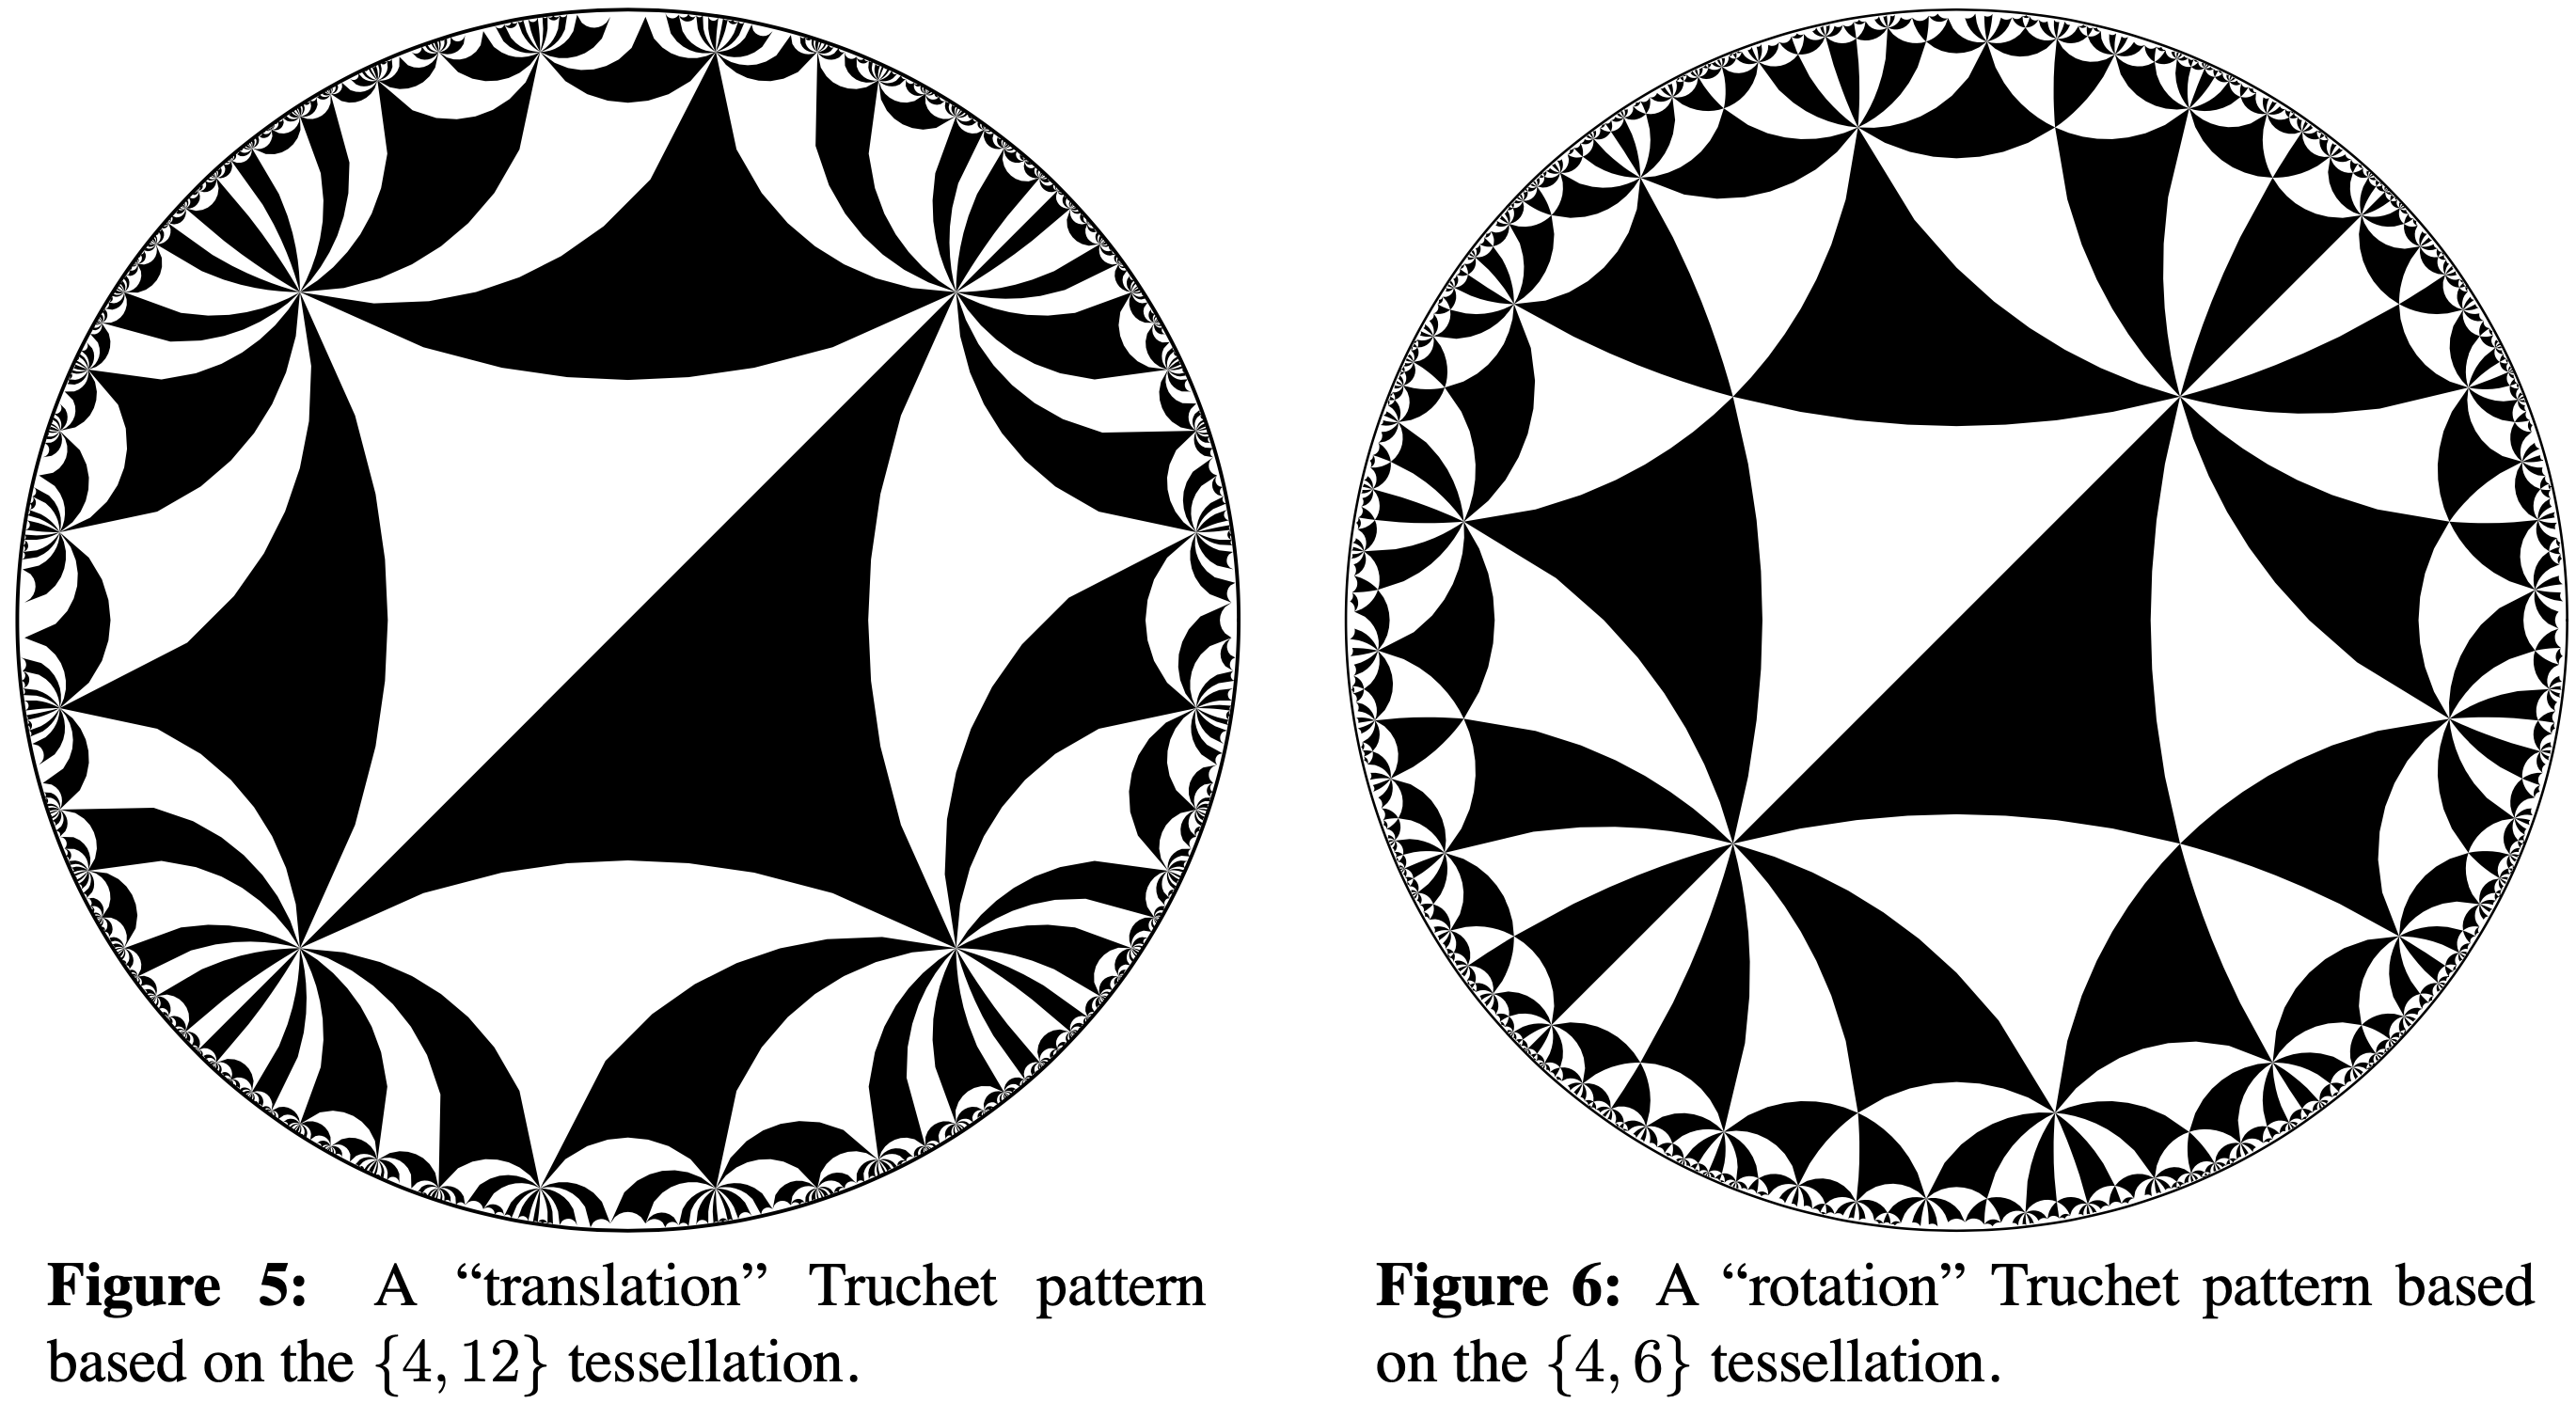
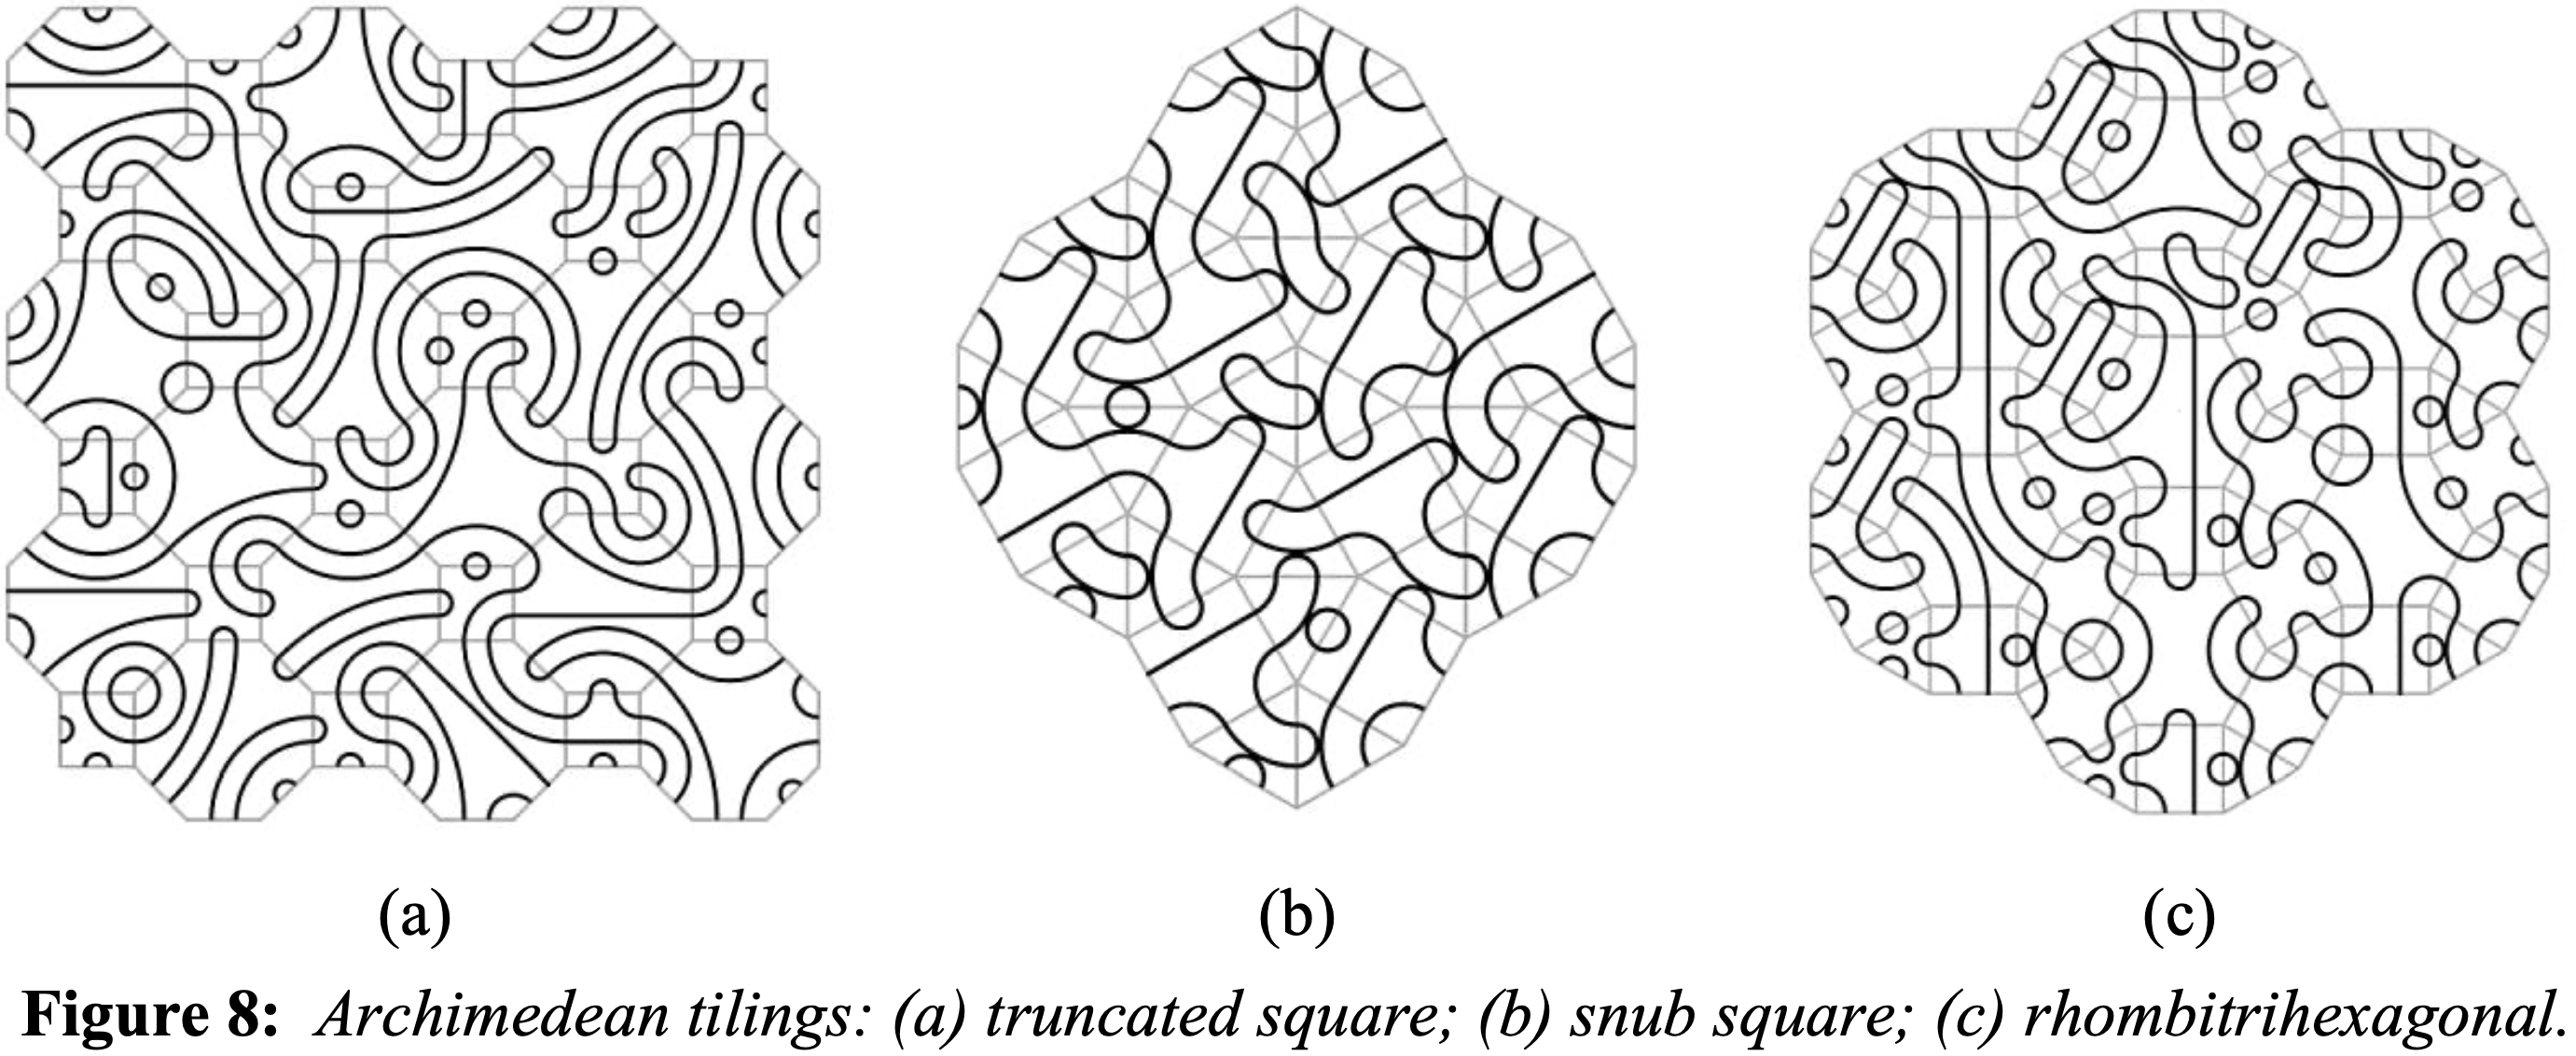
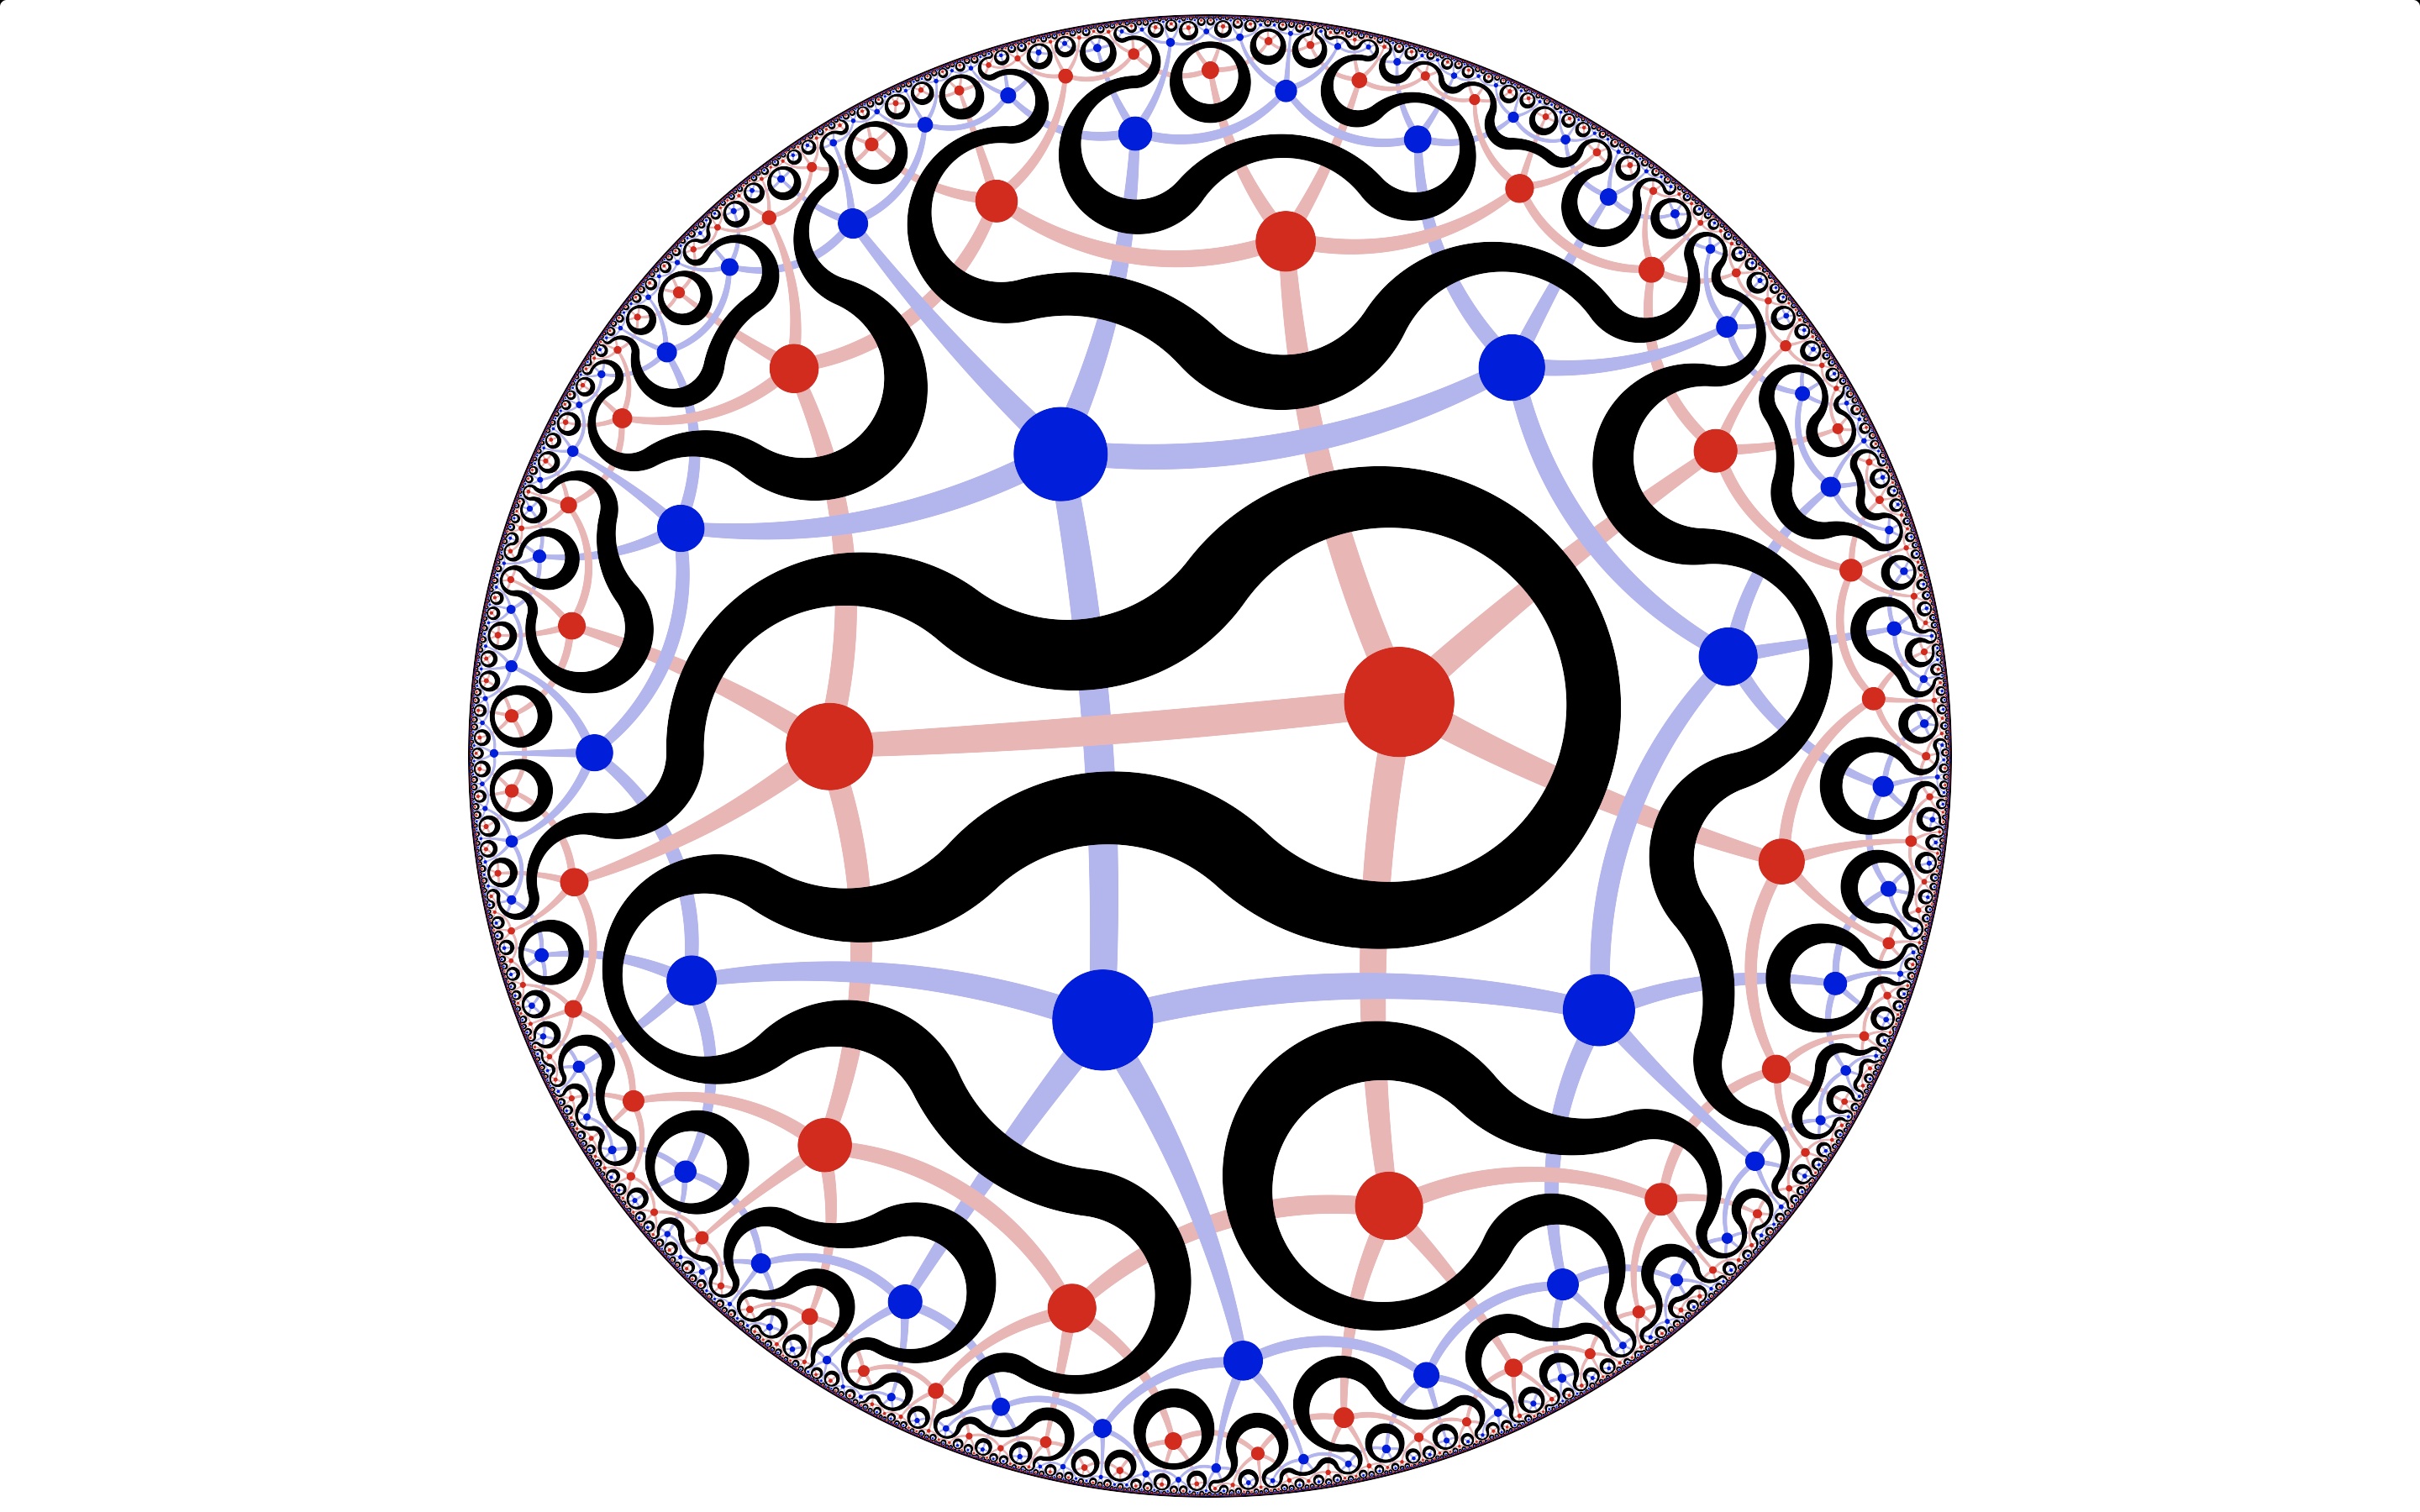
Truchet tiles have been extended to other lattices and domains by many other artists and researchers. Douglas Dunham and Kerry Mitchell presented two interesting examples of hyperbolic and Archimedian Truchet tilings to the Bridges community in 2011 and 2020, respectively:
I am slightly obsessed with Truchet tiles
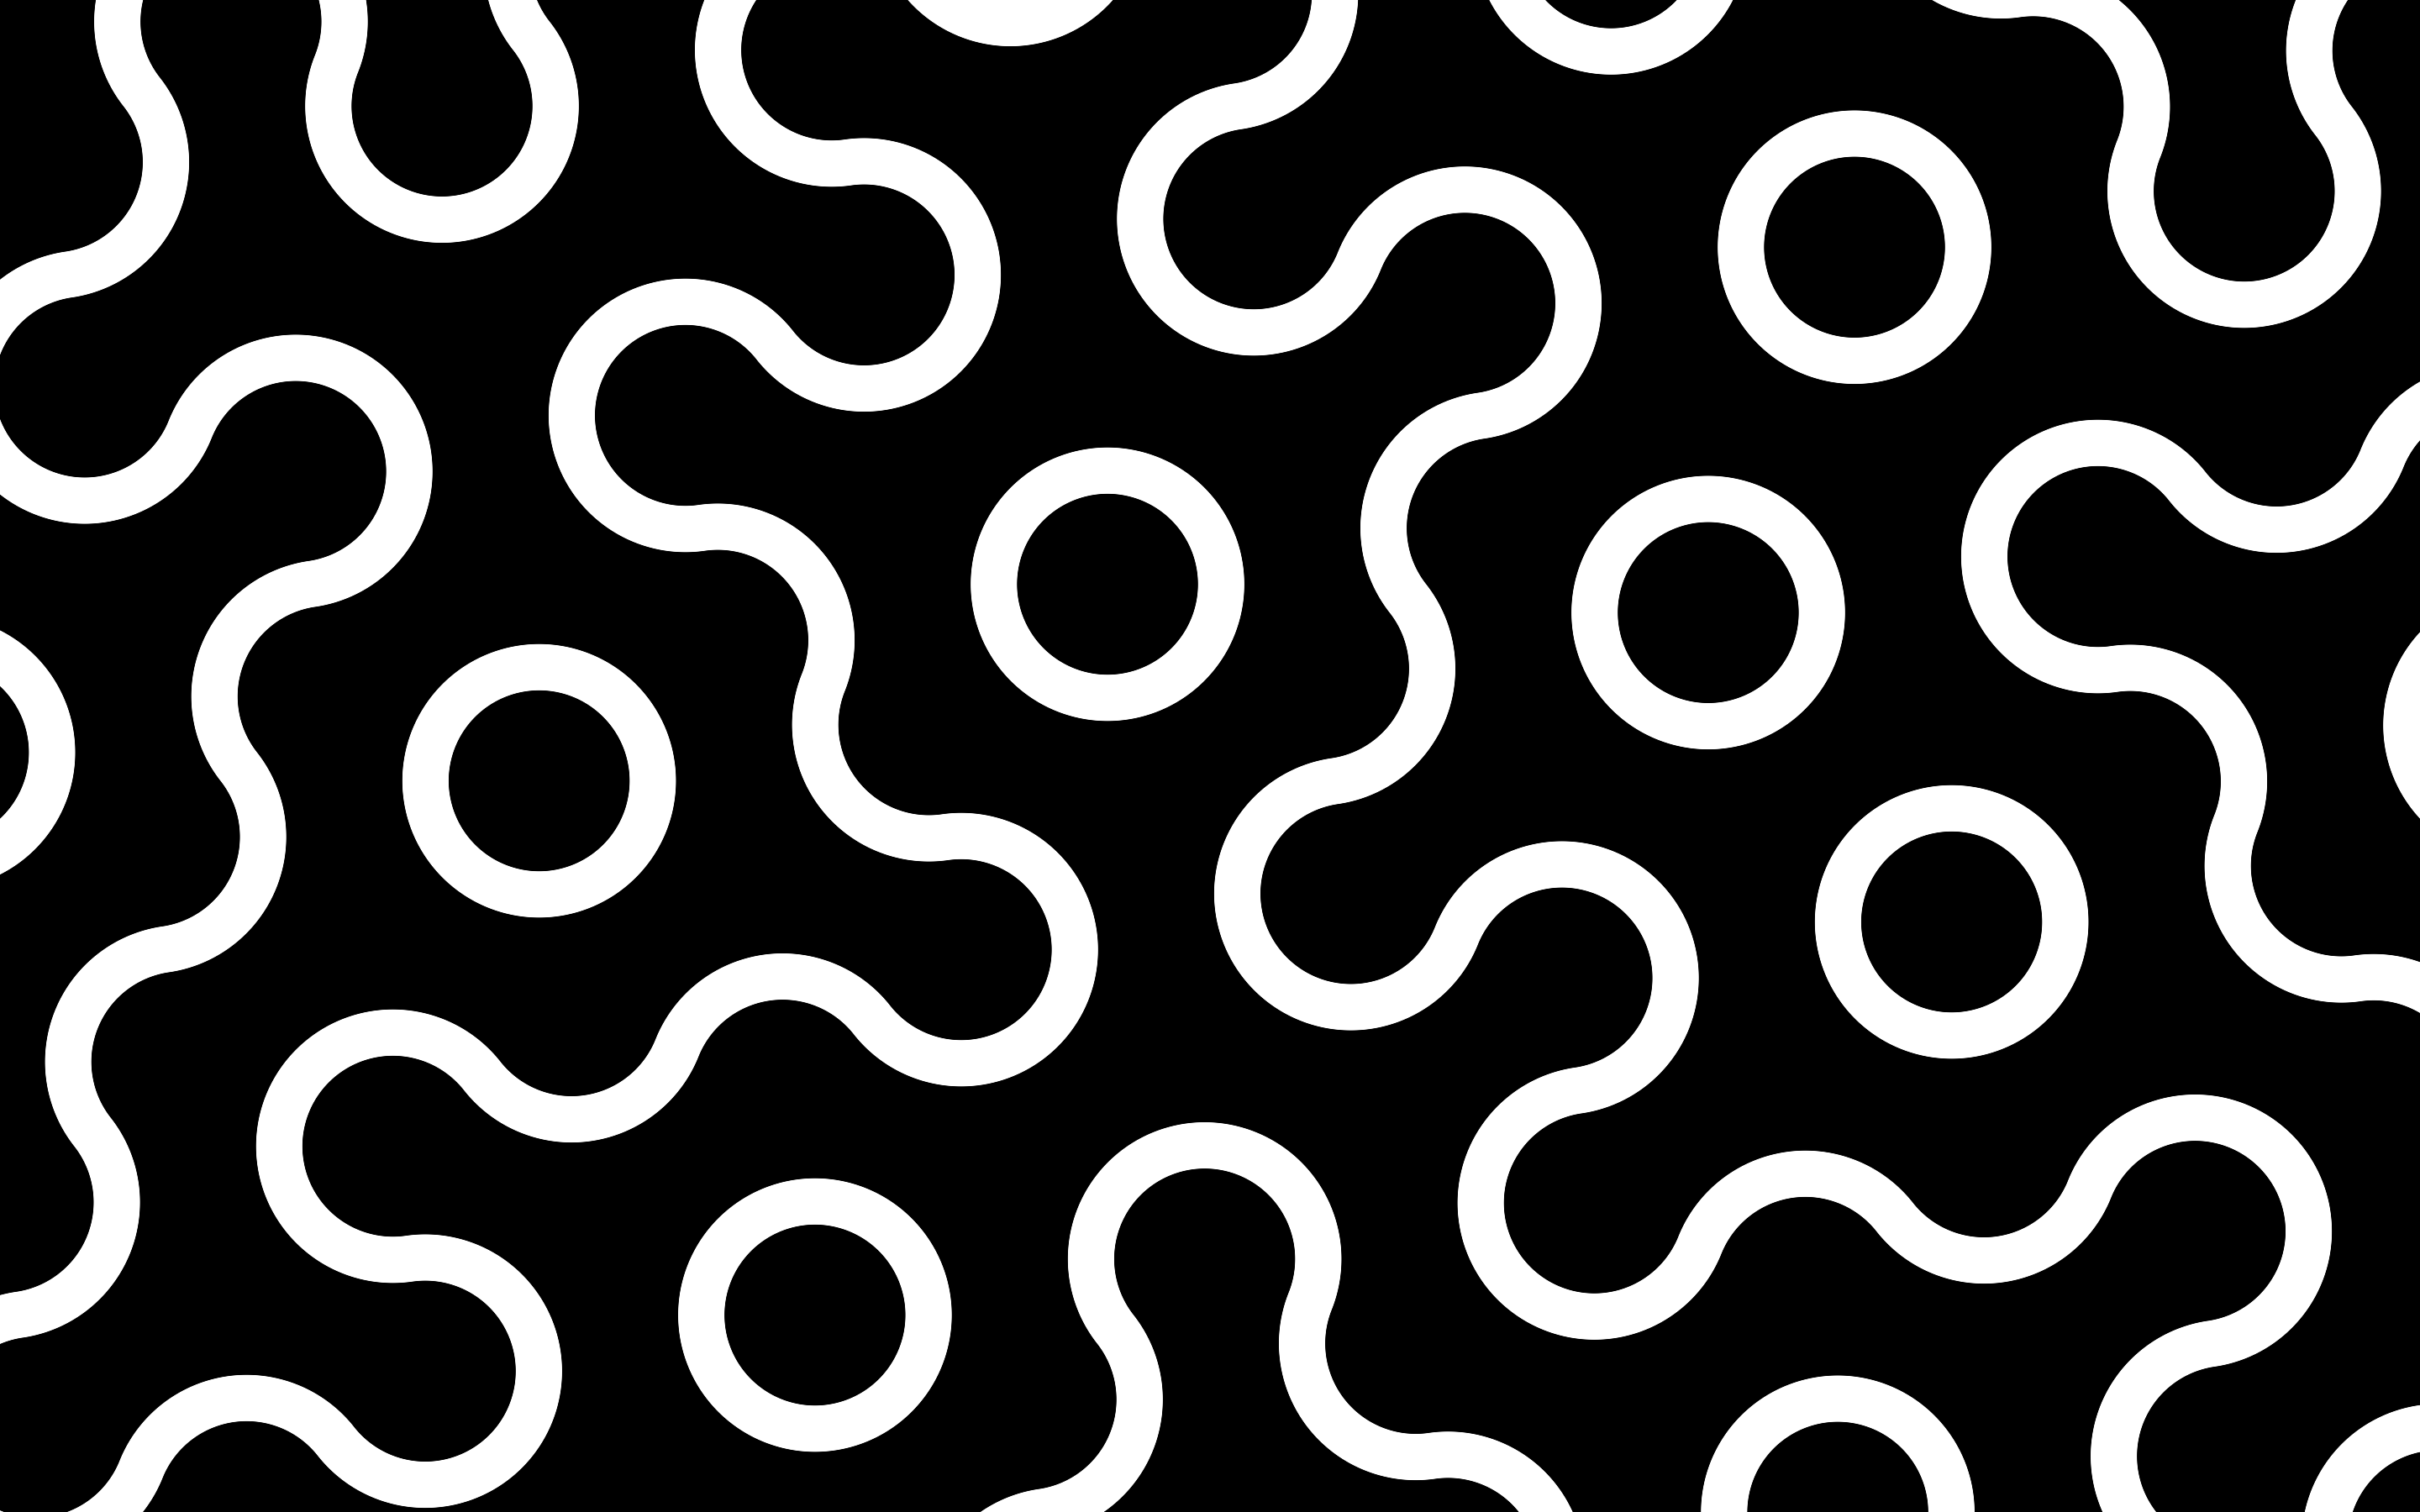
I’ve been posting computer graphics artwork on shadertoy.com since 2014. Many of my most popular shaders are Truchet tilings, including:
- a Smith-inspired hexagonal Truchet tiling;
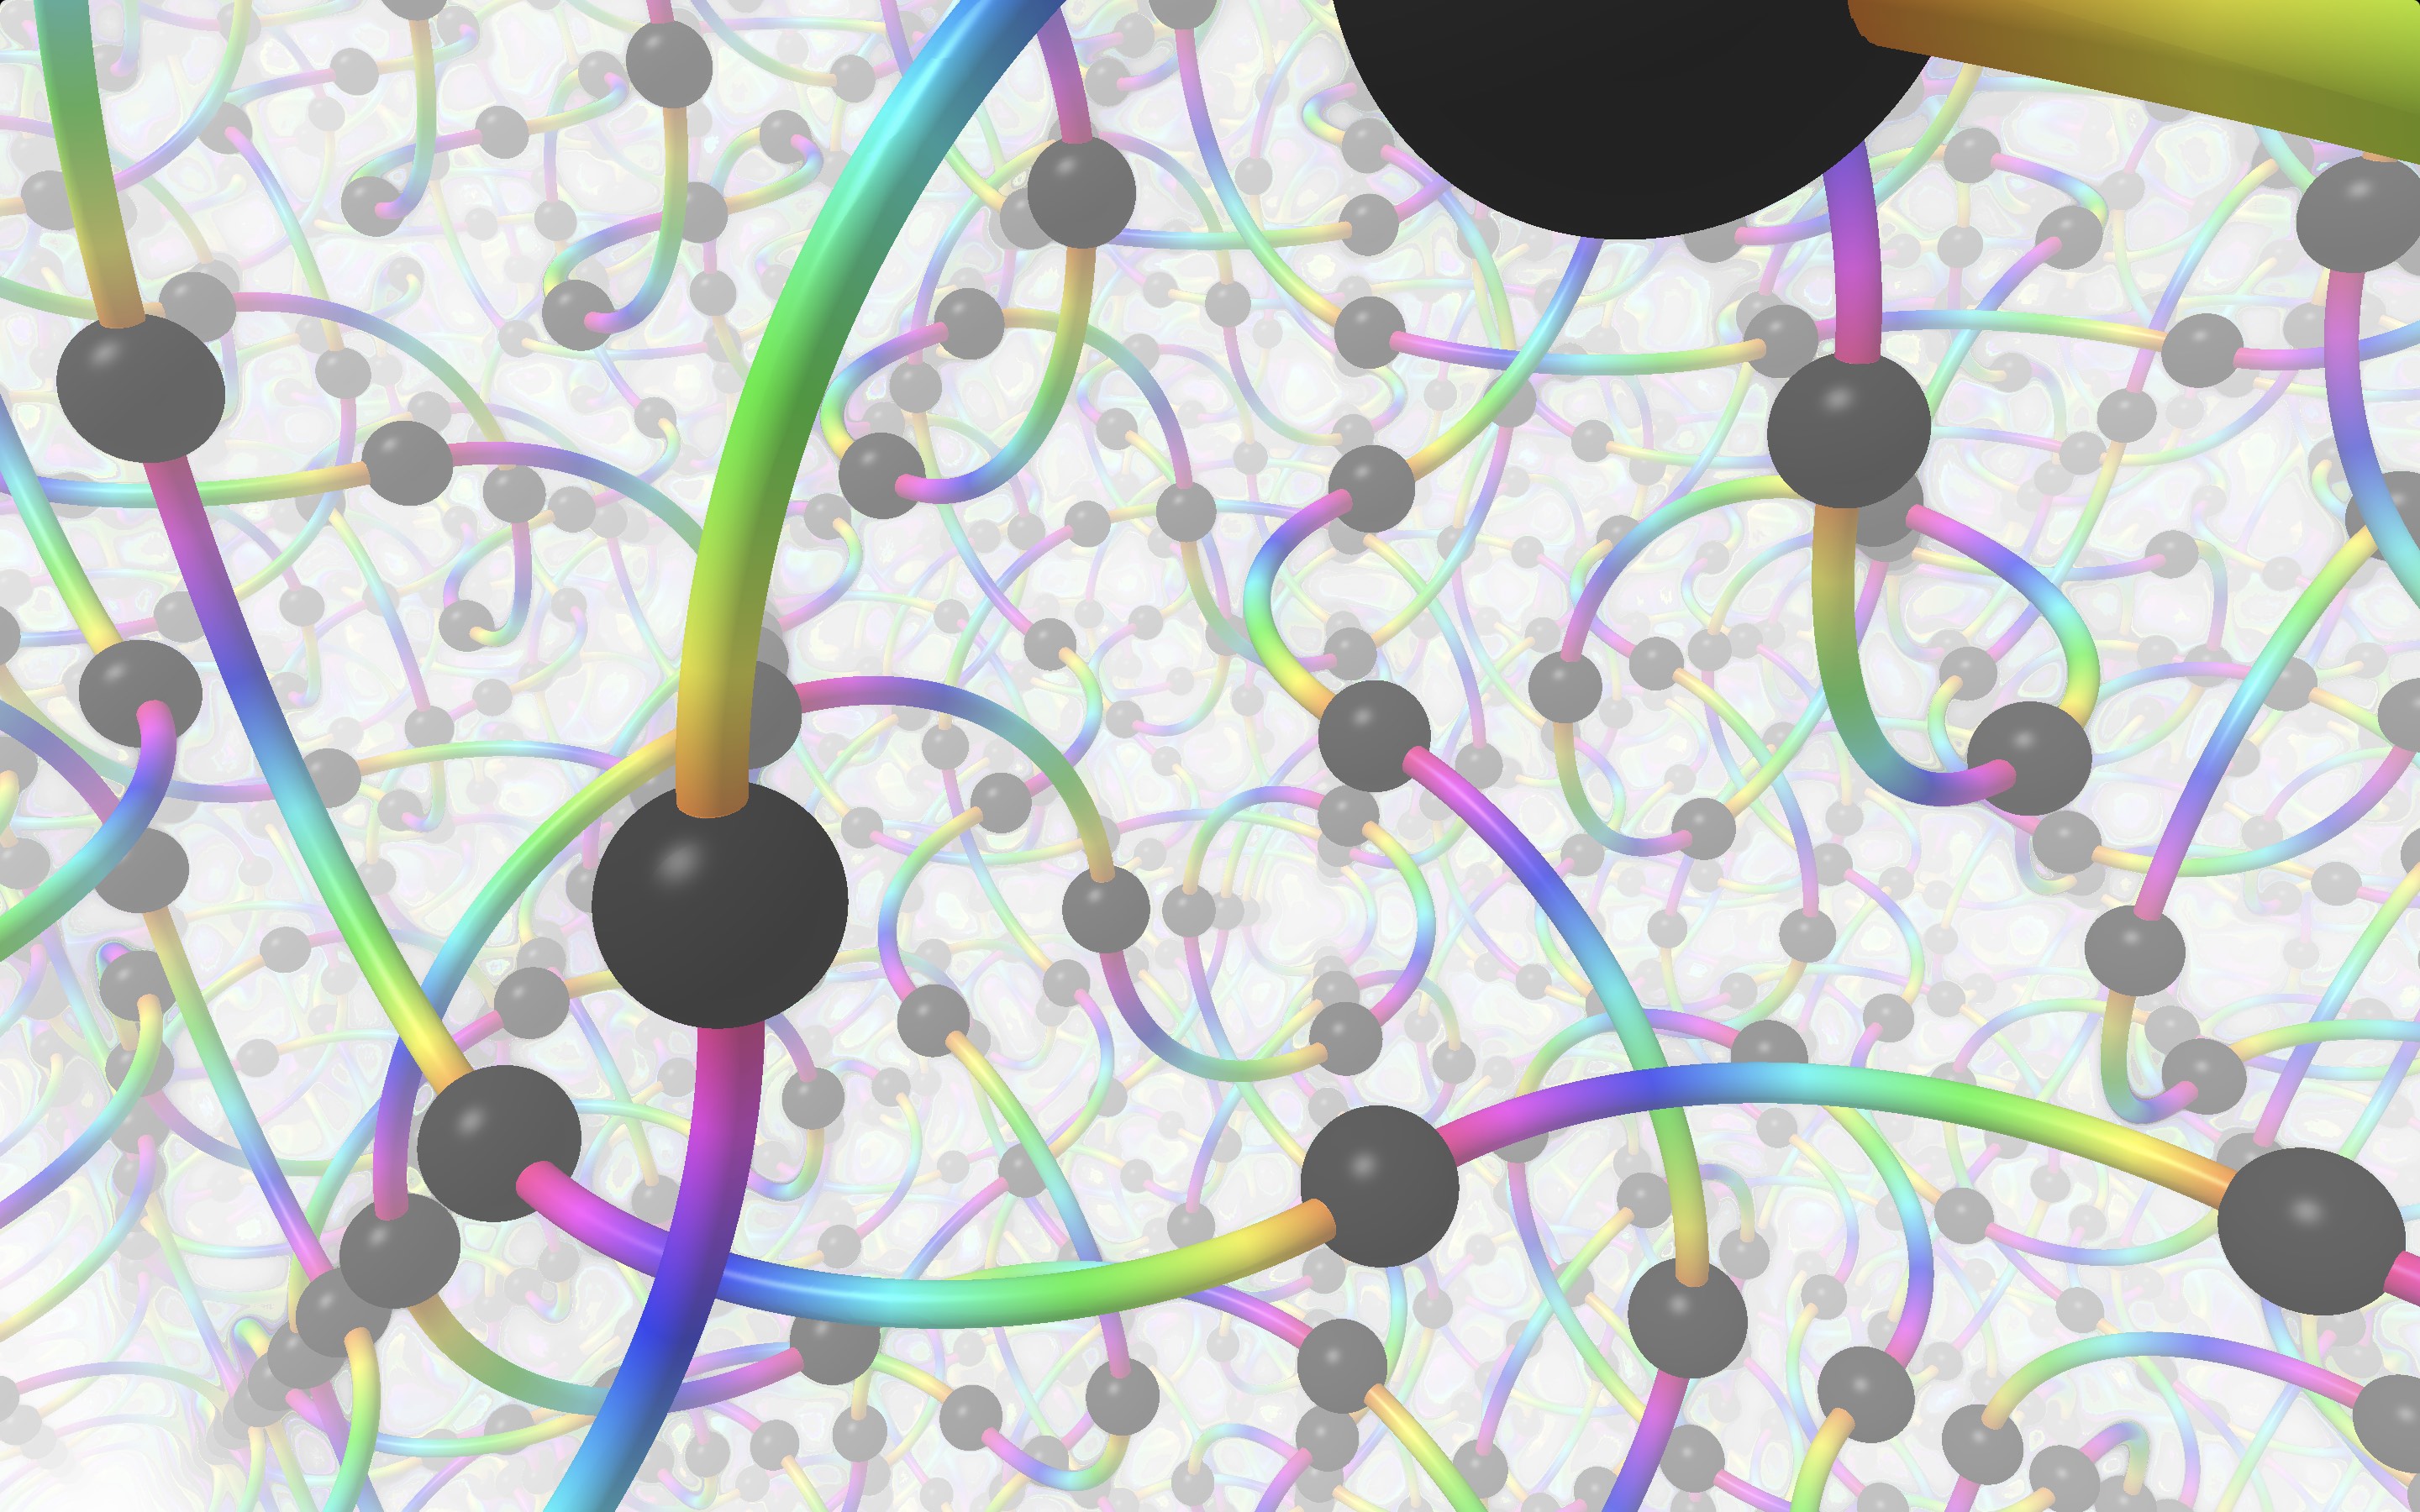
- “rainbow spaghetti”, a three-dimensional Truchet tiling of the tetrahedral-octahedral honeycomb;
- a Truchet tiling of the cubic lattice with flowing particles; and
- a hyperbolic Truchet tiling similar to Dunham’s.
All four shaders are illustrated below:
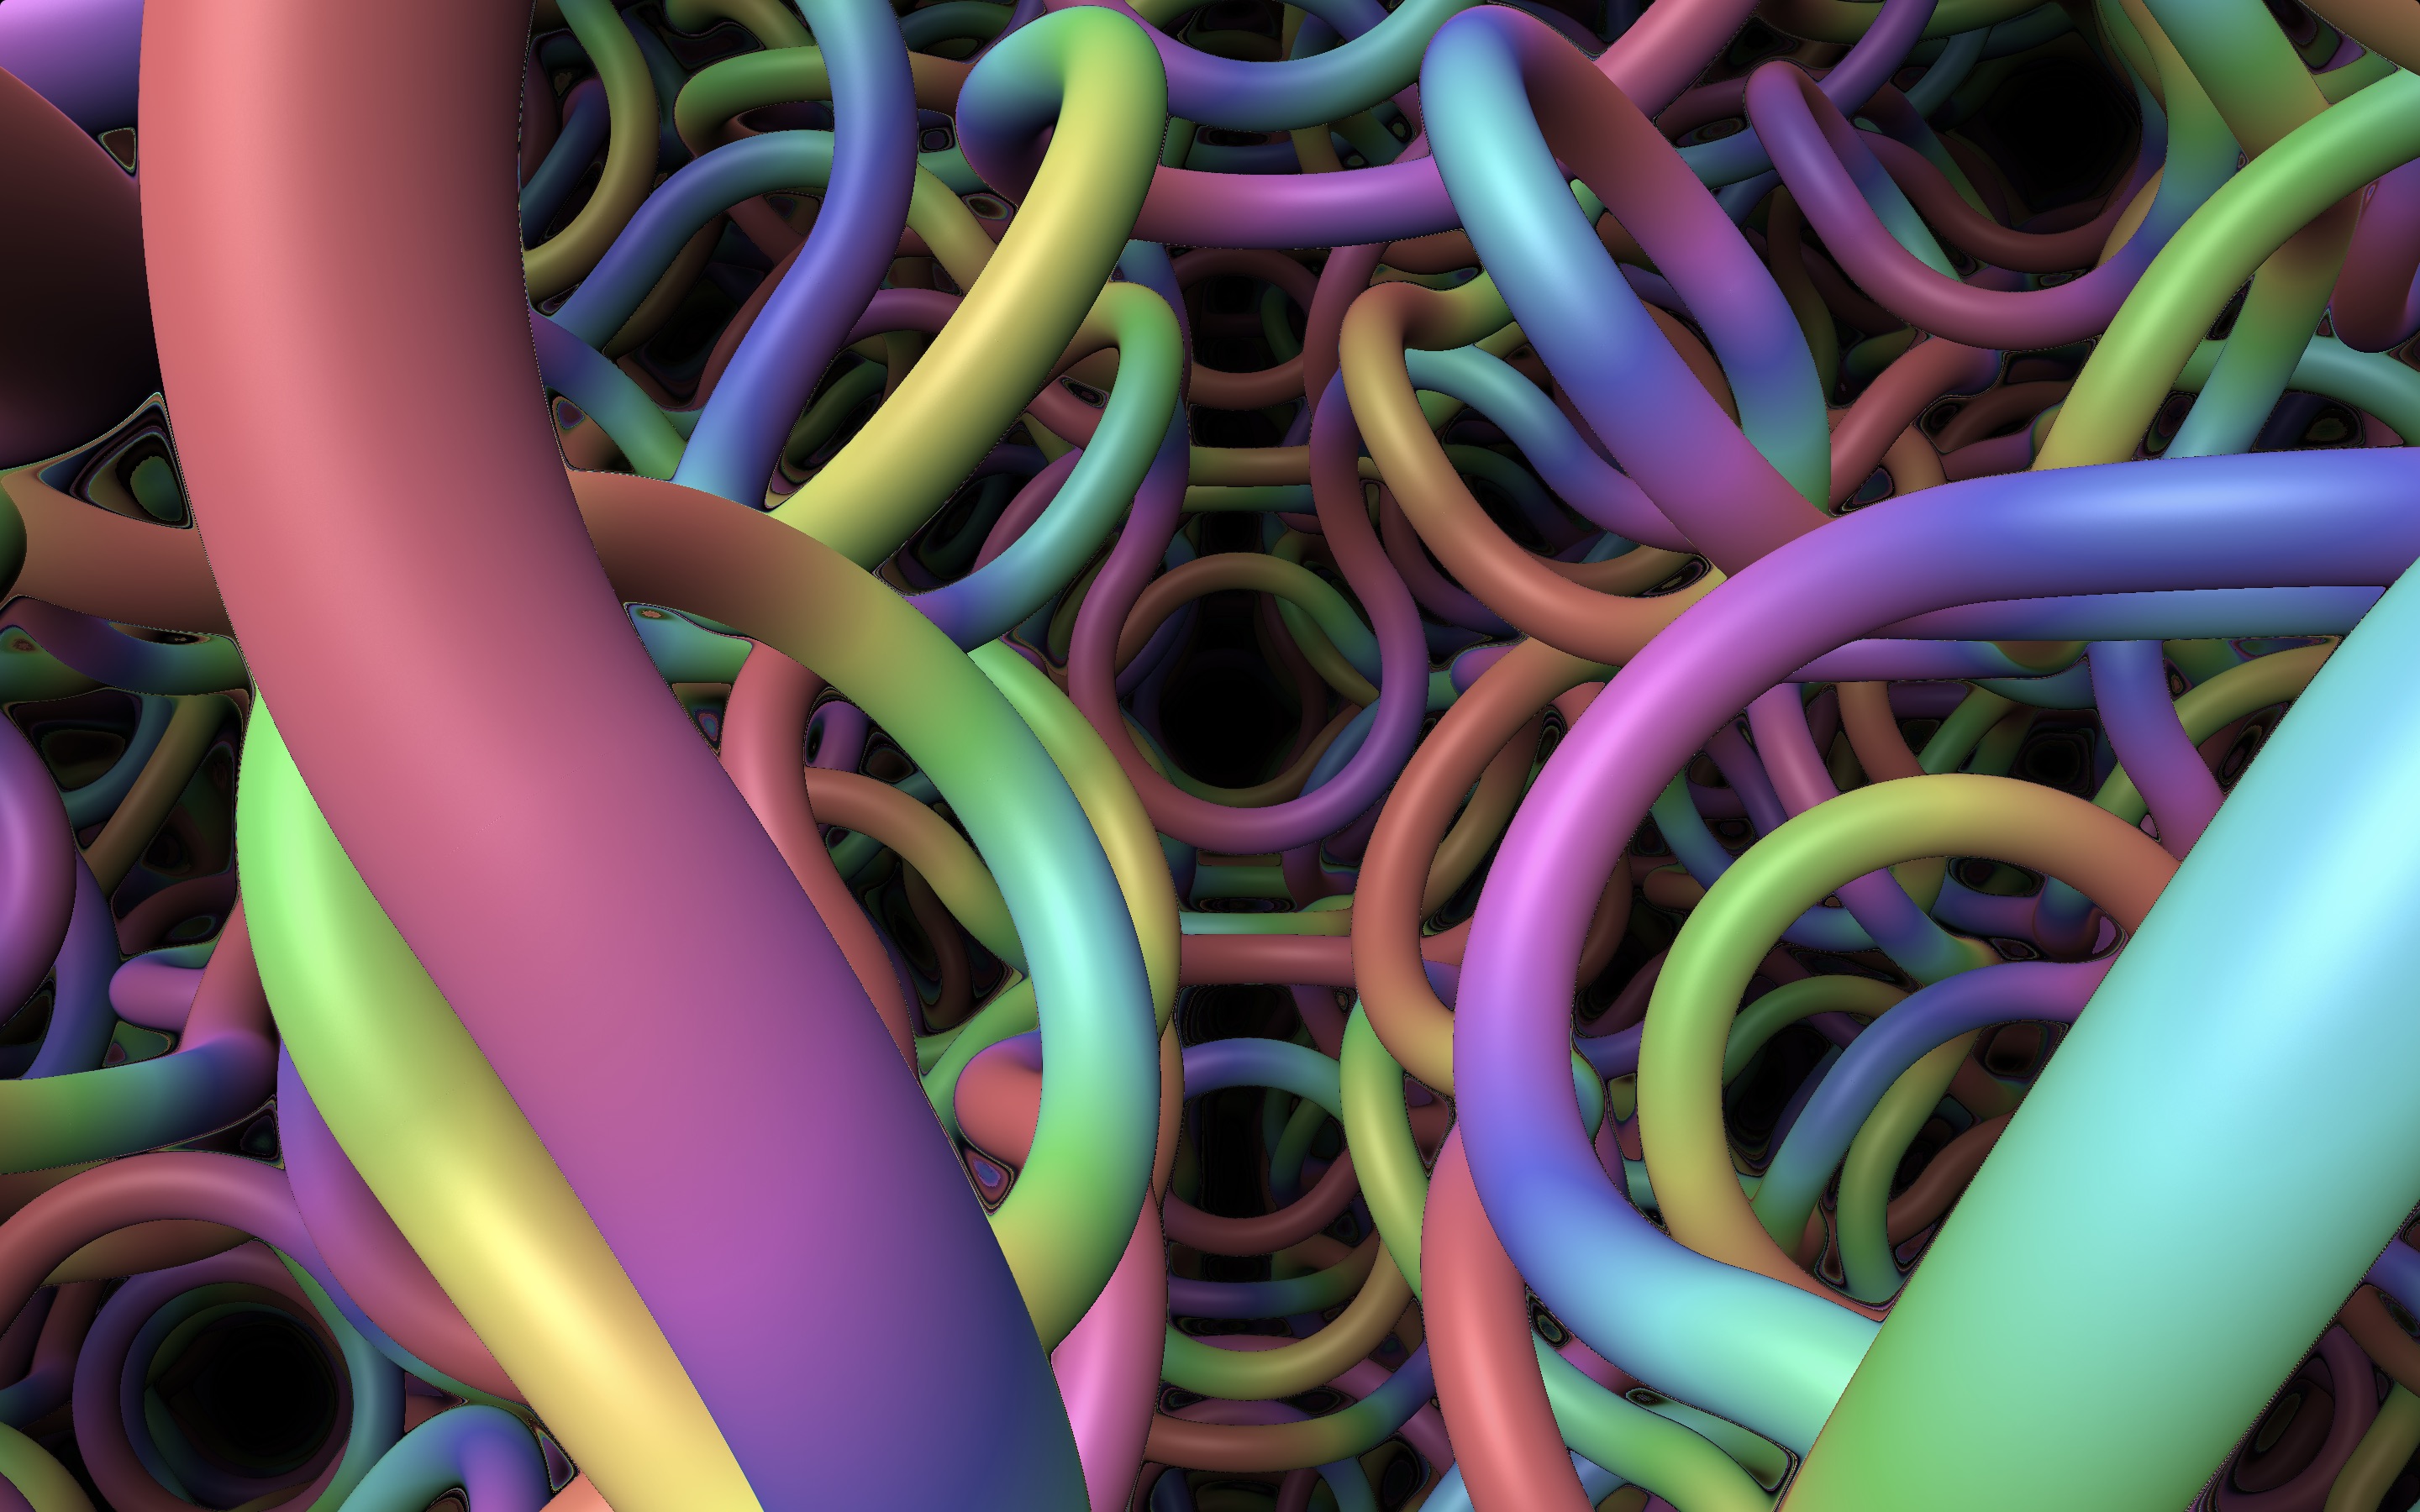
In late 2020, I posted two additional Truchet tiling shaders. Both resemble Mitchell’s approach adapting Smith’s tiles to Archimedian tilings, but instead of planar tilings, my shaders are based on uniform tilings of the sphere, also known as uniform spherical polyhedra.


The 2020 shaders are entitled “rainbow noodle orbs” and “heavy metal squiggle orb”.
From shader to fabricated objects
When I presented my geometric quilts at the Mathematical Art Exhibition at the 2023 Joint Mathematics Meetings, I was very impressed with Matthew Huang Cummins’s sculpture work, realized using 3D printing. His sculpture inspired me to make a physical version of the “heavy metal squiggle orb” shader I had written two years prior.
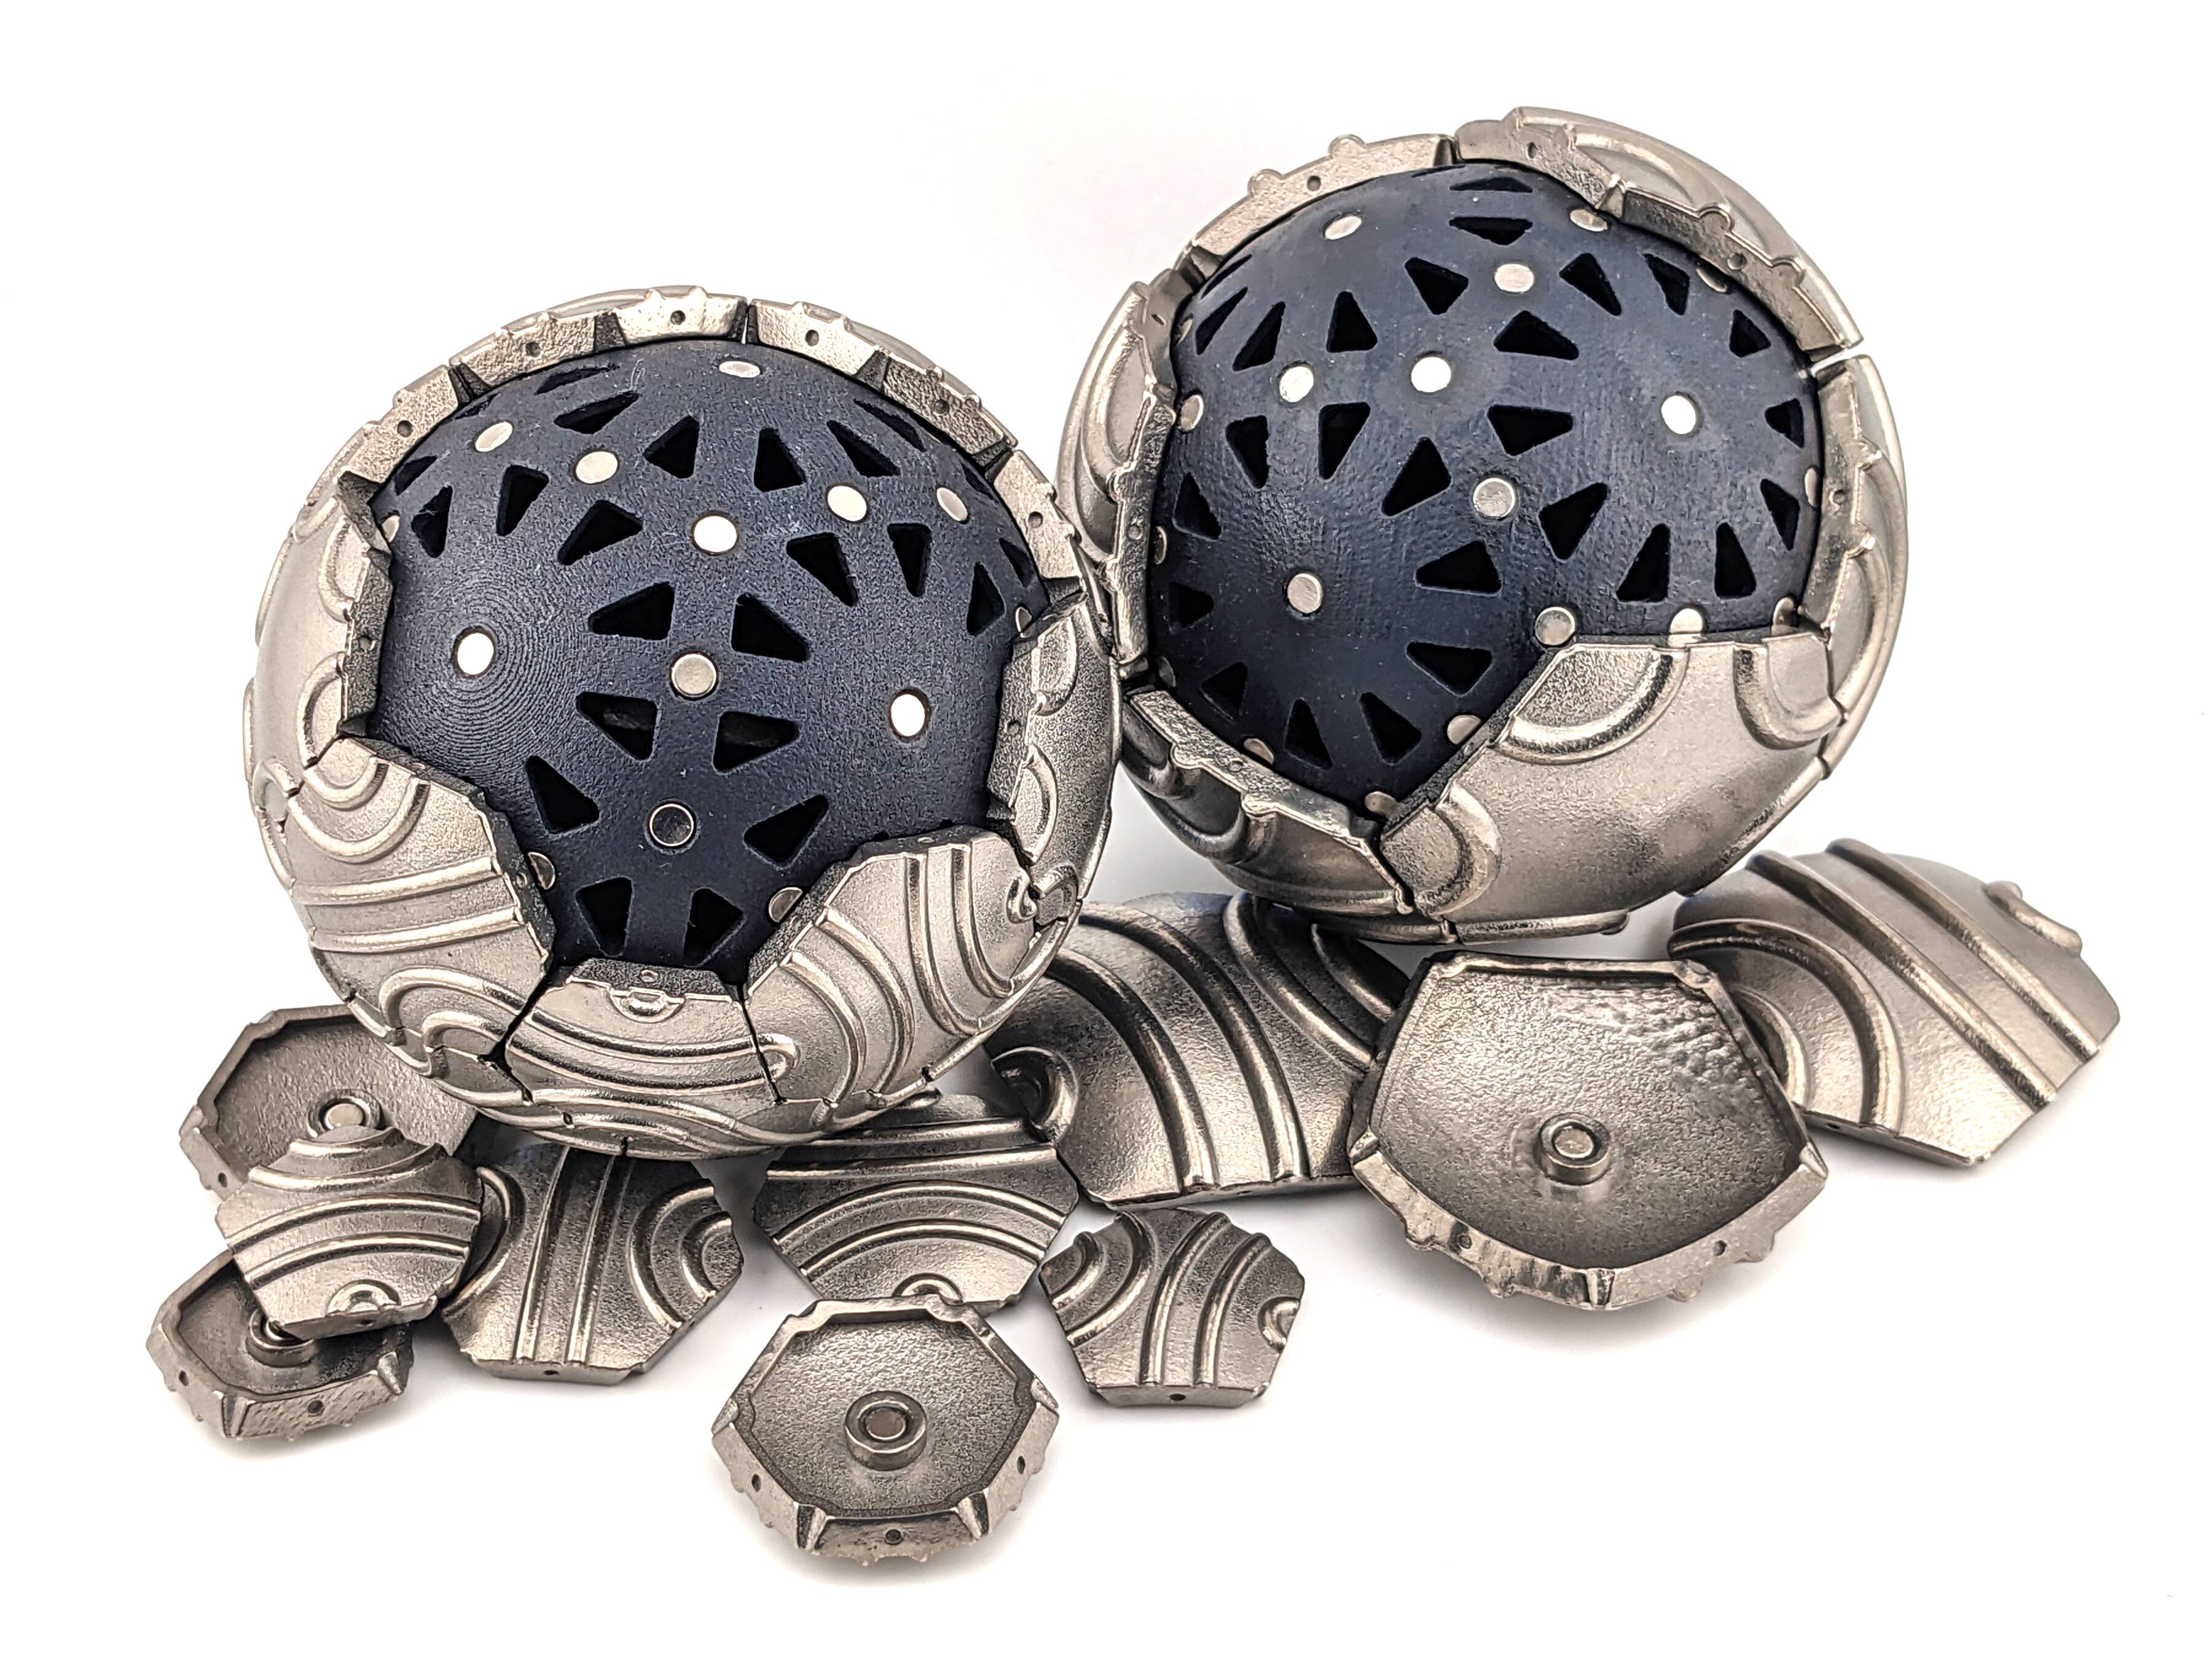
In order to move from a fragment shader to a tangible physical object, I wanted to achieve some particular design goals. Most of all, I wanted the tilings to be reconfigurable in the sense that any single tile should be able to be rotated in place, or swapped with another tile of the same shape. Furthermore, I wanted the tilings to be modular, capable of reusing parts to construct multiple different tilings.
Going from graphics to physical reality also required me to overcome several obstacles. The biggest obstacle is that the signed distance field representation used to render the shader is an implicit surface. It allows for easily querying how far a given point is inside or outside the solid shape being rendered. Unfortunately, most CAD programs require a boundary representation that explicitly encodes the mathematical planes and curved surfaces that constitute the exterior of an object. Converting between the two representations is non-trivial.
Aside: Matt Keeter has been doing some fantastic work creating CAD kernels that work using implicit representations of geometry, for example libfive and Fidget. I played around with both of these, but neither one produced output that met my (probably excessively high) standards. Meshing implicit functions is an active research area and still as much of an art as it is a science, as far as I can tell.
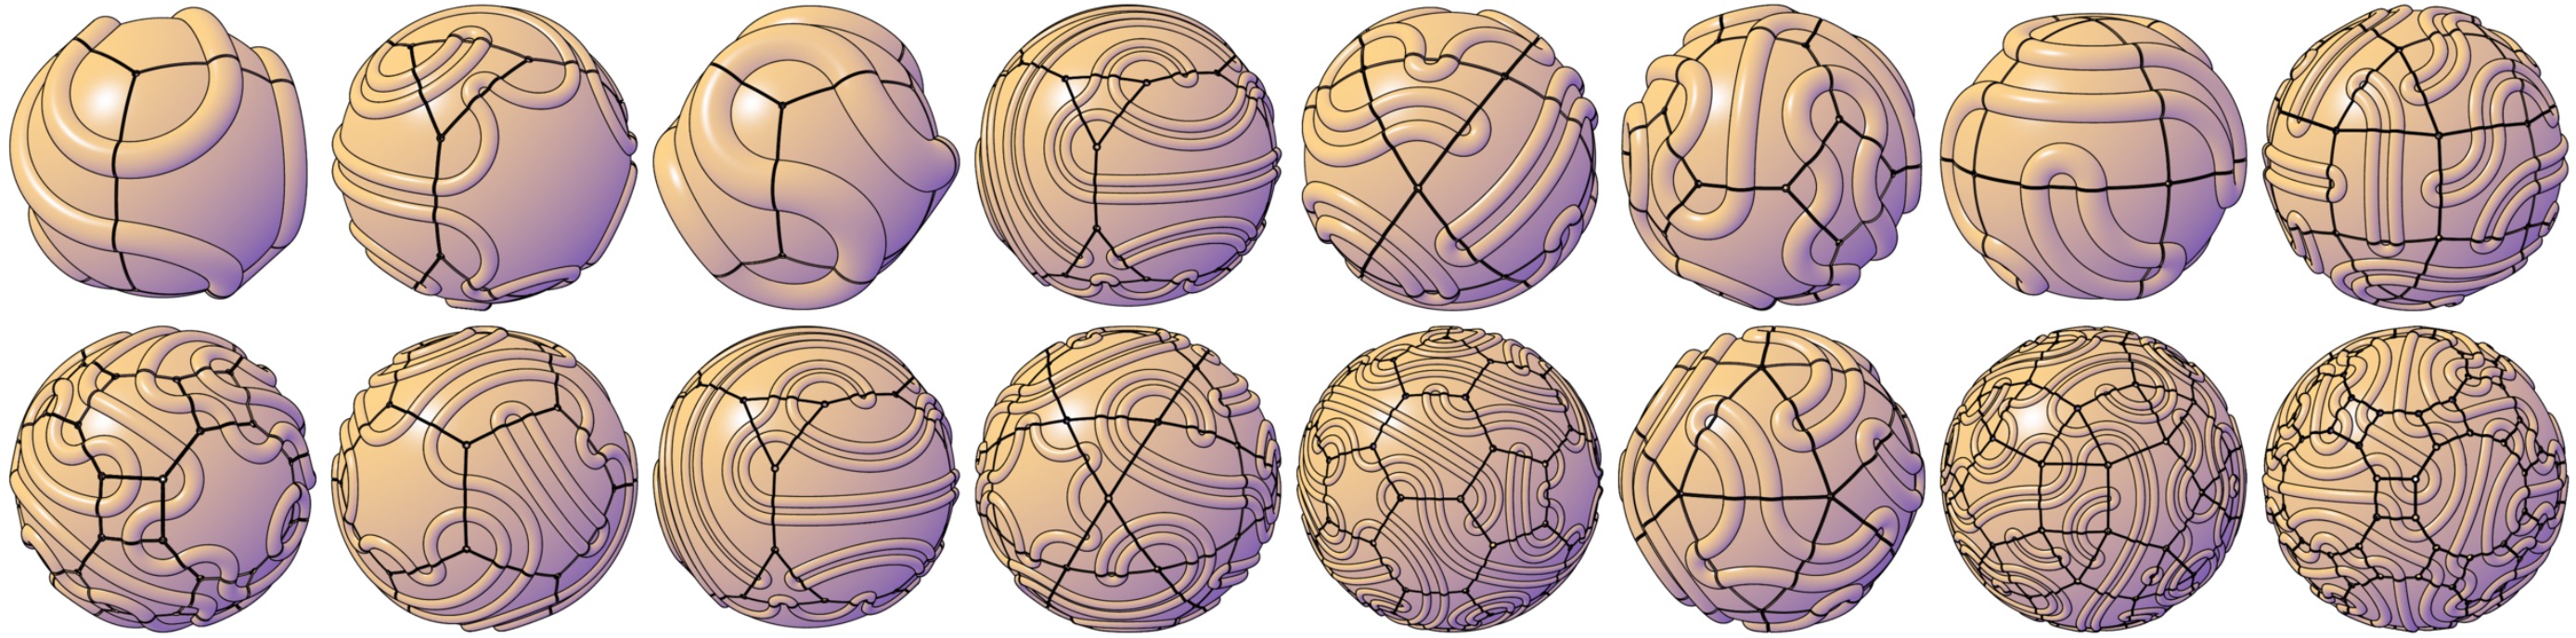
Another obstacle is the sheer number of unique parts required. Although the shapes themselves are simple – as they are defined by segements of spheres, toruses, cones and planes – a single tiling could have tens of unique parts, and multiple tilings could have hundreds, as shown above. Modeling each part by hand in a CAD program, although theoretically possible, would be prohibitively difficult (and furthermore, not much fun to do). Even if hand-modelling were feasible, such an approach would prohibit frequent iteration, which is usually necessary when designing objects for fabrication.
In the end, I decided to create a Python program to model the tiles and additional parts using the CadQuery package, based on the Open Cascade kernel used by FreeCAD. The Python script can output parts directly in both STEP and STL. The former can be viewed and edited in CAD programs and the latter is suitable for 3D printing.
Design
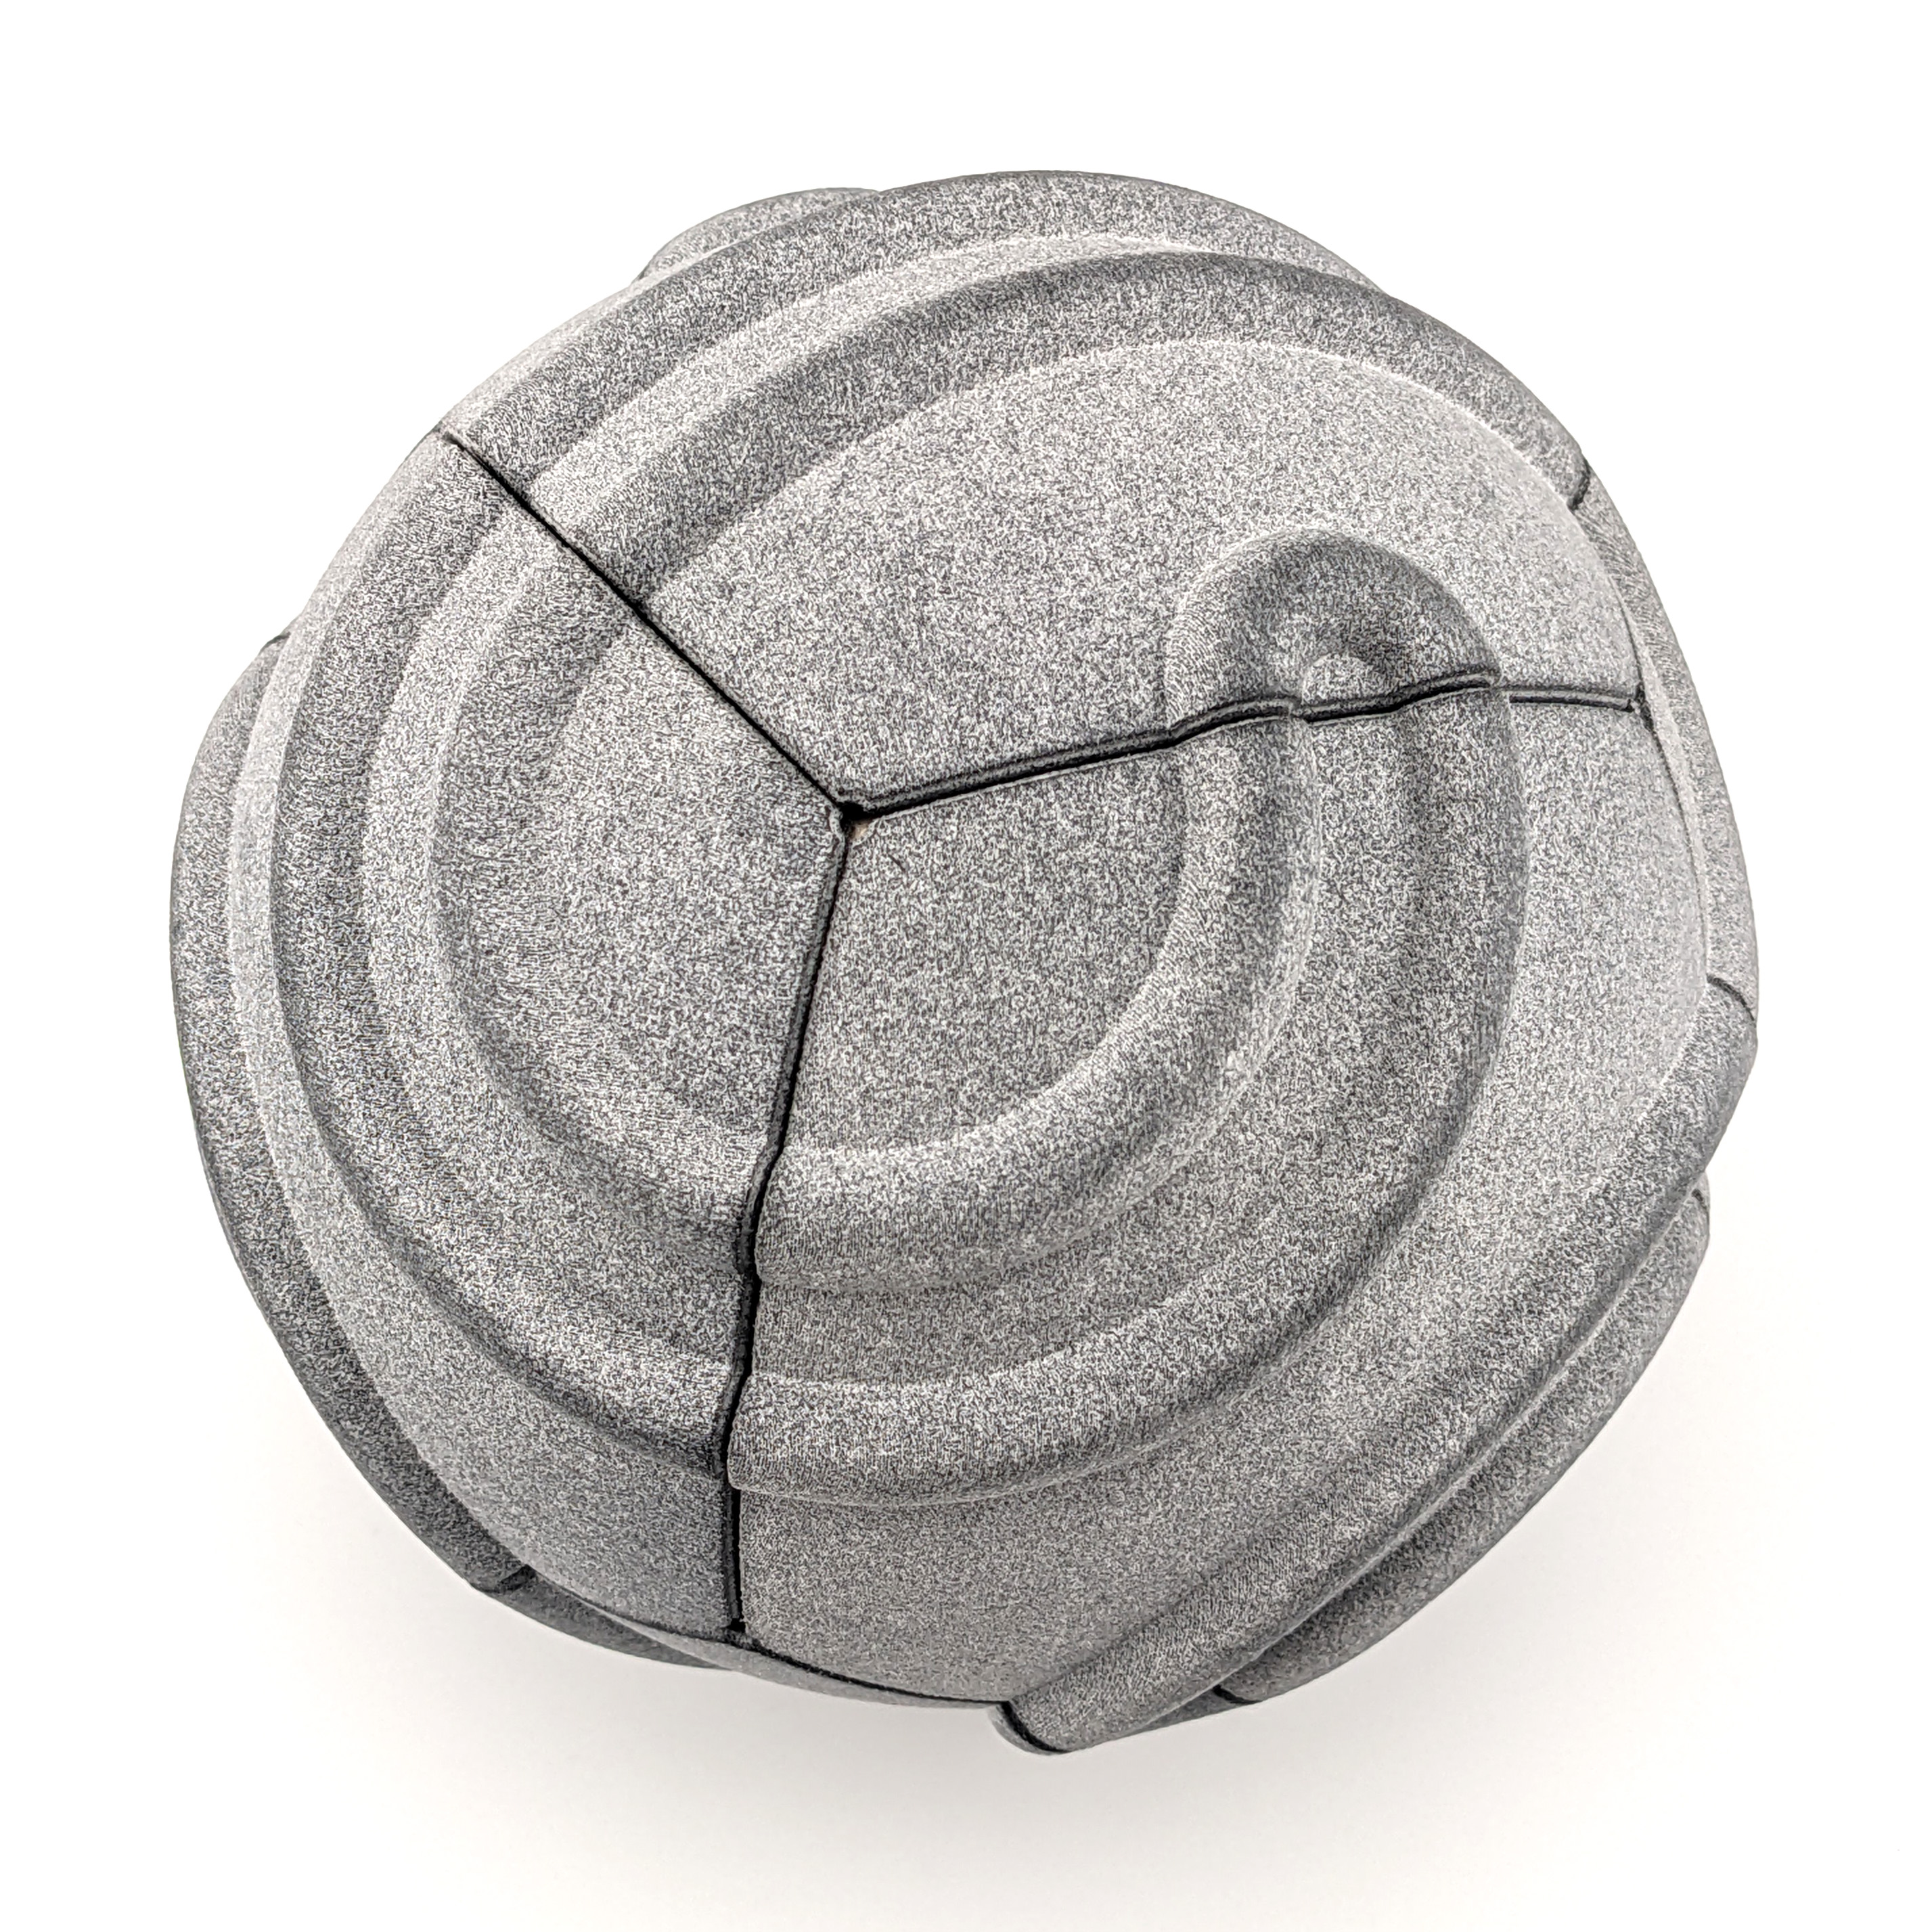
The figure below shows front, back, cross-section, and side views of a single tile from the 4.6.6 tiling.
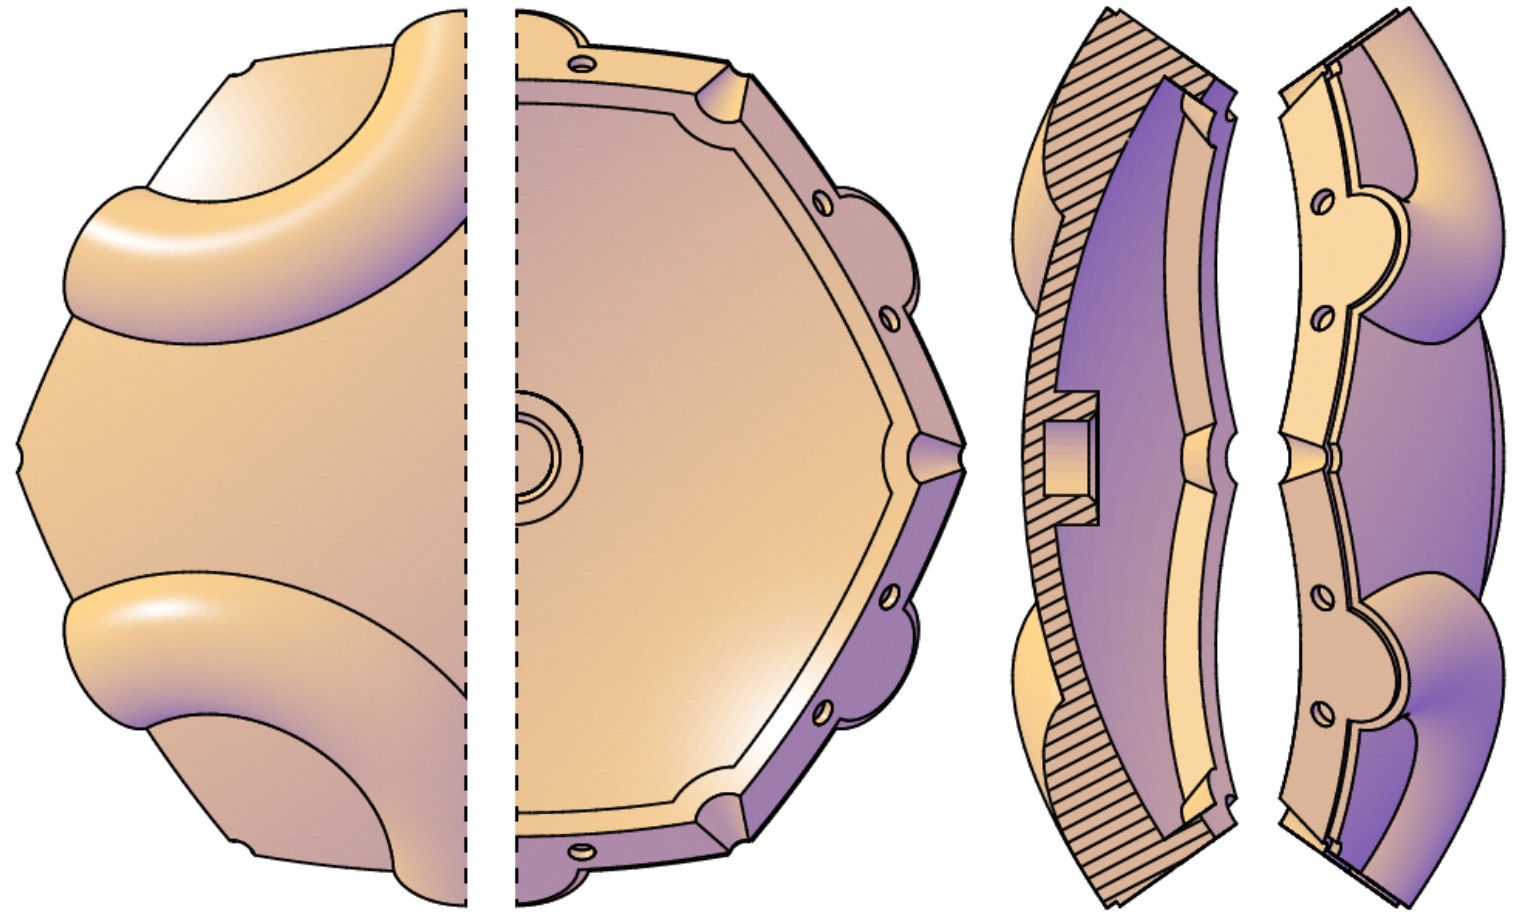
It details several important design features: The embossed torus segments on the front of the tile create the distinctive Smith-inspired Truchet tile look. On the back of the tile, there is a circular pocket for housing a neodymium disc magnet. The edge of the tile has a stepped “reveal” which creates an apparent gap between tiles, and which helps to hide small variations in tile spacing due to positioning or printing inaccuracies. Circular registration marks along the edge indicate tile compatibility – any given tiling will consist of tiles whose registration marks are equal in number and in spacing. Conical cutouts at the polygon vertices serve two purposes: like the stepped “reveal”, they help hide small errors in tile alignment at the corners; additionally, their conical shape allows insertion of a toothpick to pry tiles away from the sphere during disassembly.
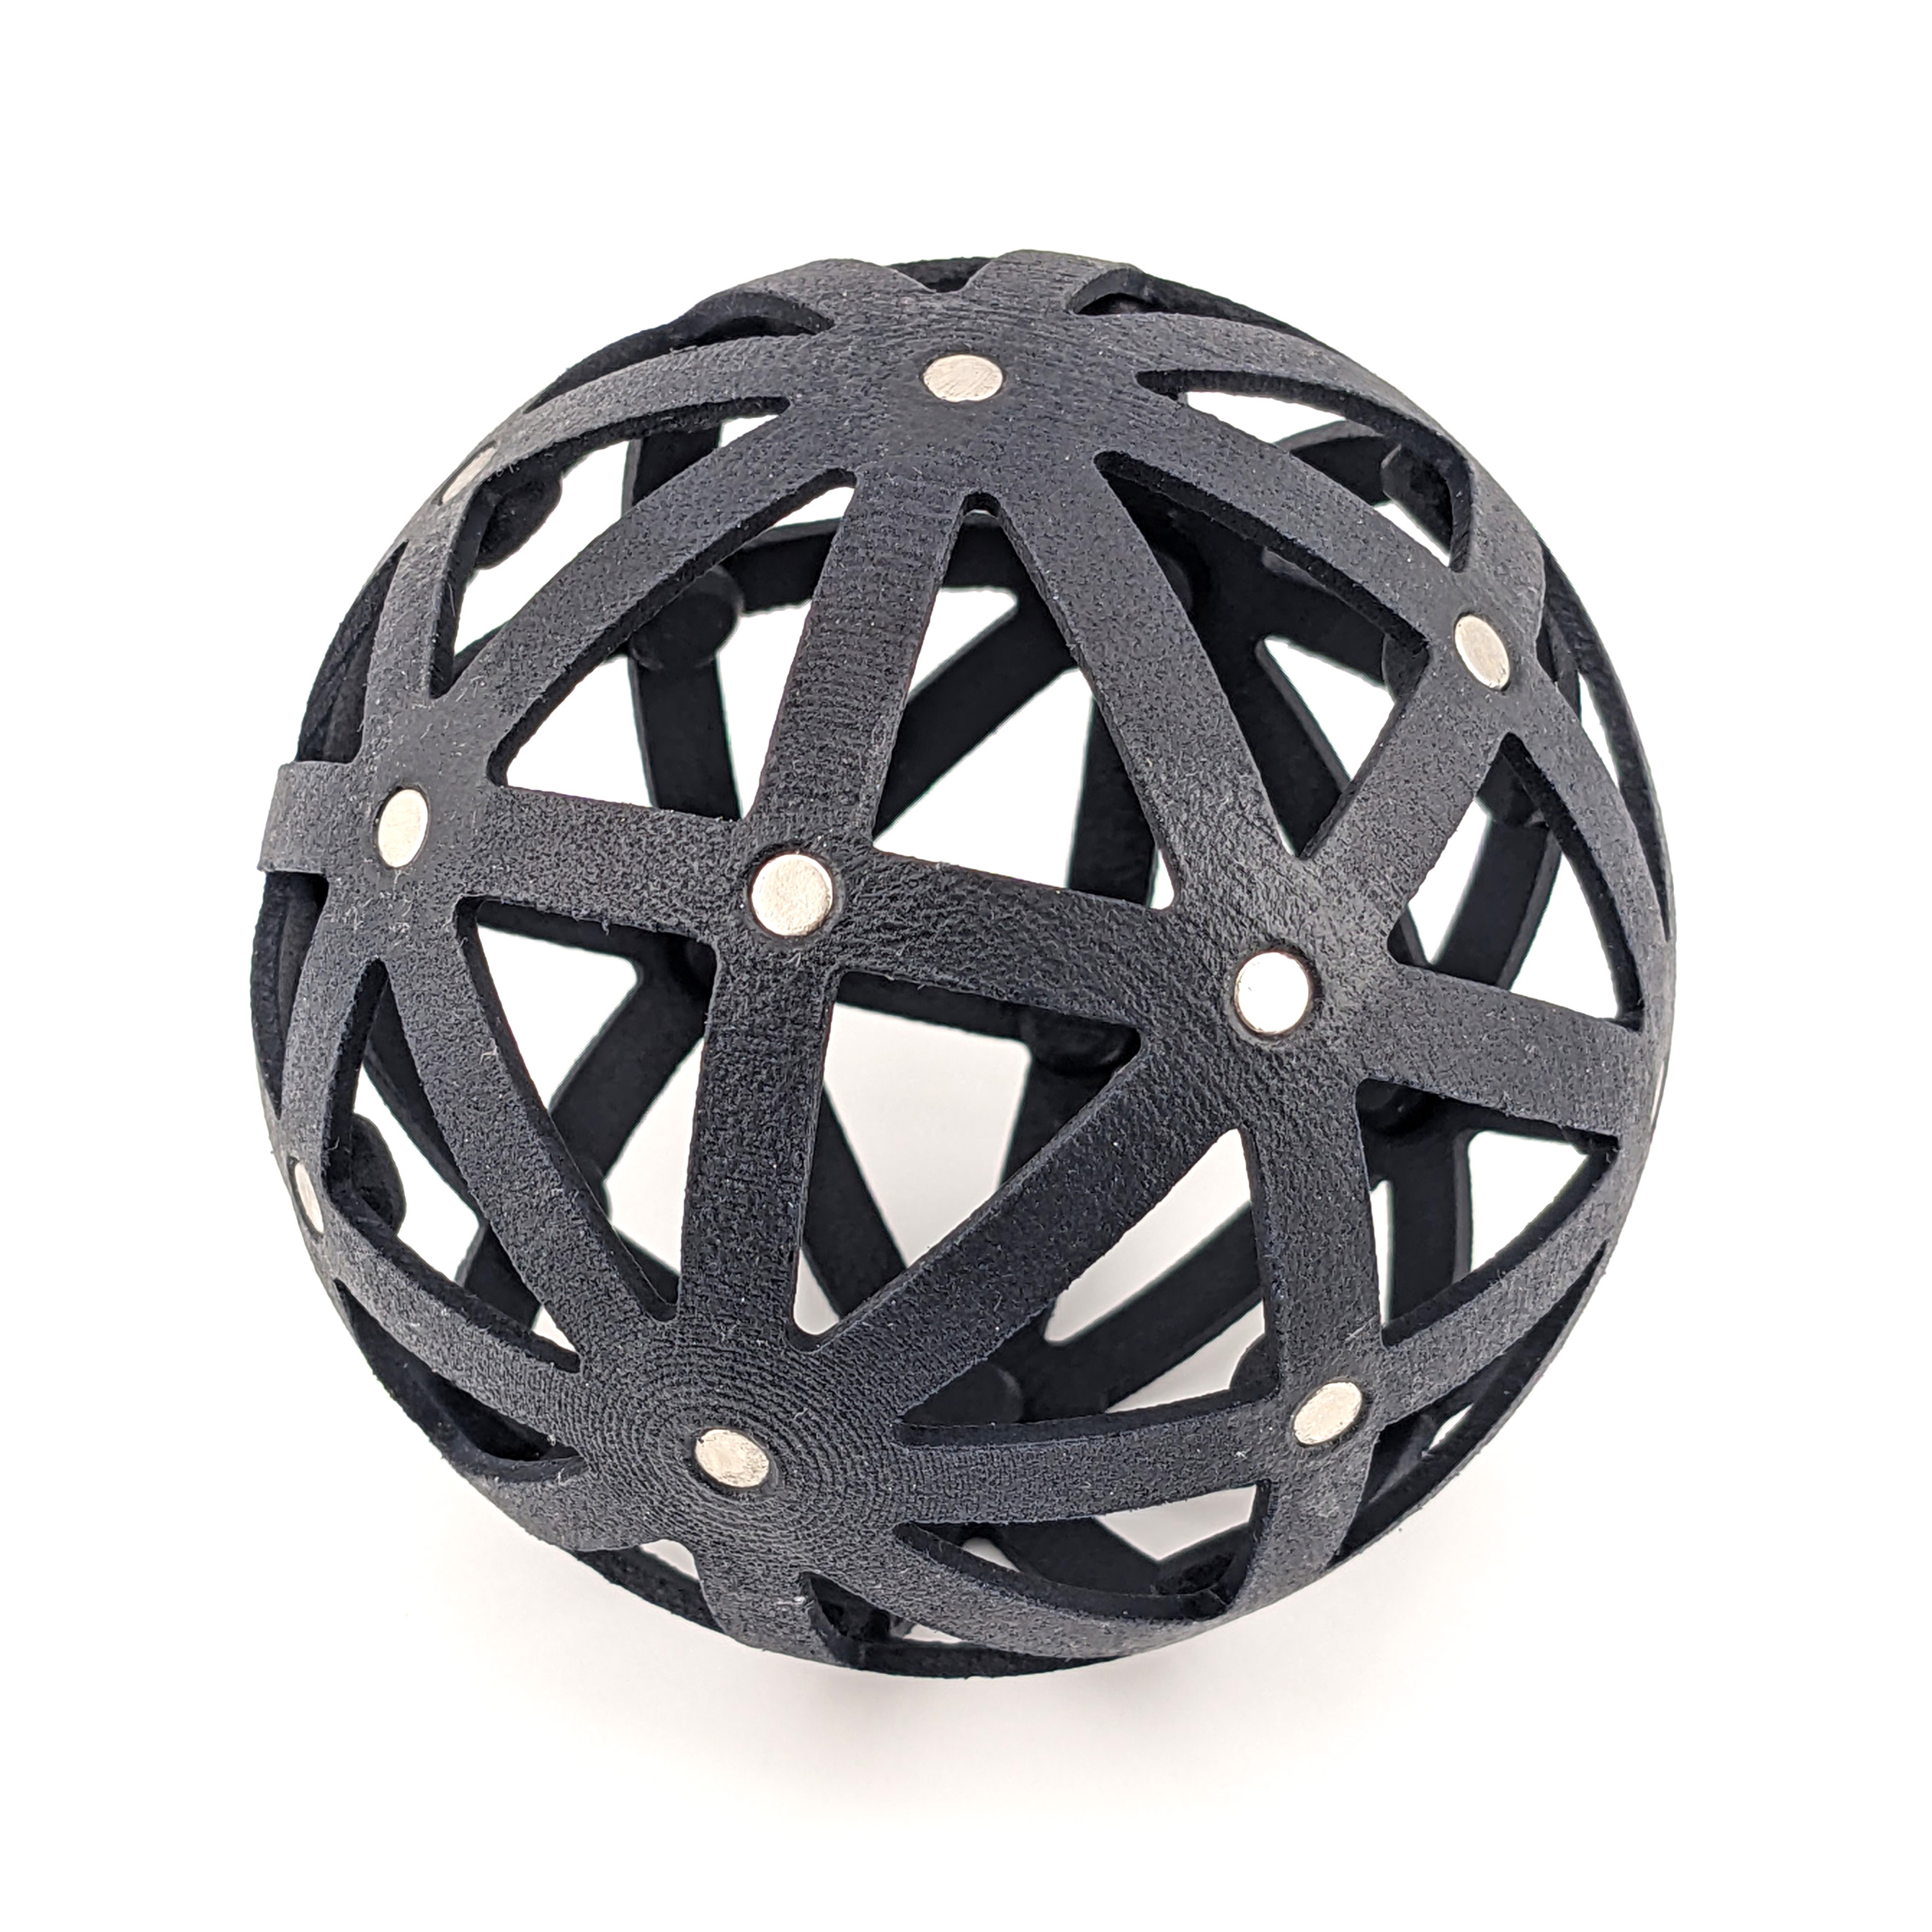
Each tile is designed to magnetically adhere to an underlying spherical scaffolding, which in turn has its own magnet housings:
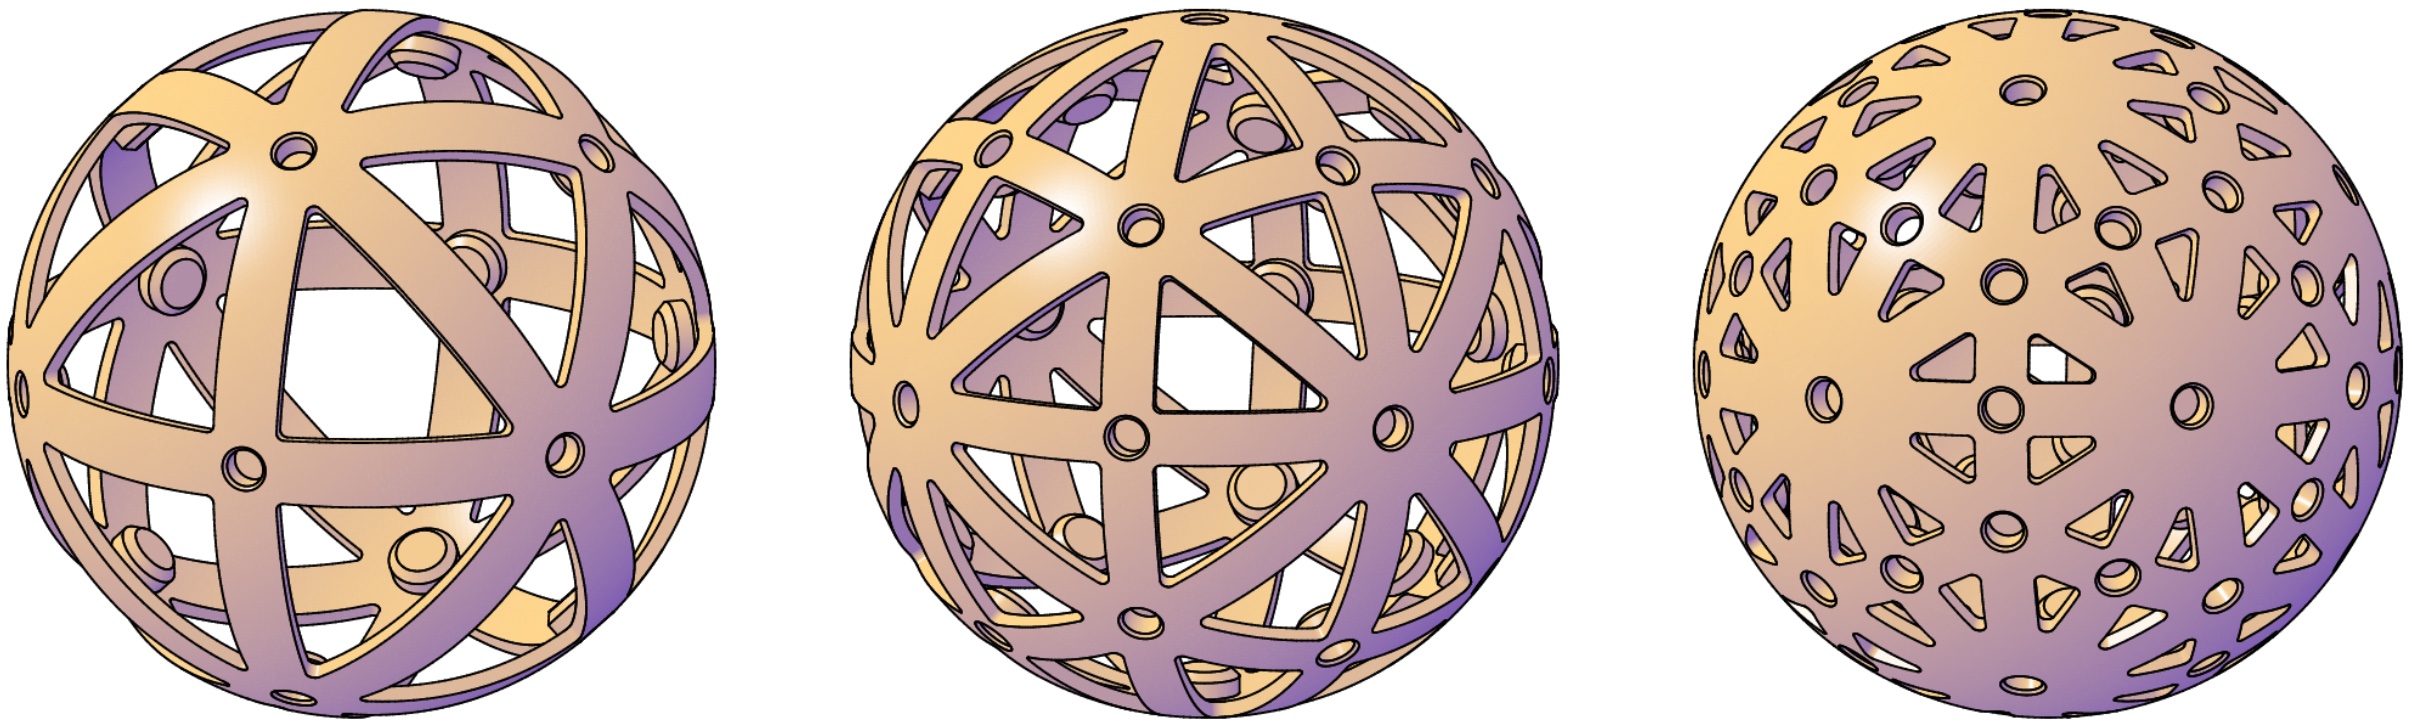
There are three scaffolds, each corresponding to one of the three polyhedral symmetry groups: tetrahedral, octahedral, and icosahedral. The scaffolds are modular in the sense that each one can be used to support tiles of any compatible symmetry. For example, the middle scaffold could be used to support a cubic tiling, octahedral tiling, or any other regular tiling in the second row of figures in this table on Wikipedia.
Fabrication
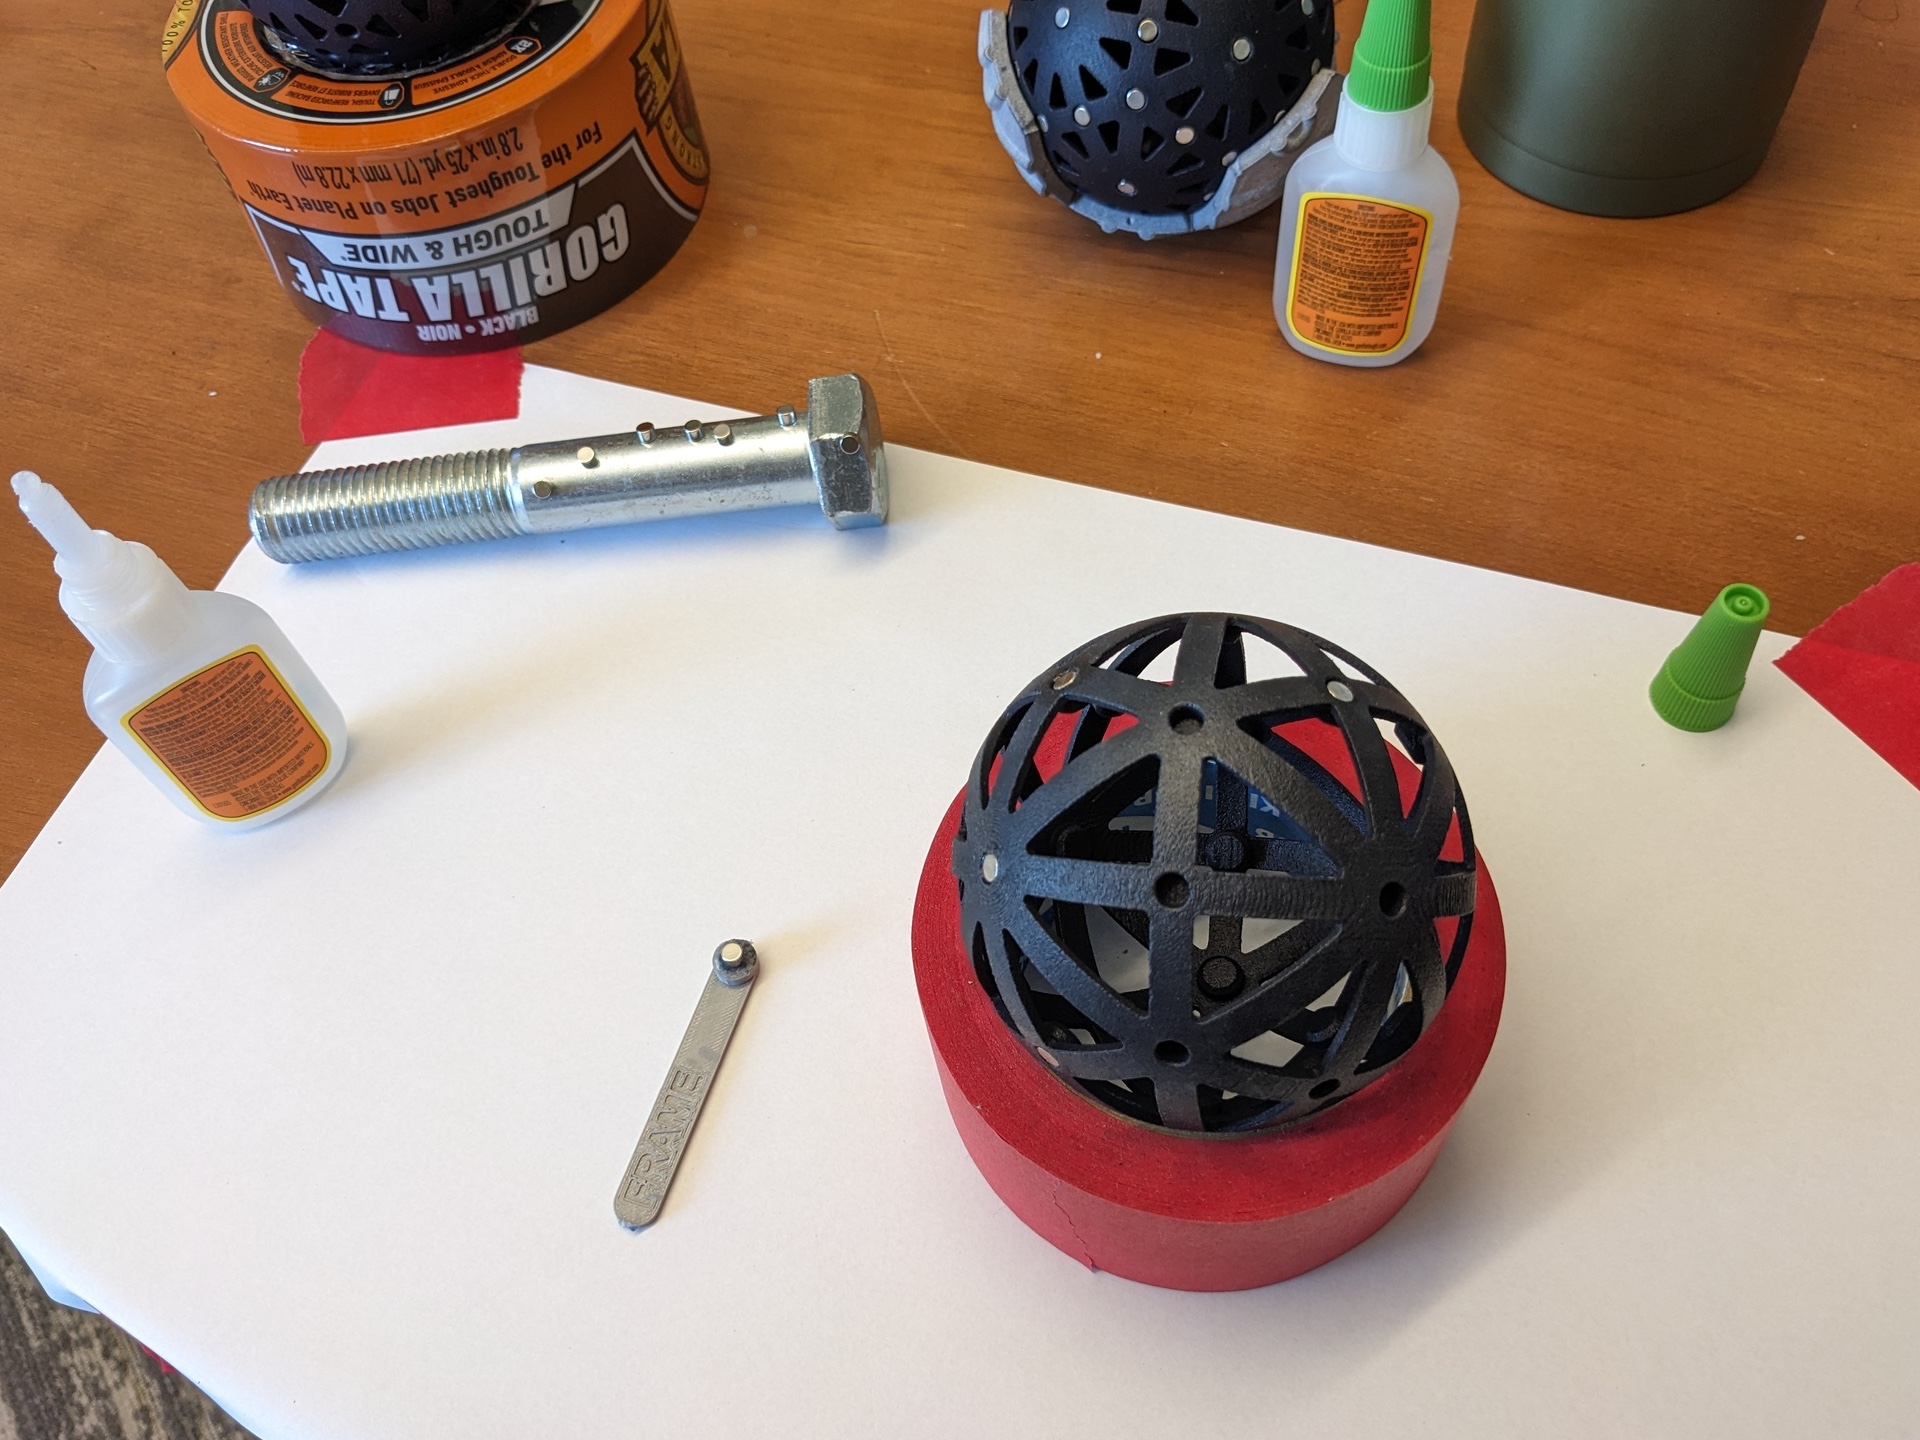
So far, I have 3D-printed several scaffolds in nylon using selective laser sintering (SLS). Fixing the magnets into the scaffolds using cyanoacrylate glue is a tedious process. In order to ensure the correct polarity of the magnets, I used a special 3D-printed magnet gluing jig, shown in the photo below. You can also see my Big Magnet Screw™, which is handy to hold individually separated magnets for ease of manipulation.
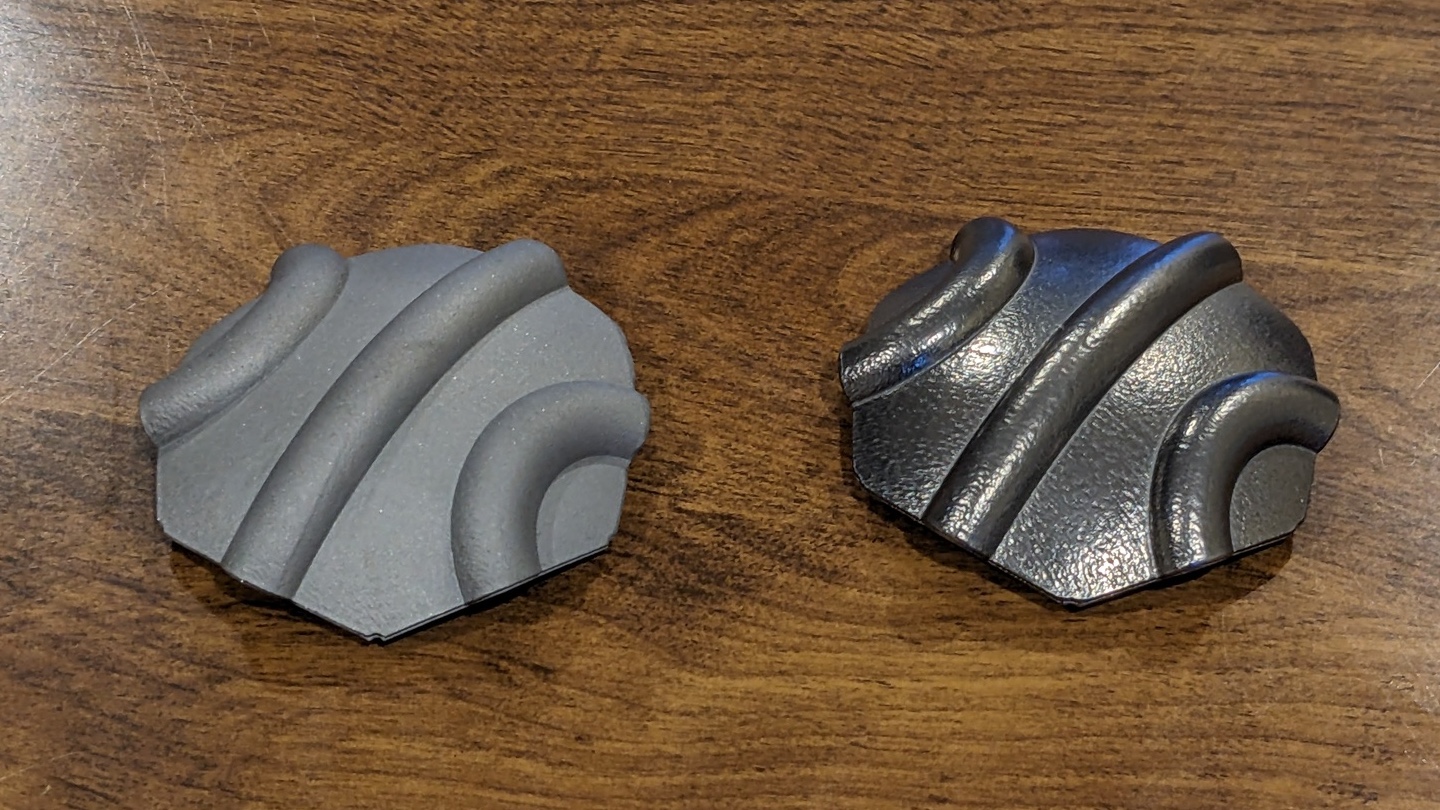
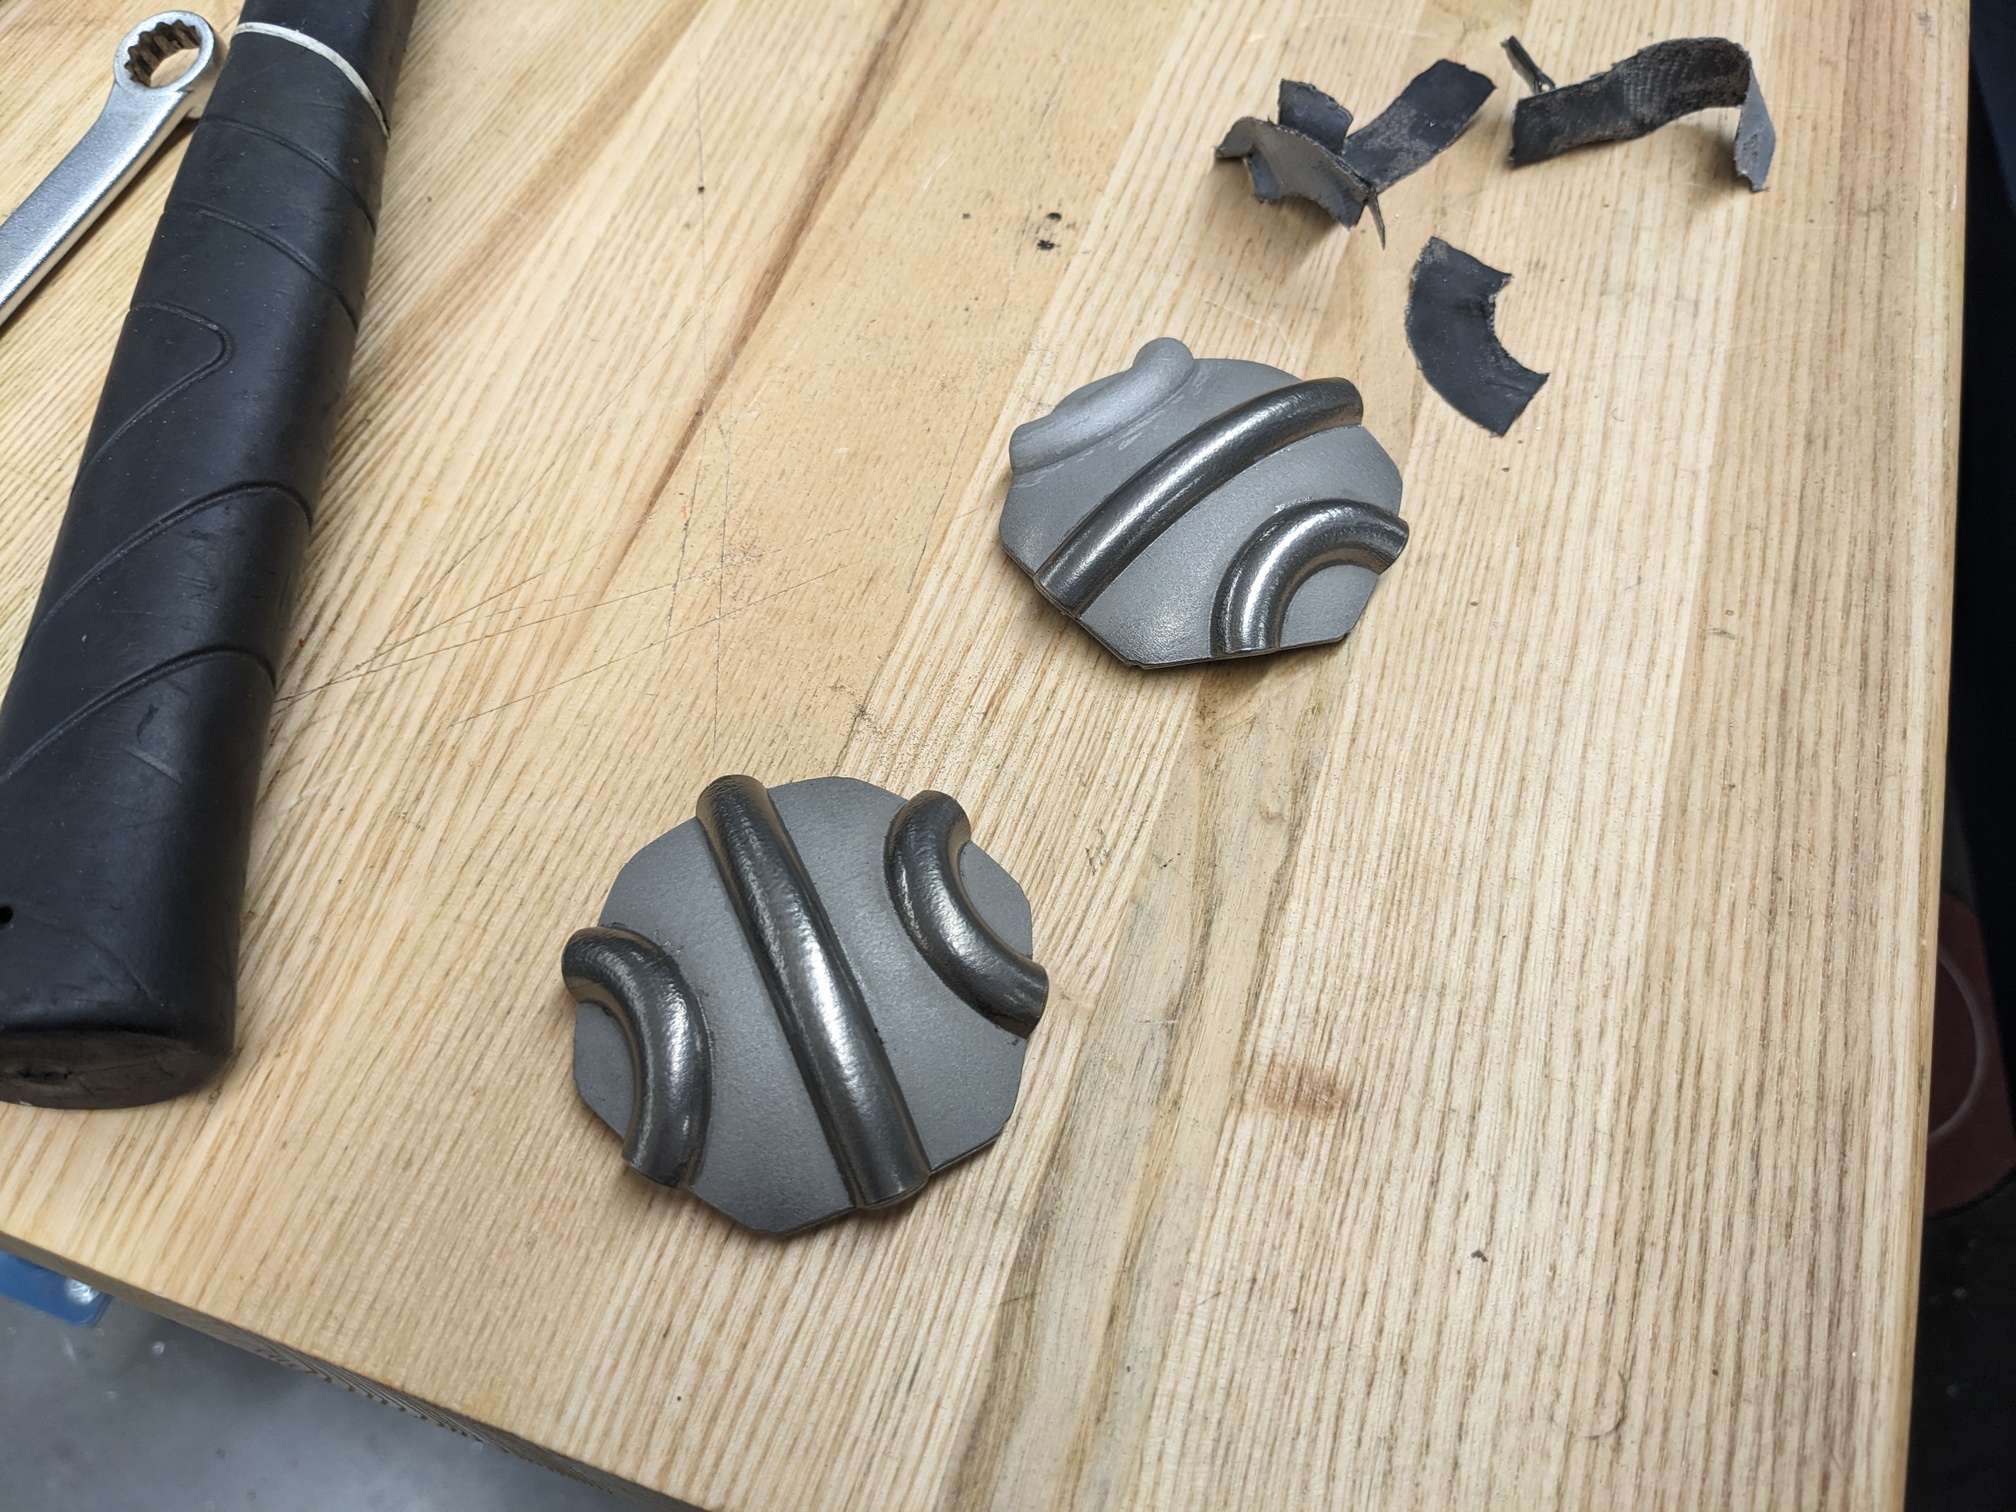
Tiles were 3D-printed in nylon using both SLS and multi-jet fusion (MJF), and in stainless steel using direct metal laser sintering (DMLS). No vapor smoothing was used for SLS or MJF parts. The steel parts were polished in a rotary tumbler based on a recipe I tried to recreate from this youtube video by @McGybeer. You can see the polisher in action on my basement workbench below:

The overall recipe for polishing went something like this:
- Rough polishing:
- Fill up the tumbler about 2/5 full of water.
- Add agressive-deburring media until it is about halfway up the water line.
- Add parts to be tumbled.
- Add a splash of cleaner for tumbling and vibrating media.
- Run for about 8 hours.
- Fine polishing:
- same as above steps but instead of using agressive-deburring media, use this steel shot media I bought from Amazon.
The process takes the parts from a dull matte finish to a nice sheen:
I used several vendors for 3D printing including hubs.com for SLS- and MJF-printed nylon (both were of good quality), and also JLC3DP and PCBWay for DMLS-printed steel. Although I ended up with OK results with some of the parts from PCBWay, many parts printed by PCBWay were far from their stated dimensional tolerances of 0.3 mm. And although the initial couple of parts I got from JLC3DP were of good quality and on dimension, JLC3DP had insufficient capcity to fulfill an order I placed soon afterwards due to a bottleneck during the Lunar New Year holiday. I’m eager to print more tiles in steel using JLC3DP, but the tarrifs that Trump has imposed on China through his administration’s present trade war has made it prohibitively expensive to do so for the moment.
Exhibition and future work
I’m eager to show off the artworks depicted at the top of the page at the 2025 Bridges Conference Art Exhibition. Time permitting, I think I’ll print out a few extra tilings to carry around the conference with me. I’m tempted to try out the color-dyed and smoothed finishes for SLS nylon from shapeways.
I also worked on a dual-texture finish for a stainless steel tiling that didn’t work out because of the dimensional accuracy issues with PCBWay’s prints. It involved a complicated procedure of polishing followed by sandblasting to leave the torus segments shiny and the underlying sphere surface matte:
I’m hoping to print a few more of these tilings during my upcoming 2025-2026 academic year sabbatical leave. Stay tuned!
For extra mathematical details and nerdery, please be sure to check out this preprint of my Bridges 2025 conference paper (to be replaced with a link to the official paper once submissions are finalized).